NOISE FILTER REMOVAL
CAUTION / NOTICE / HINT
The necessary procedures (adjustment, calibration, initialization or registration) that must be performed after parts are removed, installed or replaced during the noise filter removal/installation are shown below.
| Replacement Part or Procedure | Necessary Procedures | Effects/Inoperative when not Performed | Link |
|---|---|---|---|
| Disconnect cable from negative battery terminal | Correct the steering angle neutral point | Panoramic view monitor system | |
| Initialize servo motor | Air conditioning system | ||
| Reset slide door close position | Power slide door system | ||
| Reset back door close position | Power back door system |
PROCEDURE
-
REMOVE ROOF HEADLINING ASSEMBLY
-
REMOVE RADIO SETTING CONDENSER
Note
When a terminal cover is removed, the radio setting condenser must be replaced because the terminal covers and condenser are supplied as a set.
-

Remove the bolt.
-
Disengage the clamp to disconnect the radio setting condenser with wire harness from the vehicle body.
-
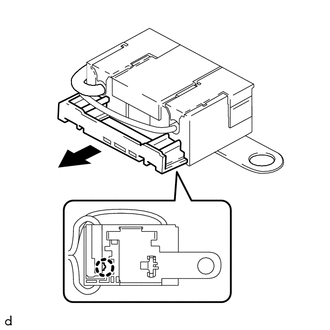
Disengage the claw and pull out the cover as shown in the illustration.
-
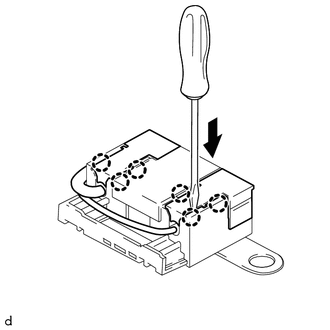
Using a screwdriver, disengage the claws to remove the 2 terminal covers from the condenser.
-
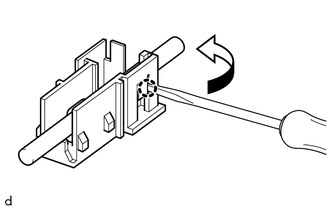
Using a screwdriver, bend back and break off the claw as shown in the illustration.
-
Remove the terminal cover from the wire harness.
Note
-
Make sure to hold the crimping side of the terminal when disconnecting the wire harness from the terminal cover.
-
Make sure not to bend the exposed wire when disconnecting the wire harness from the terminal cover.
-
Check for deformation of the terminal after the wire harness has been removed from the terminal cover.
-
-