STEREO JACK ADAPTER ASSEMBLY REMOVAL
PROCEDURE
-
REMOVE UPPER CONSOLE PANEL SUB-ASSEMBLY (for Integrated Console Box Type)
-
REMOVE NO. 1 STEREO JACK ADAPTER ASSEMBLY (for Integrated Console Box Type)
-
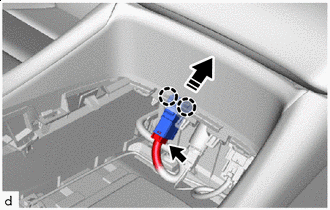

Remove in this Direction Disconnect the connector.
-
Disengage the claws to remove the No. 1 stereo jack adapter assembly as shown in the illustration.
-
-
REMOVE REAR CONSOLE END PANEL SUB-ASSEMBLY (for Separate Console Box Type)
-
REMOVE UPPER CONSOLE PANEL SUB-ASSEMBLY (for Separate Console Box Type)
-
REMOVE NO. 3 BOX PANEL (for Separate Console Box Type)
-
REMOVE NO. 1 STEREO JACK ADAPTER ASSEMBLY (for Separate Console Box Type)
-
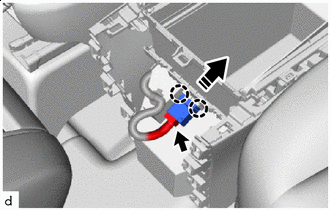
Remove in this Direction Disconnect the connector.
-
Disengage the claws to remove the No. 1 stereo jack adapter assembly as shown in the illustration.
-
-
REMOVE CONSOLE BOX ASSEMBLY (for Integrated Console Box Type)
-
REMOVE STEREO JACK ADAPTER ASSEMBLY (for Integrated Console Box Type)
-
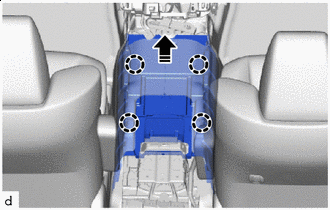
Remove in this Direction Disengage the claws to remove the No. 2 center console silencer as shown in the illustration.
-
Disconnect the connectors.
-
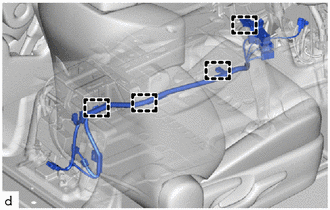
Disengage the clamps to remove the stereo jack adapter assembly with No. 3 antenna cord sub-assembly.
-