ROOF SPEAKER REMOVAL
CAUTION / NOTICE / HINT
The necessary procedures (adjustment, calibration, initialization or registration) that must be performed after parts are removed, installed or replaced during the roof speaker removal/installation are shown below.
| Replacement Part or Procedure | Necessary Procedures | Effects/Inoperative when not Performed | Link |
|---|---|---|---|
| Disconnect cable from negative battery terminal | Correct the steering angle neutral point | Panoramic view monitor system | |
| Initialize servo motor | Air conditioning system | ||
| Reset slide door close position | Power slide door system | ||
| Reset back door close position | Power back door system |
Tech Tips
-
Use the same procedure for both the RH and LH sides.
-
The procedure described below is for the LH side.
PROCEDURE
-
REMOVE ROOF HEADLINING ASSEMBLY
-
REMOVE ROOF SPEAKER ASSEMBLY (for Front Side)
-
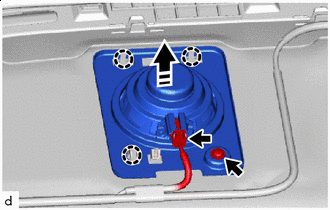

Remove in this Direction Disconnect the connector.
-
Remove the screw.
-
Disengage the claws to remove the roof speaker assembly as shown in the illustration.
Note
Do not touch the cone part of the roof speaker assembly.
-
-
REMOVE ROOF SPEAKER ASSEMBLY (for Rear Side)
-
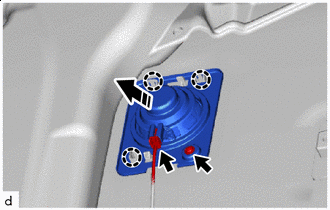
Remove in this Direction Disconnect the connector.
-
Remove the screw.
-
Disengage the claws to remove the roof speaker assembly as shown in the illustration.
Note
Do not touch the cone part of the roof speaker assembly.
-