VALVE BODY ASSEMBLY REMOVAL
CAUTION / NOTICE / HINT
The necessary procedures (adjustment, calibration, initialization, or registration) that must be performed after parts are removed, installed, or replaced during the transmission valve body assembly removal/installation are shown below.
| Replacement Part or Procedure | Necessary Procedures | Effects/Inoperative when not Performed | Link |
|---|---|---|---|
|
Perform the following procedures in the order shown:
|
|
Click here for Initialization Click here for Registration |
| Replacement of shift solenoid valve SL1 and/or SL2 | Perform Road Test to Allow TCM to Learn | ||
| Removal/installtaion of the radiator grille | Television camera view adjustment | Panoramic view monitor system |
PROCEDURE
-
PRECAUTION
Note
If automatic transaxle assembly parts have been replaced, refer to the Parts Replacement Compensation Table to determine if any additional operations are necessary.
-
REMOVE FRONT BUMPER COVER (for ALPHARD)
-
REMOVE FRONT BUMPER COVER (for VELLFIRE)
-
REMOVE FRONT LOWER BUMPER ABSORBER
-
REMOVE NO. 1 ENGINE UNDER COVER
-
REMOVE REAR ENGINE UNDER COVER LH
-
DRAIN AUTOMATIC TRANSAXLE FLUID
-
REMOVE FRONT SUSPENSION MEMBER REINFORCEMENT LH
-
REMOVE AUTOMATIC TRANSAXLE OIL PAN SUB-ASSEMBLY
-
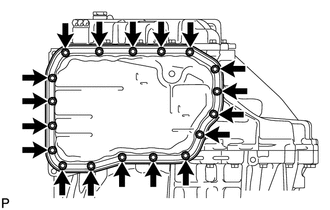
Remove the 18 bolts and automatic transaxle oil pan sub-assembly from the transaxle case sub-assembly.
Note
Some fluid will remain in the automatic transaxle oil pan sub-assembly. Remove all the bolts, and carefully remove the automatic transaxle oil pan sub-assembly.
-
Remove the automatic transaxle oil pan gasket from the automatic transaxle oil pan sub-assembly.
-
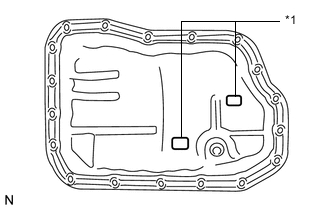
*1 Transmission Oil Cleaner Magnet Remove the 2 transmission oil cleaner magnets from the automatic transaxle oil pan sub-assembly.
Note
Make sure to remove any metallic powder, sludge, etc. from the automatic transaxle oil pan sub-assembly.
-
-
INSPECT TRANSMISSION OIL CLEANER MAGNET
-
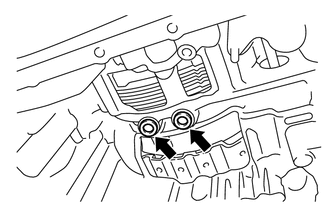
REMOVE VALVE BODY OIL STRAINER ASSEMBLY
-

Remove the 2 bolts and valve body oil strainer assembly from the transmission valve body assembly.
-
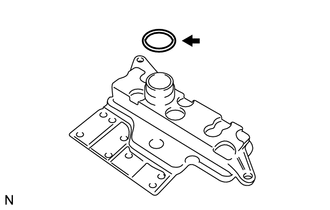
Remove the O-ring from the valve body oil strainer assembly.
-
-
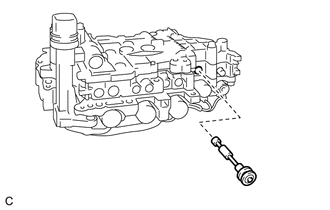
REMOVE TRANSMISSION VALVE BODY ASSEMBLY
-
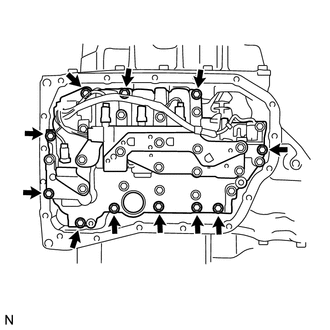
Remove the 11 bolts and transmission valve body assembly from the transaxle case sub-assembly.
Note
-
When removing the transmission valve body assembly, be careful not to allow the transmission revolution sensor and the automatic transaxle assembly to interfere with each other.
-
As the manual valve is not secured to the transmission valve body assembly, make sure it does not fall out when removing the transmission valve body assembly.
-
-
-
REMOVE TRANSAXLE CASE GASKET
-
Remove the 2 transaxle case gaskets from the transaxle case sub-assembly.
-
-
REMOVE MANUAL VALVE
-
Remove the manual valve from the transmission valve body assembly.
-