FRONT CONSOLE BOX DISASSEMBLY
CAUTION / NOTICE / HINT
Tech Tips
-
Use the same procedure for RHD and LHD vehicles.
-
The procedure listed below is for LHD vehicles.
PROCEDURE
-
REMOVE CONSOLE COMPARTMENT DOOR SUB-ASSEMBLY
-
Remove the 4 screws and console compartment door sub-assembly.
-
-
REMOVE NO. 3 BOX PANEL
-
Detach the 2 clips and 2 claws, 3 guides and remove the No. 3 box panel.
-
-
REMOVE CONSOLE BOX PLATE
-


Protective Tape Using a screwdriver, detach the 4 claws and remove the 2 console box plates.
Tech Tips
Tape the screwdriver tip before use.
-
-
REMOVE MOBILE WIRELESS CHARGER CRADLE ASSEMBLY (w/ Wireless Charger)
-
REMOVE CONSOLE BOX ILLUMINATION LIGHT ASSEMBLY (w/ Wireless Charger)
-
Protective Tape Disconnect the connector.
-
Using a screwdriver, detach the 2 claws and remove the console box illumination light assembly.
Tech Tips
Tape the screwdriver tip before use.
-
-
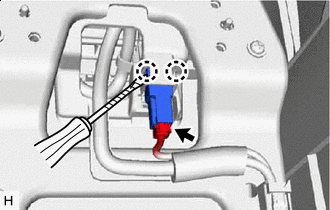
REMOVE CONSOLE BOX WIRE (w/ Wireless Charger)
-
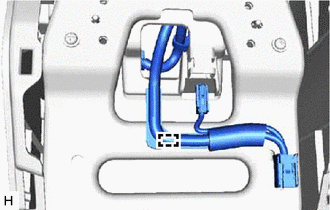
Detach the clamp and remove the console box wire.
-
-
REMOVE CONSOLE BOX WIRE (w/o Wireless Charger)
-

*a Screw *b Connector Remove the 4 screws and disconnect the bracket.
-
Disconnect the connector and detach the clamp and remove the console box wire.
-
-
REMOVE CONSOLE BOX ILLUMINATION LIGHT ASSEMBLY (w/o Wireless Charger)
-
Protective Tape Using a screwdriver, detach the 2 claws and remove the console box illumination light assembly.
Tech Tips
Tape the screwdriver tip before use.
-
-
REMOVE NO. 2 BOX SIDE PANEL
-
Detach the 9 claws and remove the No. 2 box side panel.
-
-
REMOVE NO. 1 BOX SIDE PANEL
-
Detach the 9 claws and remove the No. 1 box side panel.
-
-
REMOVE SHIFTING HOLE COVER SUB-ASSEMBLY
-
Protective Tape Using a screwdriver, detach the 7 claws and remove the shifting hole cover sub-assembly.
Tech Tips
Tape the screwdriver tip before use.
-
-
REMOVE SHIFT POSITION INDICATOR
-
Remove the 2 screws and shift position indicator.
-
-
REMOVE INTEGRATION CONTROL AND PANEL ASSEMBLY
-
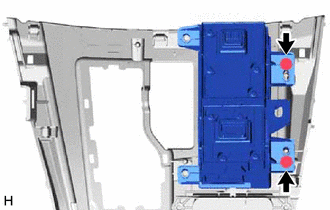
Remove the 2 screws and the integration control and panel assembly.
-
-
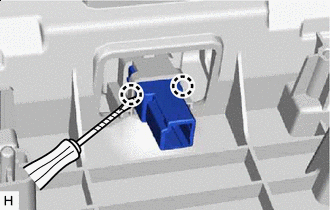
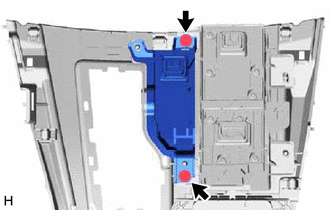
REMOVE REMOTE OPERATION CONTROLLER ASSEMBLY
-
Remove the 4 screws and remote operation controller assembly.
-
-
REMOVE CONSOLE COMPARTMENT BOX
-
Remove the 2 console compartment boxs.
-
-
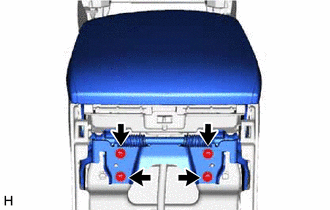
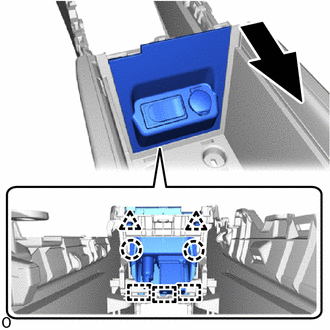
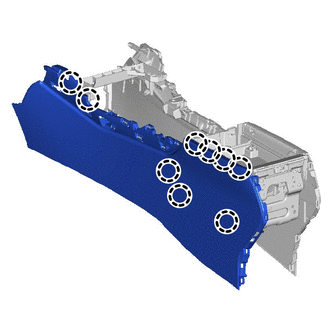
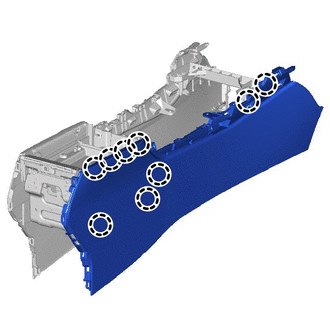
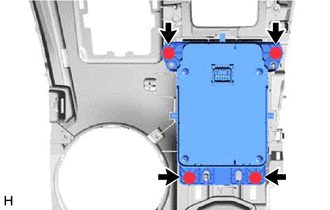
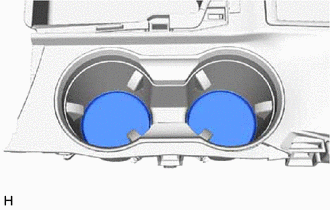
REMOVE CONSOLE CUP HOLDER BOX SUB-ASSEMBLY
-

Protective Tape Using a screwdriver, detach the 10 claws and remove the cup holder rail.
Tech Tips
Tape the screwdriver tip before use.
-
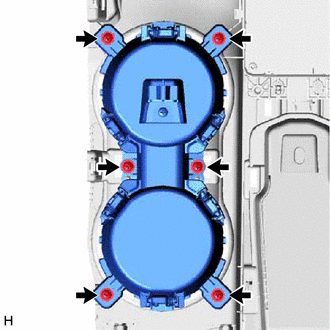
Remove the 6 screws and console cup holder box sub-assembly.
-
-
REMOVE CONSOLE ARMREST LID
-
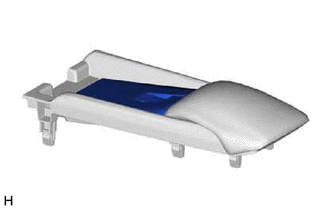
Remove the console armrest lid.
-
-
REMOVE CONSOLE BOX POCKET SUB-ASSEMBLY
-

Remove the 4 screws and console box pocket sub-assembly.
-
-
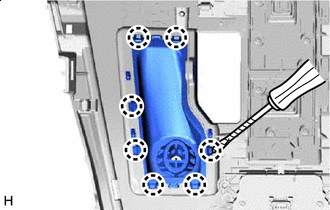
REMOVE CONSOLE BOX REGISTER ASSEMBLY
-
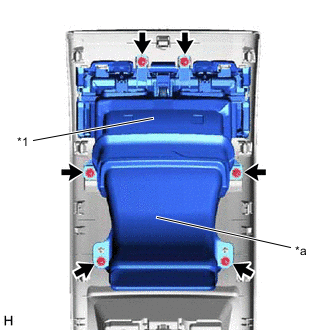
*1 Console Box Register Assembly *a Duct Remove the 6 screws and console box register assembly together with the duct.
-
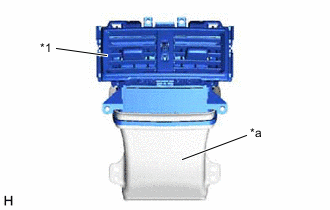
*1 Console Box Register Assembly *a Duct Disconnect the console box register assembly from the duct.
-
-
REMOVE REFRESHING SEAT SWITCH (w/ Rear Seat Heater)