MULTI-DISPLAY REASSEMBLY
PROCEDURE
-
PRECAUTION
Note
-
When installing and removing the front panel, make sure not to touch the display panel.
-
Make sure there is no dirt (fingerprints, oil, etc.) on the front panel or display panel. If dirty, wipe it off with a soft cloth (such as a dry glasses cloth).
-
-
INSTALL FRONT PANEL ASSEMBLY
Tech Tips
Reuse the cushion seat.
-
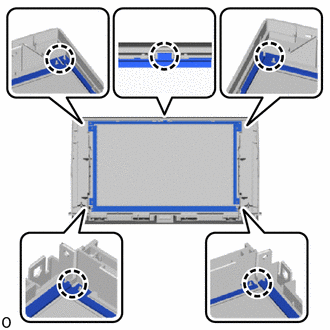
Align the protrusions of the front panel with the cushion seat positioning holes and install the front panel assembly.
Note
-
Do not mistake the top and bottom of the cushion seat as the shape is different.
-
Install the cushion side so that it faces the display side.
-
When installing, check that the protrusions and positioning holes are correctly aligned as shown in the illustration.
-
If the part is not installed correctly as shown in the illustration and a clearance exists between the front panel and the display, a malfunction may occur (such as rattling or the intrusion of dirt).
-
-

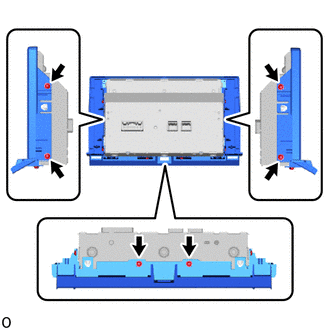
Attach the claw.
Note
Blow the part with air so that foreign matter does not enter from between the display and the front panel.
-
Install the display with the 6 screws.
-
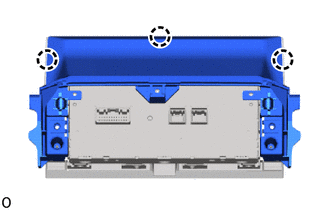
Attach the claw.
-
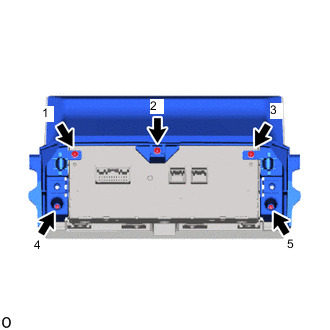
Tighten the 5 screws in the order shown in the illustration to install the rear panel.
-