RADIATOR GRILLE(except Sport Package) DISASSEMBLY
PROCEDURE
-
REMOVE FRONT TELEVISION CAMERA ASSEMBLY (w/ Panoramic View Monitor System)
-
REMOVE NO. 1 ULTRASONIC SENSOR (w/ LEXUS Parking Assist-sensor System)
-
REMOVE NO. 1 ULTRASONIC SENSOR RETAINER (w/ LEXUS Parking Assist-sensor System)
-
REMOVE FRONT BUMPER EXTENSION MOUNTING BRACKET
-
Remove the 2 screws and front bumper extension mounting bracket.
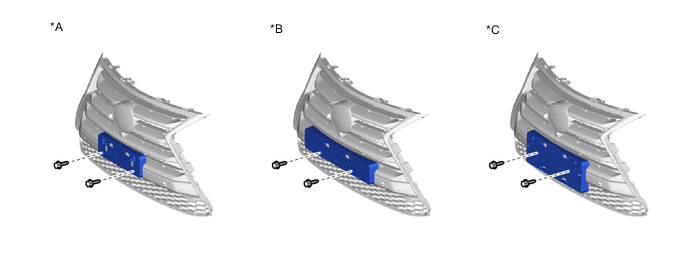
*A for Type A *B for Type B *C for Type C - -
-
-
REMOVE FRONT BUMPER EXTENSION
-
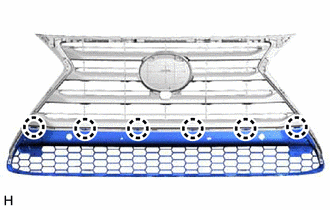
Detach the 6 claws and remove the front bumper extension.
-
-
REMOVE FRONT BUMPER HOLE COVER LH
-
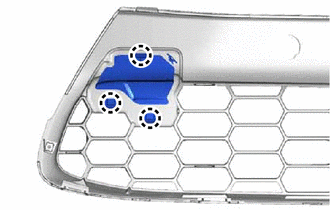
Detach the 3 claws and remove the front bumper hole cover LH.
-
-
REMOVE FRONT BUMPER HOLE COVER RH
Tech Tips
Use the same procedure described for the LH side.
-
REMOVE RADIATOR GRILLE
-
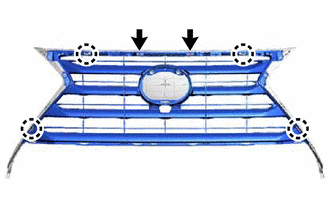
Remove the 2 screws.
-
Detach the 4 claws and remove the radiator grille from the radiator grille moulding.
-
-
REMOVE RADIATOR GRILLE EMBLEM
-
When Replacing the Radiator Grille Emblem:
-


Protective Tape Apply protective tape around the spring nut.
-
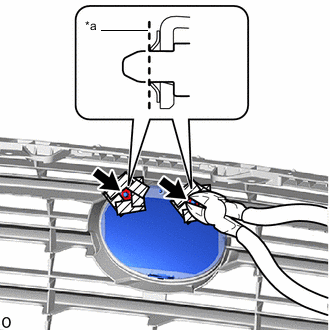
*a Cut Using a plier nipper (side cutters), cut the radiator grille emblem at the positions shown in the illustration.
-
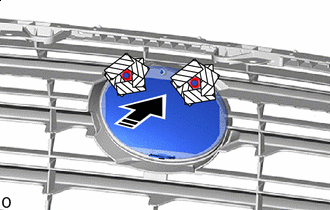

Push in this Direction Push the radiator grille emblem to remove the 2 spring nuts as shown in the illustration.
CAUTION:
Make sure to cover the spring nuts with a piece of cloth or equivalent to prevent them from flying off during removal.
-
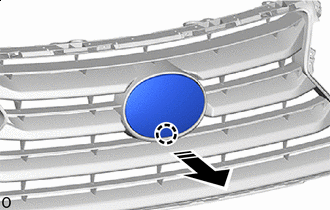
Remove in this Direction Detach the claw as shown in the illustration to remove the radiator grille emblem.
-
-
When Replacing the Front Bumper Cover:
-
Using a center punch, make a depression at the positions shown in the illustration.
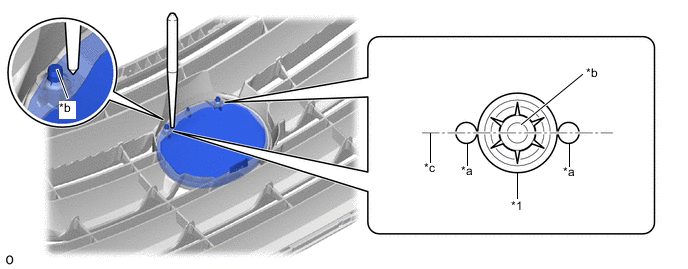
*1 Spring Nut - - *a Depression *b Pin of Radiator Grille Emblem *c Center Line - - Tech Tips
-
Make sure to make the depressions so they are aligned with the center line of the pin of the radiator grille emblem.
-
Make sure to make the depressions correctly so that a plier nipper (side cutters) can be used to pinch the spring nuts.
-
-
Using a plier nipper (side cutters), rotate the 2 spring nuts to align the cutouts of each spring nut as shown in the illustration.
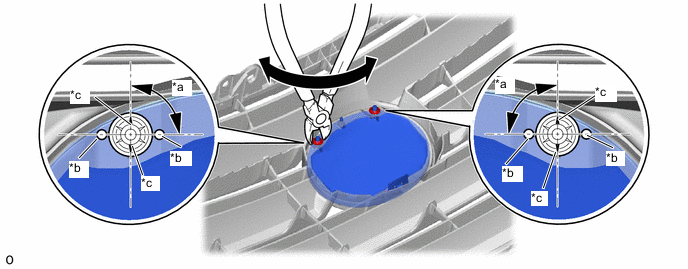
*a 90° *b Depression *c Cutout - - -
using a plier nipper (side cutters), deform each spring nut as shown in the illustration and then remove the 2 spring nuts.
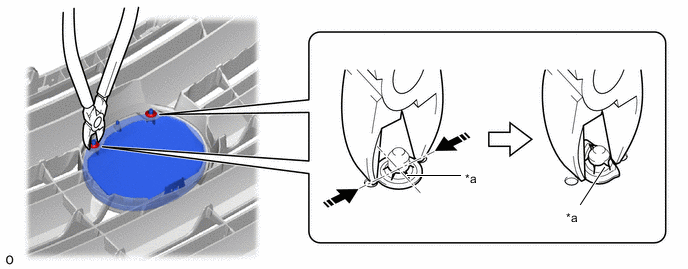
*a Cutout - - Pinch - - -
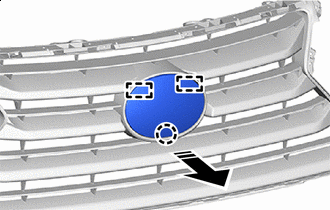
Remove in this Direction Detach the 2 claws and 2 guides as shown in the illustration to remove the radiator grille emblem.
-
-