FRONT AXLE HUB REMOVAL

CAUTION / NOTICE / HINT
Tech Tips
-
Use the same procedure for the RH and LH sides.
-
The procedure listed below is for the LH side.
PROCEDURE
-
REMOVE FRONT WHEEL
-
REMOVE FRONT AXLE SHAFT NUT LH
-
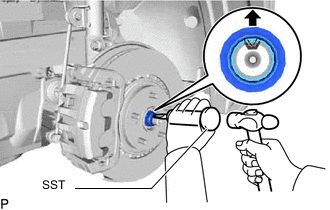
Using SST and a hammer, unstake the staked part of the front axle shaft nut.
- SST
- 09930-00010 ( 09931-00010, 09931-00020 )
Note
Loosen the staked part of the front axle shaft nut completely, otherwise the screw of the drive shaft may be damaged.
-
While applying the brakes, remove the front axle shaft nut.
-
-
DISCONNECT FRONT SPEED SENSOR LH (w/o AVS)
-
DISCONNECT FRONT SPEED SENSOR LH (w/ AVS)
-
DISCONNECT FRONT FLEXIBLE HOSE (w/o AVS)
-
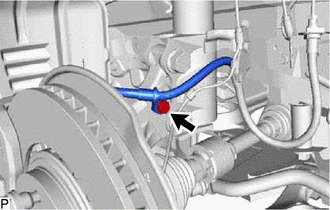
Remove the bolt and disconnect the flexible hose.
-
-
DISCONNECT FRONT DISC BRAKE CALIPER ASSEMBLY LH
-
REMOVE FRONT DISC
-
DISCONNECT TIE ROD END SUB-ASSEMBLY LH
-
DISCONNECT FRONT LOWER NO. 1 SUSPENSION ARM SUB-ASSEMBLY LH
-
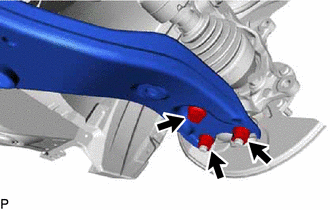
Remove the bolt and 2 nuts.
-
Disconnect the front lower No. 1 suspension arm sub-assembly LH from the lower ball joint assembly LH.
-
-
REMOVE FRONT AXLE ASSEMBLY LH
-
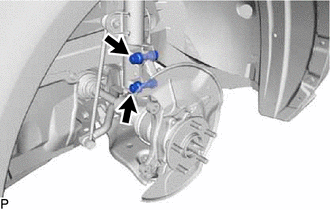
Remove the 2 bolts and 2 nuts, and disconnect the front shock absorber assembly with coil spring from the steering knuckle.
Tech Tips
While fixing the nuts in place, loosen and remove the bolts.
-
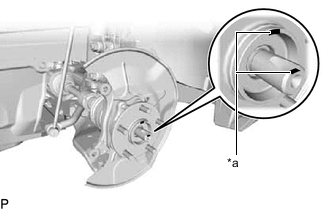
*a Matchmark Put matchmarks on the drive shaft and front axle hub sub-assembly.
-
Using a plastic-faced hammer, remove the steering knuckle assembly.
Note
Be careful not to damage the front axle outboard joint boot and speed sensor rotor. Do not excessively push out the drive shaft from the axle assembly.
-
-
REMOVE FRONT AXLE HUB SUB-ASSEMBLY LH
-
Secure the front axle assembly in a vise.
Note
When using a vise, do not overtighten it.
-
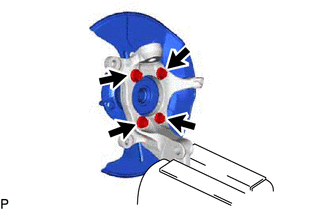
Remove the 4 bolts and front axle hub sub-assembly from the steering knuckle.
Note
Do not place the hub and bearing's magnet rotor side so that it is facing downward, and do not allow the magnet rotor side to become damaged or contact foreign matter.
-
Remove the front brake dust cover from the steering knuckle.
-