ATF TEMPERATURE SENSOR REMOVAL
PROCEDURE
-
REMOVE NO. 1 ENGINE UNDER COVER ASSEMBLY
-
REMOVE REAR ENGINE UNDER COVER LH
-
DRAIN AUTOMATIC TRANSAXLE FLUID
-
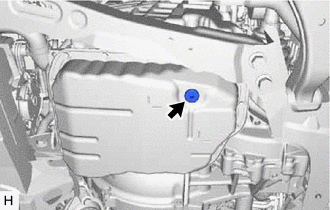
Using a 6 mm hexagon socket wrench, remove the overflow plug and gasket from the automatic transaxle oil pan sub-assembly.
-
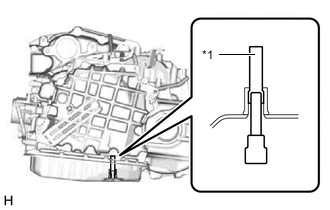
*1 No. 1 Transmission Oil Filler Tube Using a 6 mm socket hexagon wrench, remove the No. 1 transmission oil filler tube from the automatic transaxle assembly and drain the automatic transaxle fluid.
-
Using a 6 mm socket hexagon wrench, install the No. 1 transmission oil filler tube to the automatic transaxle assembly.
- Torque:
- 1.7 N*m { 17 kgf*cm, 15 in.*lbf }
-
Using a 6 mm hexagon socket wrench, temporarily install the gasket and overflow plug to the automatic transaxle oil pan sub-assembly.
Tech Tips
Reuse the old gasket as the overflow plug will be removed again to adjust the fluid level.
-
-
REMOVE FRONT SUSPENSION MEMBER REINFORCEMENT LH
-
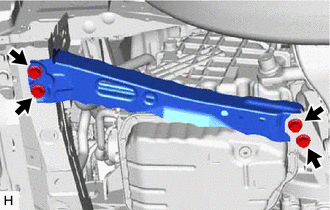
Remove the 4 bolts and front suspension member reinforcement LH.
-
-
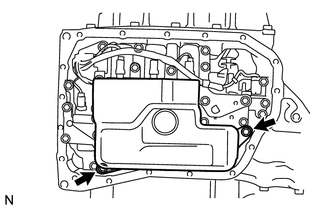
REMOVE AUTOMATIC TRANSAXLE OIL PAN SUB-ASSEMBLY
-
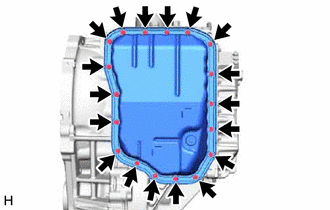
Remove the 18 bolts and automatic transaxle oil pan sub-assembly from the automatic transaxle assembly.
Note
Some fluid will remain in the automatic transaxle oil pan sub-assembly. Remove all the bolts, and carefully remove the automatic transaxle oil pan sub-assembly.
-
Remove the gasket from the automatic transaxle oil pan sub-assembly.
-
Remove the 2 transmission oil cleaner magnets from the automatic transaxle oil pan sub-assembly.
-
Examine particles in the automatic transaxle oil pan sub-assembly.
-
Collect any steel chips with the removed transmission oil cleaner magnets. Look carefully at the chips and particles in the automatic transaxle oil pan sub-assembly and on the transmission oil cleaner magnets to see the type of wear which might be found in the automatic transaxle assembly.
Result Steel (magnetic) Bearing, gear and plate wear Brass (non-magnetic) Bushing wear
-
-
-
REMOVE VALVE BODY OIL STRAINER ASSEMBLY
-
Remove the 2 bolts and valve body oil strainer assembly from the transmission valve body assembly.
-
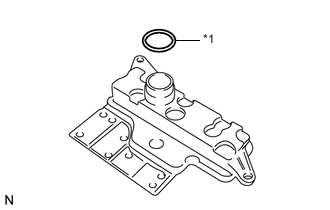
*1 O-ring Remove the O-ring from the valve body oil strainer assembly.
-
-
REMOVE ATF TEMPERATURE SENSOR ASSEMBLY
-

*1 Clamp Disconnect the connector.
-
Remove the 4 bolts, ATF temperature sensor assembly and clamp from the transmission valve body assembly.
-
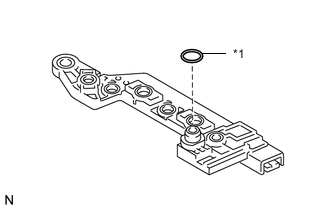
*1 O-ring Remove the O-ring from the ATF temperature sensor assembly.
-