HIGH MOUNTED STOP LIGHT ASSEMBLY REMOVAL
PROCEDURE
-
REMOVE CENTER STOP LIGHT COVER
-
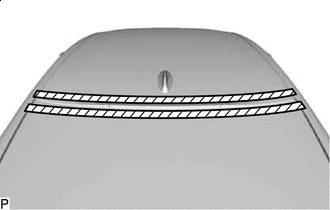

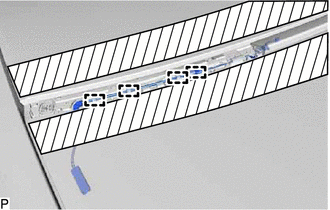
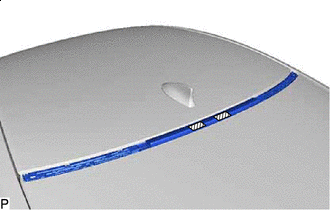
Protective Tape Apply protective tape around the center stop light assembly as shown in the illustration.
-
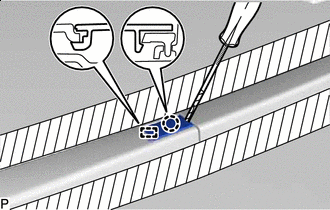
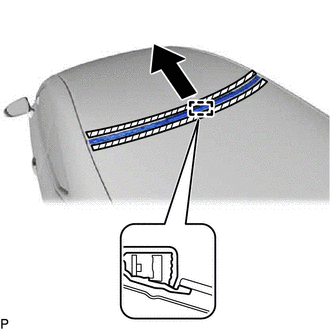
Protective Tape Using a screwdriver with its tip wrapped with protective tape, disengage the claw and guide to remove the center stop light cover.
Tech Tips
Use the same procedure for the RH side and LH side.
-
-
REMOVE NO. 2 CENTER STOP LIGHT COVER LH
-
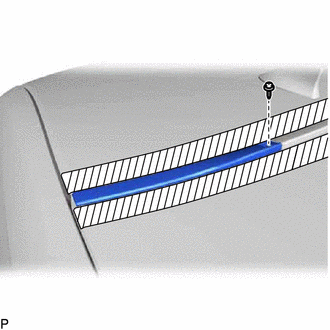
Remove the screw.
-
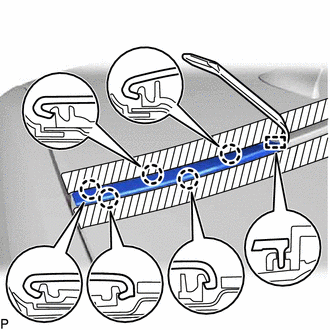
Using a moulding remover, disengage the guide and 5 claws to remove the No. 2 center stop light cover LH.
Note
When removing the No. 2 center stop light cover LH, take care not to damage the back window glass sub-assembly and vehicle body.
Tech Tips
When removing the No. 2 center stop light cover LH, disengage the guide and 5 claws from the inside of the No. 2 center stop light cover LH.
-
-
REMOVE NO. 2 CENTER STOP LIGHT COVER RH
Tech Tips
Use the same procedure as for the LH side.
-
REMOVE CENTER STOP LIGHT CLIP
-
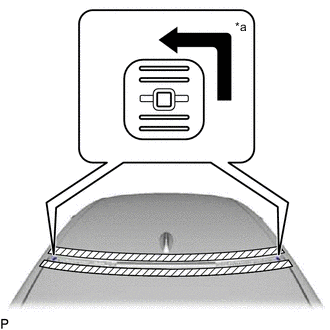
*a 90° Using a screwdriver, turn the center stop light clip 90 degrees and remove the 2 center stop light clips.
-
-
REMOVE CENTER STOP LIGHT ASSEMBLY
-
Disengage the 4 clamps.
-

Disconnect the connector.
-
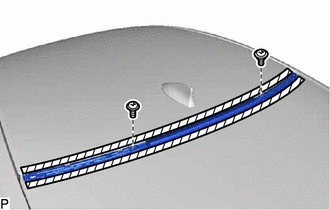
Remove the 2 screws.
-
Disengage the 2 guides.
-
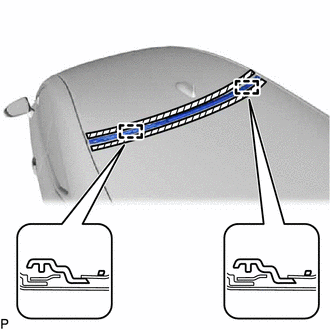
Double-sided Tape Separate the double-sided tape.
-
Push the center stop light assembly toward the front of the vehicle to disengage the guide and remove the center stop light assembly.
Note
When removing the center stop light assembly, take care not to damage the back window glass sub-assembly and vehicle body.
-