PROCEDURE
- Click here
REMOVE HEADLIGHT LEVELING MOTOR
-
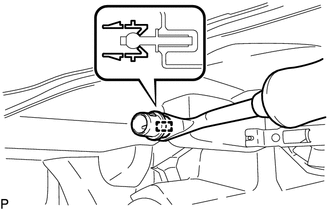
Disconnect the connector.
-
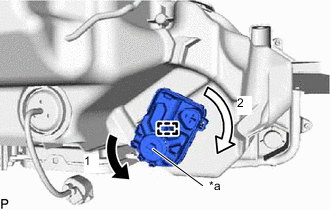
*a Aiming Screw Turn the aiming screw of the headlight leveling motor in the direction indicated by the arrow (1) shown in the illustration.
Tip:
-
Turn the aiming screw until the headlight leveling motor can be moved in the direction indicated by the arrow (2) shown in the illustration.
-
Make sure to remember the number of aiming screw rotations.
-
-
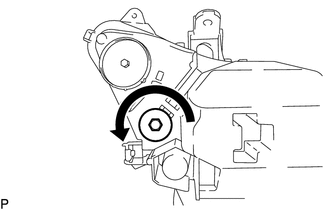
Turn the headlight leveling motor in the direction indicated by the arrow (2) shown in the illustration to disengage the pin.
Tip:When removing the headlight leveling motor of the headlight assembly RH, turn the headlight leveling motor in the opposite direction of the arrow (2) shown in the illustration.
-
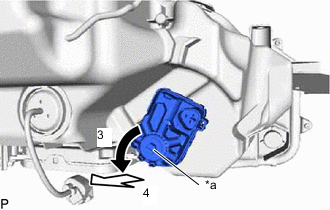
*a Aiming Screw Turn the aiming screw of the headlight leveling motor in the direction indicated by the arrow (3) shown in the illustration to disengage the shaft.
Tip:Make sure to remember the number of aiming screw rotations.
-
Pull out the headlight leveling motor in the direction indicated by the arrow (4) shown in the illustration to remove it.
-
- Click here
REMOVE HEADLIGHT LEVELING MOTOR BASE PACKING
-
Remove the headlight leveling motor base packing.
Note:After the headlight leveling motor base packing is removed, be sure to replace it with a new one. Failure to do so may cause water ingress.
-
- Click here
REMOVE HEADLIGHT LIGHT CONTROL ECU SUB-ASSEMBLY
- Click here
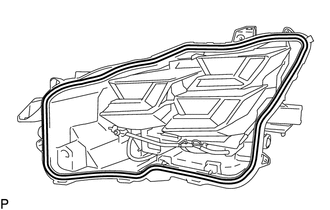
REMOVE HEADLIGHT GASKET
- Click here
REMOVE HEADLIGHT LENS
-
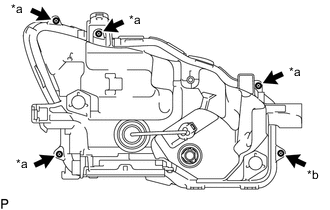
*a Screw *b "TORX" Screw Remove the 4 screws.
-
Using a T20H "TORX" driver, remove the "TORX" screw.
-
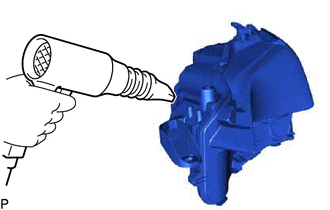
Using a dryer, heat the backside of the headlight assembly.
Note:If the headlight assembly is heated unevenly, it will deform or melt.
-
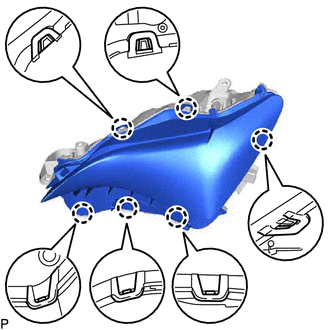
Disengage the 6 claws.
-
Remove the headlight lens.
Note:
-
Be sure to wear clean rubber gloves.
-
Do not allow dirt or foreign matter to get on the headlight lens.
-
If there are any fingerprints on the back of the headlight lens, wipe them off with a soft cloth.
Tip:If the headlight lens cannot be removed even after heating, using a screwdriver with its tip wrapped with protective tape, lift the headlight lens. Be careful not to damage the headlight lens and housing.
-
-
- Click here
REMOVE HEADLIGHT LENS GASKET
-
Remove the headlight lens gasket.
Note:After the headlight lens is removed, be sure to replace headlight lens gasket with a new one. Failure to do so may cause water ingress.
-
- Click here
REMOVE HEADLIGHT UNIT ASSEMBLY
Note:
-
Do not allow dirt or foreign matter to get on the headlight unit assembly.
-
If there are any fingerprints on the headlight unit assembly, wipe them off with a soft cloth.
-
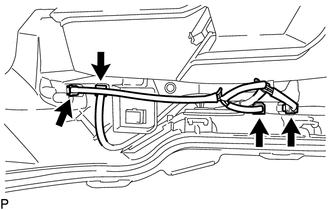
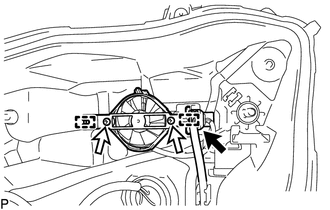
Disconnect the 4 connectors.
-

Protective Tape Using a screwdriver with its tip wrapped with protective tape, disengage the 2 claws to separate the headlight unit assembly from the pivot collar.
Tip:If the headlight unit assembly interferes with the screwdriver, making it difficult to disengage the claws, turn the horizontal aiming screw to move the headlight unit assembly to the point where the claws can be disengaged.
-
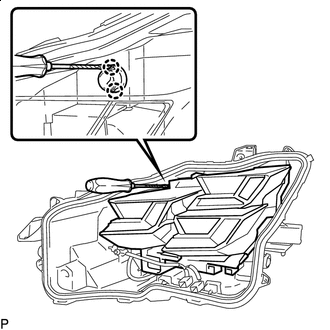
While holding the headlight unit assembly by hand, turn the horizontal aiming screw as shown in the illustration until the headlight unit assembly can be removed.
Tip:Make sure to remember the number of aiming screw rotations.
-
Using a clip remover, disengage the clamp to remove the pivot collar.
-
- Click here
REMOVE HEADLIGHT FAN
-
Disconnect the connector.
-
Remove the 2 screws.
-
Disengage the 2 guides to remove the headlight fan with the bracket.
-
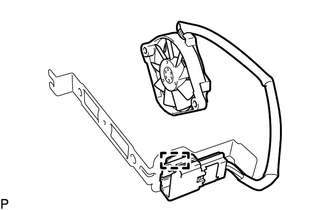
Disengage the clamp to remove the headlight fan from the bracket.
-