HOOD REASSEMBLY
PROCEDURE
-
INSTALL HOOD STAY BRACKET LH
-
INSTALL HOOD SUPPORT ASSEMBLY LH
-
INSTALL HOOD STAY BRACKET RH
Tech Tips
Use the same procedure as for the LH side.
-
INSTALL HOOD SUPPORT ASSEMBLY RH
Tech Tips
Use the same procedure as for the LH side.
-
CONNECT WASHER HOSE ASSEMBLY
-

Engage the 5 clamps to connect the washer hose assembly.
-
-
INSTALL WASHER NOZZLE SUB-ASSEMBLY
-
INSPECT WASHER NOZZLE SUB-ASSEMBLY
-
ADJUST WASHER NOZZLE SUB-ASSEMBLY
-
INSTALL HOOD INSULATOR
-
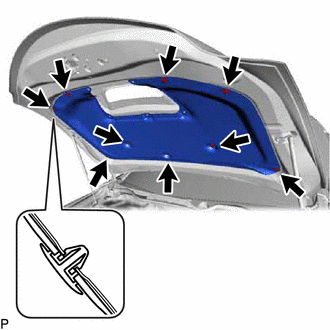
Install the hood insulator with 9 new hood insulator clips.
-
-
INSTALL HOOD BULGE PLATE ASSEMBLY (except Carbon Fiber Reinforced Plastic Hood)
-
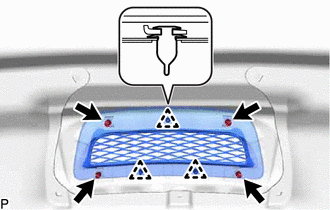
Engage the 3 clips to install the hood bulge plate assembly.
-
Install the 4 nuts.
-
-
INSTALL NO. 1 HOOD BULGE PROTECTOR (for Carbon Fiber Reinforced Plastic Hood)
-
Clean the hood bulge plate assembly.
-
Remove the release paper from a new No. 1 hood bulge protector.
Tech Tips
After removing the release paper, keep the exposed adhesive free from foreign matter.
-
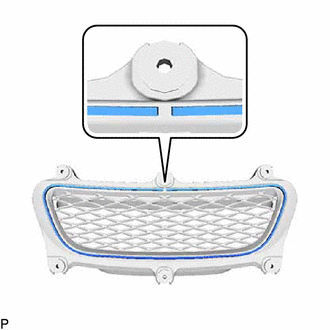
Install the No. 1 hood bulge protector as shown in the illustration.
-
-
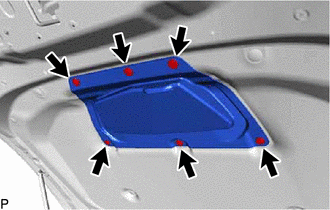
INSTALL HOOD BULGE PLATE ASSEMBLY (for Carbon Fiber Reinforced Plastic Hood)
-
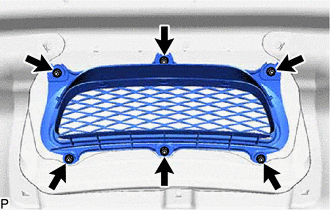
Install the hood bulge plate assembly with the 6 nuts.
-
-
INSTALL NO. 2 HOOD INSULATOR
-
Install the No. 2 hood insulator with the 6 clips.
-
-
INSTALL HOOD TO RADIATOR SUPPORT SEAL
-
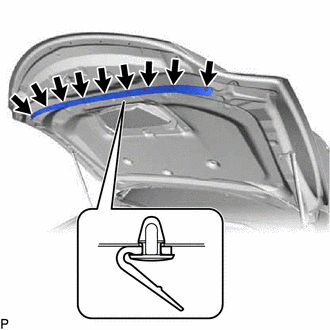
Install the hood to radiator support seal with 9 new hood to radiator support seal clips.
-