PROCEDURE
- Click here
REMOVE FRONT EXHAUST PIPE ASSEMBLY
- Click here
REMOVE FRONT NO. 1 FLOOR HEAT INSULATOR
-
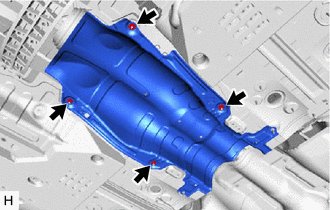
Remove the 4 nuts and front No. 1 floor heat insulator.
-
- Click here
REMOVE NO. 1 FUEL TANK PROTECTOR
-
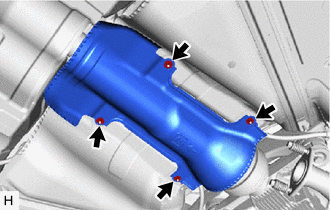
Remove the 4 nuts and No. 1 fuel tank protector.
-
- Click here
REMOVE PROPELLER WITH CENTER BEARING SHAFT ASSEMBLY
-
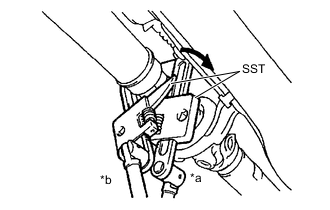
*a Turn *b Hold Using SST, loosen the adjusting nut until it can be turned by hand.
09922-10010 Note:Make sure to turn SST as shown in the illustration.
Tip:Use 2 of the same type of SST.
-
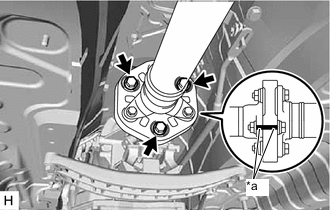
*a Matchmark Put matchmarks on the automatic transmission flange yoke assembly and propeller with center bearing shaft assembly.
-
Remove the 3 bolts, 3 washers and 3 nuts.
Note:The propeller intermediate shaft assembly and flexible coupling should not be disconnected.
-
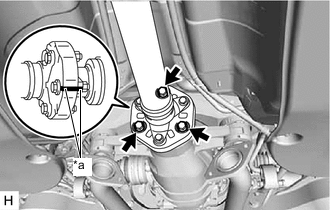
*a Matchmark Put matchmarks on the rear drive pinion companion flange and propeller with center bearing shaft assembly.
-
Remove the 3 bolts, 3 washers and 3 nuts.
Note:The propeller shaft assembly and flexible coupling should not be disconnected.
-
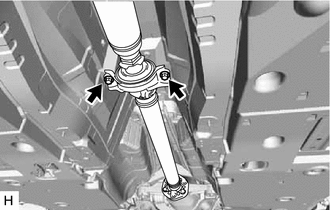
Remove the 2 bolts and 2 adjusting washers.
Tip:Some vehicles are not equipped with the adjusting washers.
-
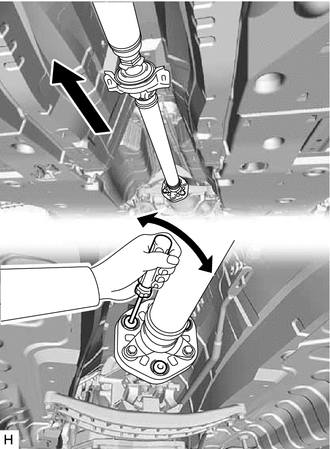
Push the propeller shaft assembly straight forward to compress the propeller with center bearing shaft assembly and pull out the propeller with center bearing shaft assembly from the centering pin of the differential.
Note:Press the propeller shaft assembly straight ahead to keep the transmission and propeller intermediate shaft assembly aligned straight.
Tip:If it is difficult to disconnect the flange from the flexible coupling, pry it using a screwdriver.
-
Pull the propeller with center bearing shaft assembly outward from the vehicle's rear to remove it.
Note:The propeller intermediate shaft assembly and propeller shaft assembly should not be disconnected.
-