AUTOMATIC TRANSMISSION ASSEMBLY REMOVAL

PROCEDURE
-
REMOVE STARTER ASSEMBLY
-
REMOVE ENGINE MOUNTING DAMPER
-
REMOVE NO. 2 EXHAUST MANIFOLD HEAT INSULATOR
-
REMOVE EXHAUST MANIFOLD SUB-ASSEMBLY LH (TWC: Front Catalyst)
-
REMOVE EXHAUST MANIFOLD TO HEAD GASKET (for Bank 1)
-
REMOVE NO. 1 EXHAUST PIPE SUPPORT BRACKET SUB-ASSEMBLY
-
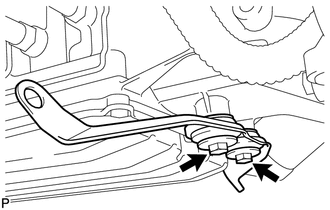
Remove the 2 bolts and No. 1 exhaust pipe support bracket sub-assembly.
-
-
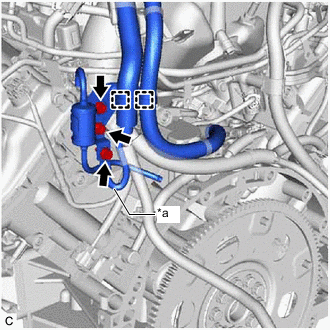
REMOVE OIL COOLER TUBE
-
Slide the 2 clips and disconnect the 2 oil cooler hoses from the automatic transmission assembly.
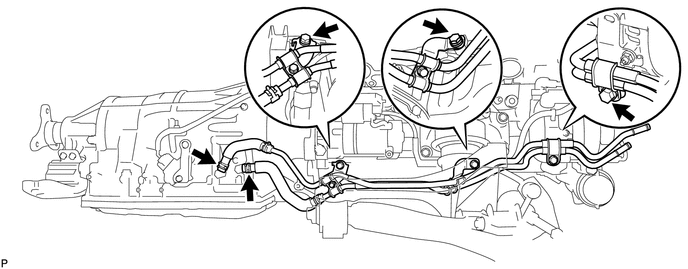
Tech Tips
Use a container to catch any ATF which flows out of the 2 oil cooler hoses.
-
Remove the 3 bolts and oil cooler tube from the No. 2 flexible hose clamp and engine assembly.
-
-
REMOVE DRIVE PLATE AND TORQUE CONVERTER ASSEMBLY SETTING BOLT
-
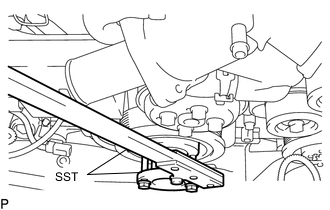
Using SST, hold the crankshaft pulley.
- SST
- 09213-70011 ( 09213-70020 )
-
Remove the 6 drive plate and torque converter assembly setting bolts.
Tech Tips
There will be one black colored bolt.
-
-
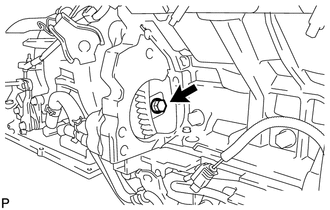
REMOVE REAR ENGINE MOUNTING MEMBER
-
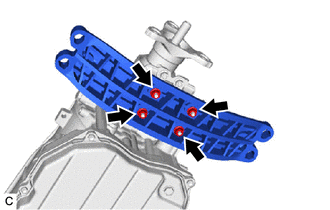
Remove the 4 nuts and rear engine mounting member from the rear engine mounting insulator.
-
-
REMOVE REAR ENGINE MOUNTING INSULATOR ASSEMBLY
-
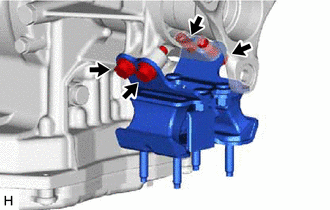
Remove the 4 bolts and rear engine mounting insulator assembly from the automatic transmission assembly.
-
-
REMOVE FLOOR SHIFT GEAR SHIFTING ROD SUB-ASSEMBLY
-
Remove the clip.
-
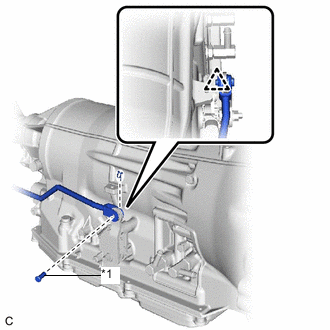
*1 Pin Remove the pin and floor shift gear shifting rod sub-assembly from the transmission control shaft lever RH.
-
-
DISCONNECT WIRE HARNESS
-
Disconnect the park/neutral position switch assembly connector.
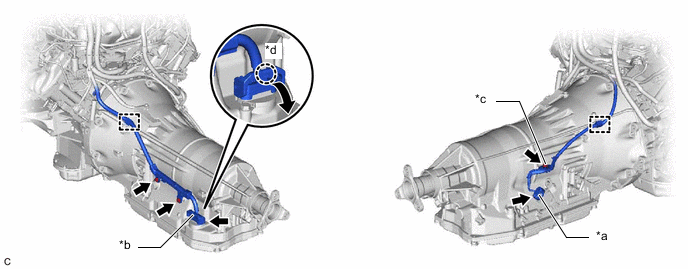
*a Park/Neutral Position Switch Assembly Connector *b Transmission Wire Connector *c Nut *d Claw -
Disconnect the transmission wire connector.
Tech Tips
Disengage the claw, pull down the lever, and then disconnect the transmission wire connector.
-
Disengage the 2 clamps.
-
Remove the nut and 2 bolts.
-
Disconnect the wire harness from the automatic transmission assembly.
-
-
REMOVE AUTOMATIC TRANSMISSION ASSEMBLY
-
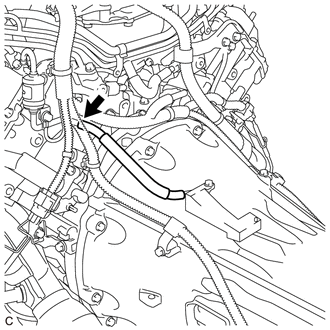
Disconnect the breather plug hose from the transmission breather assembly.
-
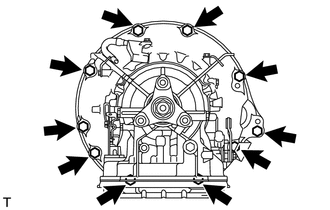
Remove the 10 bolts and automatic transmission assembly from the engine assembly.
Note
-
To prevent damage to the 2 knock pins, do not pry between the automatic transmission assembly and engine assembly.
-
-
-
REMOVE TORQUE CONVERTER ASSEMBLY
-

*a Matchmark Put matchmarks on the automatic transmission case sub-assembly and the torque converter assembly.
-
Remove the torque converter assembly from the automatic transmission assembly.
-
-
REMOVE TRANSMISSION BREATHER ASSEMBLY
-
*a Ground Wire Remove the bolt and disconnect the ground wire from transmission breather assembly.
-
Disengage the 2 clamps to disconnect the wire harness from transmission breather assembly.
-
Remove the 2 bolts and transmission breather assembly from the engine assembly.
-
-
INSPECT TORQUE CONVERTER ASSEMBLY