SLIDING ROOF HOUSING REASSEMBLY
PROCEDURE
-
INSTALL SLIDING ROOF DRIVE CABLE SUB-ASSEMBLY
-
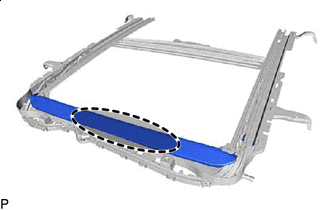

Hold Position Hold down the roof wind deflector panel sub-assembly.
-
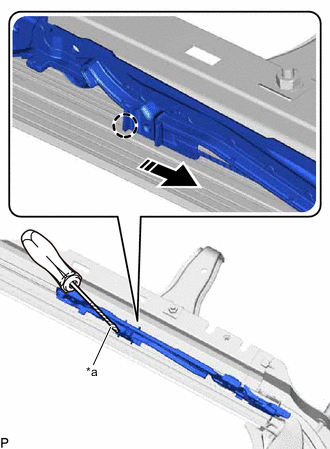
*a Protective Tape Push Position 
Install in this Direction Using a screwdriver, slide the sliding roof drive cable LH as shown in the illustration to install it.
Tech Tips
-
Tape the screwdriver tip before use.
-
Use the same procedure for the RH side.
-
-
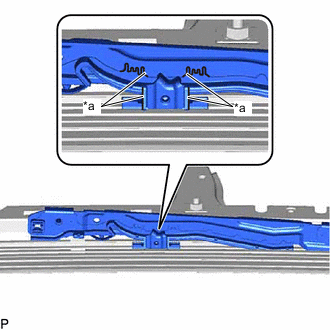
*a Alignment Mark Adjust Fully Closed Position:
-
Using a screwdriver, slide the sliding roof drive cable LH in either direction and align the alignment marks as shown in the illustration.
Tech Tips
Use the same procedure for the RH side.
-
-
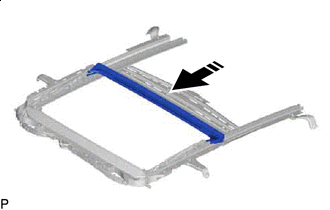
Install in this Direction Insert the rear roof drip channel into the sliding roof housing sub-assembly as shown in the illustration.
-
Engage the 2 claws as shown in the illustration to install the rear roof drip channel.
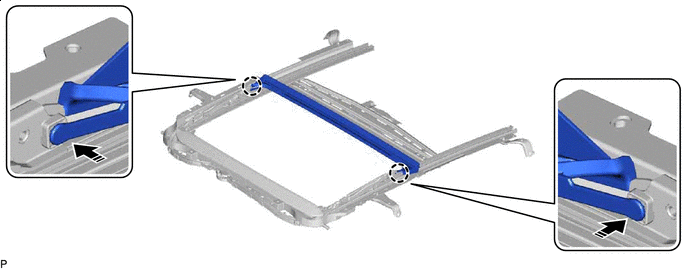
Install in this Direction - -
-
-
INSTALL SUNSHADE TRIM SUB-ASSEMBLY
-
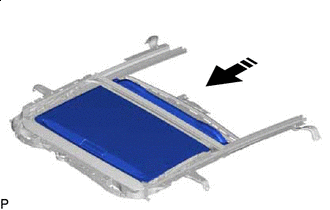
Install in this Direction Insert the sunshade trim sub-assembly into the sliding roof housing sub-assembly as shown in the illustration.
-
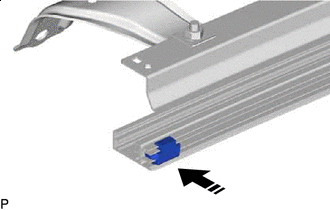
Install in this Direction Install the rear sliding roof sunshade stopper as shown in the illustration.
Tech Tips
Use the same procedure for the RH side.
-
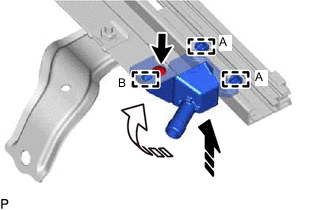
Install in this Direction (1) 
Install in this Direction (2) Move the sliding roof piece sub-assembly LH in the direction indicated by the arrow (1) shown in the illustration to engage the 2 guides (A).
-
Move the sliding roof piece sub-assembly LH in the direction indicated by the arrow (2) shown in the illustration to engage the guide (B).
-
Install the sliding roof piece sub-assembly LH with the screw.
Tech Tips
Use the same procedure for the RH side.
-
-
INSTALL SLIDING ROOF DRIVE GEAR SUB-ASSEMBLY
-
Apply MP grease to the gear of the sliding roof drive gear sub-assembly.
-
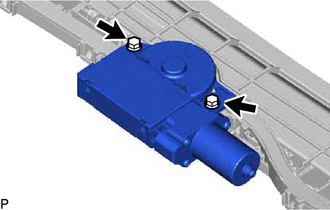
Install the sliding roof drive gear sub-assembly with the 2 bolts.
- Torque:
- 5.4 N*m { 55 kgf*cm, 48 in.*lbf }
-
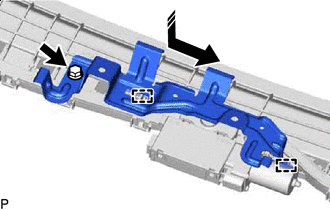
Install in this Direction Engage the 2 guides as shown in the illustration.
-
Install the map light bracket with the bolt.
- Torque:
- 5.4 N*m { 55 kgf*cm, 48 in.*lbf }
-