REAR CONSOLE BOX REMOVAL
PROCEDURE
-
REMOVE UPPER CONSOLE PANEL SUB-ASSEMBLY
-
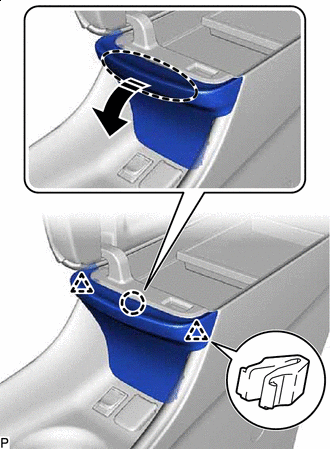

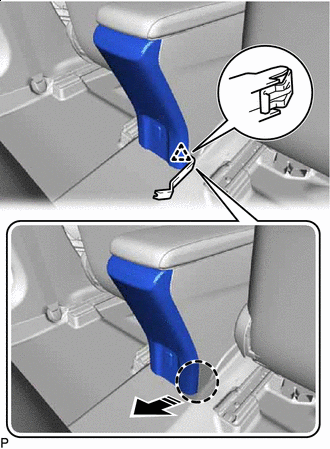
Place Hand Here 
Remove in this Direction Disengage the claw and 2 clips as shown in the illustration.
Note
-
As the claw may be damaged, make sure to disengage it carefully.
-
If the claw is damaged, replace the No. 1 upper box plate with a new one.
-
-
Using a moulding remover, disengage the 12 clips and 2 guides as shown in the illustration.
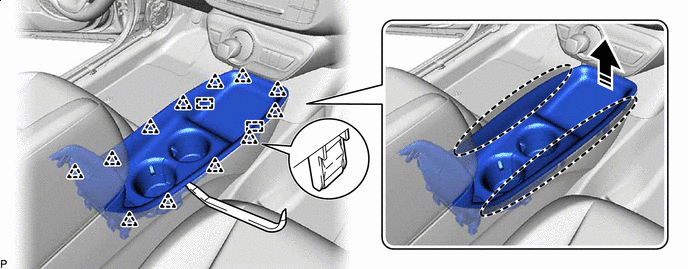
Insert Moulding Remover Here Remove in this Direction -
Disconnect each connector.
-
Disengage each clamp to remove the upper console panel sub-assembly and No. 1 upper box plate.
-
-
REMOVE NO. 1 UPPER BOX PLATE
-
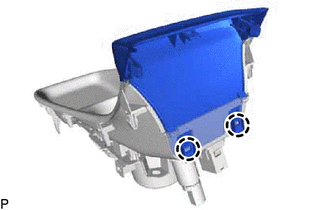
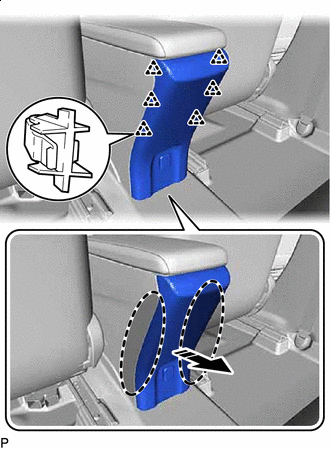
Disengage the 2 claws to remove the No. 1 upper box plate.
-
-
REMOVE CONSOLE CUP HOLDER BOX SUB-ASSEMBLY
-
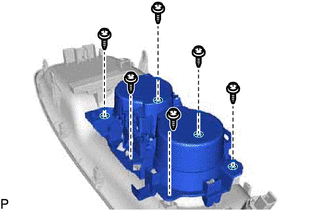
Remove the 6 screws and console cup holder box sub-assembly.
-
-
REMOVE CONSOLE REAR END PANEL SUB-ASSEMBLY
-
Insert Moulding Remover Here Remove in this Direction Using a moulding remover, disengage the clip as shown in the illustration.
-

Insert Moulding Remover Here Remove in this Direction Using a moulding remover, disengage the clip as shown in the illustration.
-
Place Hand Here Remove in this Direction Disengage the 6 clips as shown in the illustration.
-
Disconnect the connector to remove the console rear end panel sub-assembly.
-
-
REMOVE REAR CONSOLE BOX ASSEMBLY
-

Remove the 6 bolts and rear console box assembly.
-