AIR CONDITIONING AMPLIFIER REMOVAL
CAUTION / NOTICE / HINT
The necessary procedures (adjustment, calibration, initialization or registration) that must be performed after parts are removed and installed, or replaced during air conditioning amplifier assembly removal/installation are shown below.
| Replaced Part or Performed Procedure | Necessary Procedure | Effect/Inoperative Function when Necessary Procedure not Performed | Link |
|---|---|---|---|
| Air conditioning amplifier assembly | Initialize servo motor (Air conditioning system) | DTCs are stored |
PROCEDURE
-
REMOVE REAR CONSOLE BOX ASSEMBLY
-
REMOVE ACCELERATOR PEDAL SENSOR ASSEMBLY (for LHD)
-
REMOVE NO. 1 INSTRUMENT PANEL UNDER COVER SUB-ASSEMBLY (for RHD)
-
REMOVE LOWER CENTER INSTRUMENT CLUSTER FINISH PANEL SUB-ASSEMBLY
-
REMOVE FRONT NO. 1 CONSOLE BOX INSERT
-
REMOVE AIR CONDITIONING AMPLIFIER ASSEMBLY
-
for LHD:
-
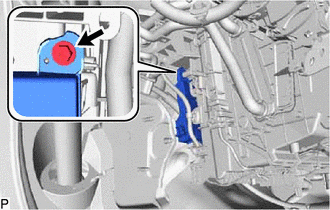
Remove the screw.
-
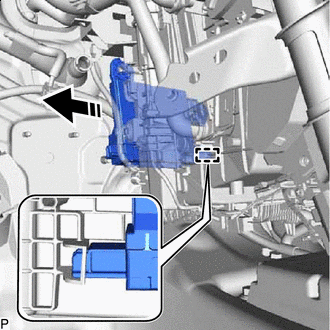

Remove in this Direction Disengage the guide to remove the air conditioning amplifier assembly as shown in the illustration.
-
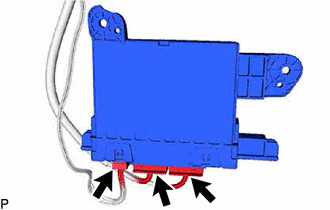
Disconnect each connector.
-
-
for RHD:
-
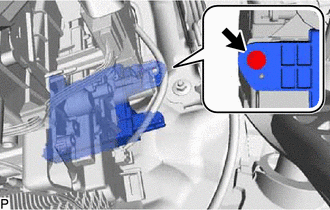
Remove the screw.
-

Remove in this Direction Disengage the guide to remove the air conditioning amplifier assembly as shown in the illustration.
-
Disconnect each connector.
-
-