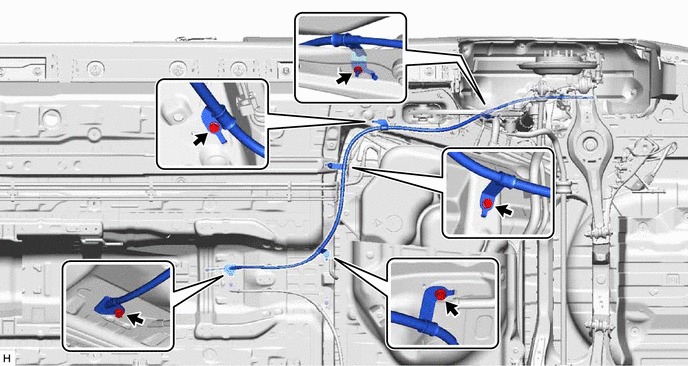
PARKING BRAKE CABLE(for Rear Side) REMOVAL
CAUTION / NOTICE / HINT
The necessary procedures (adjustment, calibration, initialization, or registration) that must be performed after parts are removed and installed, or replaced during No. 3 parking brake cable assembly removal/installation are shown below.
| Replaced Part or Performed Procedure | Necessary Procedure | Effect/Inoperative Function when Necessary Procedure not Performed | Link |
|---|---|---|---|
|
Inspection after repair |
|
w/ Canister Pump Module: Click here w/o Canister Pump Module: Click here |
CAUTION:
To prevent burns, do not touch the engine, exhaust pipe or other high temperature components while the engine is hot.
Tech Tips
Use the same procedure for the No. 2 parking brake cable assembly and No. 3 parking brake cable assembly.
PROCEDURE
-
LOOSEN NO. 1 WIRE ADJUSTING NUT
for LHD:
for RHD:
-
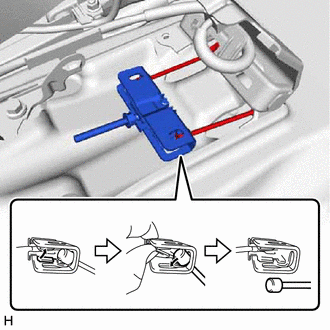
REMOVE REAR CONSOLE BOX ASSEMBLY
-
SEPARATE NO. 1 PARKING BRAKE CABLE ASSEMBLY
-
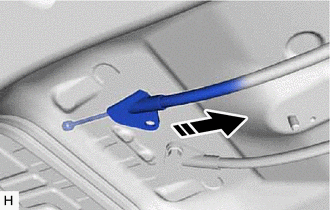
SEPARATE NO. 1 PARKING BRAKE PULL ROD SUB-ASSEMBLY
-
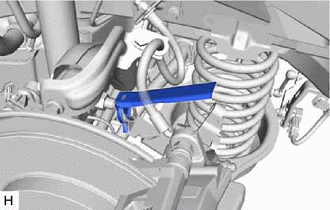
Separate the No. 1 parking brake pull rod sub-assembly from the No. 3 parking brake cable assembly as shown in the illustration.
-
-
REMOVE FRONT EXHAUST PIPE ASSEMBLY (TWC: Rear Catalyst)
-
REMOVE FRONT NO. 2 FLOOR HEAT INSULATOR
-
Remove the 4 nuts and front No. 2 floor heat insulator.
-
-
REMOVE REAR FLOOR SIDE MEMBER COVER LH (for LH Side)
w/ Canister Pump Module:
w/o Canister Pump Module:
-
REMOVE NO. 1 FLOOR UNDER COVER ASSEMBLY (for RH Side)
w/ Canister Pump Module:
w/o Canister Pump Module:
-
REMOVE PARKING BRAKE LEVER PROTECTOR
-
Remove the parking brake lever protector from the No. 3 parking brake cable assembly.
-
-
REMOVE NO. 3 PARKING BRAKE CABLE ASSEMBLY
-
Remove the 4 bolts and nut, and separate the No. 3 parking brake cable assembly.
-
Pull out the No. 3 parking brake cable assembly to the outside of the vehicle body.
-
w/ Clip:
-
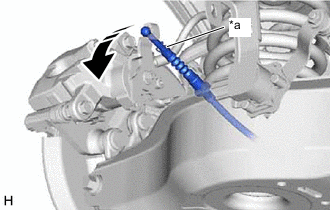
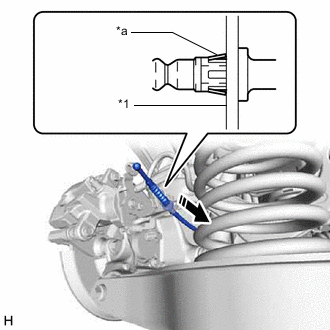
*a Clip Separate the No. 3 parking brake cable assembly from the rear disc brake cylinder assembly.
Note
-
Do not remove the clip from the No. 3 parking brake cable assembly.
-
If the clip is removed from the No. 3 parking brake cable assembly, make sure to replace it with a new one.
-
-
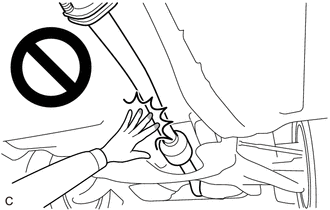
*1 Rear Disc Brake Cylinder Assembly *a Clip Disengage the clip and remove the No. 3 parking brake cable assembly.
-
-
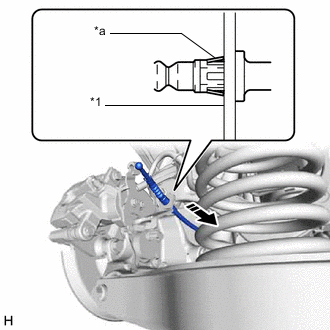
w/o Clip:
-
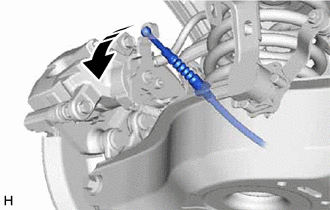
Separate the No. 3 parking brake cable assembly from the rear disc brake cylinder assembly.
-
*1 Rear Disc Brake Cylinder Assembly *a Clip Disengage the clip and remove the No. 3 parking brake cable assembly.
-
-