TELEMATICS TRANSCEIVER REMOVAL
CAUTION / NOTICE / HINT
The necessary procedures (adjustment, calibration, initialization, or registration) that must be performed after parts are removed and installed, or replaced during telematics transceiver removal/installation are shown below.
| Replaced Part or Performed Procedure | Necessary Procedure | Effect/Inoperative Function when Necessary Procedure not Performed | Link |
|---|---|---|---|
| Replacement of telematics transceiver | Register vehicle information | Emergency call service |
PROCEDURE
-
REMOVE INSTRUMENT PANEL FINISH PANEL END RH
-
REMOVE CENTER INSTRUMENT CLUSTER FINISH PANEL SUB-ASSEMBLY
-
REMOVE RADIO RECEIVER ASSEMBLY WITH BRACKET
-
REMOVE TELEMATICS TRANSCEIVER WITH ANTENNA CORD
-
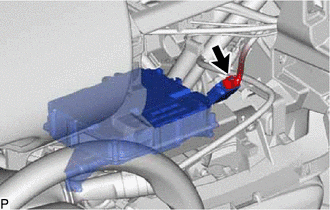
Disconnect the connector.
-
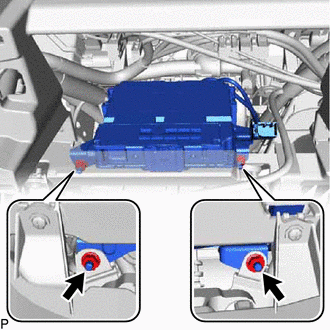
Remove the 2 nuts.
-
Disconnect the connector and remove the telematics transceiver with antenna cord.
-
-
REMOVE ANTENNA CORD SUB-ASSEMBLY
-
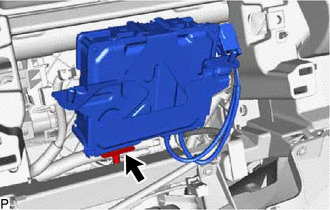
Disengage the claw.
-
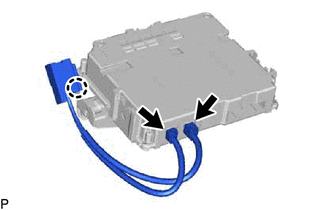
Disconnect the 2 connectors to remove the antenna cord sub-assembly.
-
-
REMOVE TELEMATICS TRANSCEIVER