EXHAUST PIPE GAS CONTROL ACTUATOR REMOVAL
PROCEDURE
-
REMOVE REAR MOTOR UNDER COVER LH
-
DRAIN ENGINE COOLANT (for Engine)
-
REMOVE EXHAUST PIPE GAS CONTROL ACTUATOR
CAUTION:
-
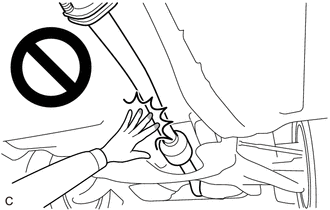
To prevent burns, do not touch the engine, exhaust pipe or other high temperature components while the engine is hot.
-
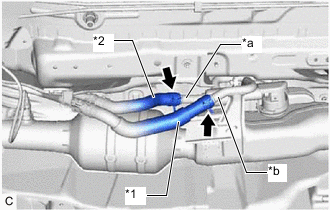
*1 Outlet Heater Water Hose B *2 Outlet Heater Water Hose C *a No. 2 Outlet Water Pipe *b Inlet Water Pipe Slide the 2 clips and disconnect the outlet heater water hose B and outlet heater water hose C from the inlet water pipe and No. 2 outlet water pipe.
-
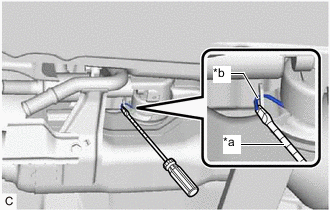
*a Protective Tape *b Spring Using a screwdriver with the tip taped, pry the portion indicated in the illustration to disengage the spring.
-

*a No. 1 Outlet Water Pipe *b No. 2 Outlet Water Pipe *c Inlet Water Pipe Remove the 3 bolts and exhaust pipe gas control actuator sub-assembly and exhaust pipe gas control actuator gasket.
Note
-
When removing the exhaust pipe gas control actuator sub-assembly, use caution because coolant may spill out from the exhaust heat recirculation system.
-
Do not apply any excessive force to the No. 1 outlet water pipe, No. 2 outlet water pipe and inlet water pipe when removing the exhaust pipe gas control actuator sub-assembly.
-
-
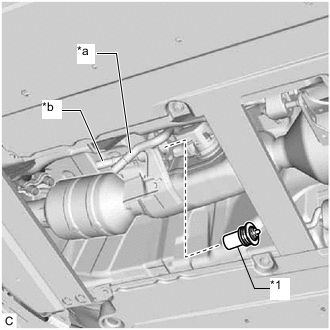
*1 Exhaust Pipe Gas Control Actuator *a No. 2 Outlet Water Pipe *b Inlet Water Pipe While closing No. 2 outlet water pipe, apply compressed air to inlet water pipe to remove the exhaust pipe gas control actuator shown in the illustration.
Tech Tips
Use a piece of cloth to catch the exhaust pipe gas control actuator.
-