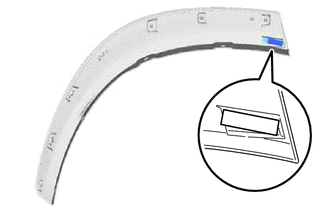
WHEEL OPENING MOULDING(for Rear) REASSEMBLY
CAUTION / NOTICE / HINT
Tech Tips
-
Use the same procedure for the RH and LH sides.
-
The procedure listed below is for the LH side.
PROCEDURE
-
INSTALL NO. 5 MOULDING TAPE
-
Clean the No. 5 moulding tape installation surface with a non-residue solvent.
-
Apply primer to the No. 5 moulding tape installation area on the quarter outside moulding sub-assembly LH.
Note
Apply primer evenly so that there are no uncoated areas.
-
Remove the peeling paper on a new No. 5 moulding tape while making sure not to touch the adhesional surface.
-
Install a new No. 5 moulding tape in the position shown in the illustration.
Note
-
Press the double-sided tape on the No. 5 moulding tape firmly to attach.
-
After the primer dries (3 minutes or more), install the No. 5 moulding tape.
-
After applying primer, reapply primer after 24 hours elapse.
-
-
-
INSTALL REAR LOWER QUARTER MOULDING PROTECTOR LH
-
Clean the rear lower quarter moulding protector LH installation surface with a non-residue solvent.
-
Apply primer to the rear lower quarter moulding protector LH installation area on the quarter outside moulding sub-assembly LH.
Note
Apply primer evenly so that there are no uncoated areas.
-
Remove the peeling paper on a new rear lower quarter moulding protector LH while making sure not to touch the adhesional surface.
-
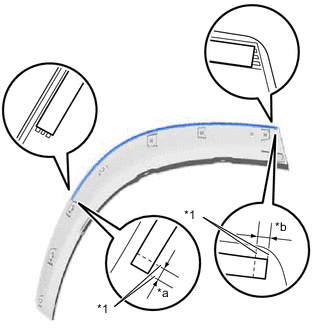
*1 Mark-off Line *a 3.0 mm (0.118 in.) *b 1.0 mm (0.0394 in.) Install a new rear lower quarter moulding protector LH in the position shown in the illustration.
Note
-
Press the double-sided tape on the rear lower quarter moulding protector LH firmly to attach.
-
After the primer dries (3 minutes or more), install the rear lower quarter moulding protector LH.
-
After applying primer, reapply primer after 24 hours elapse.
-
-