REAR DOOR OUTSIDE MOULDING REMOVAL
CAUTION / NOTICE / HINT
Tech Tips
-
Use the same procedure for the RH and LH sides.
-
The procedures listed below are for the LH side.
PROCEDURE
-
REMOVE REAR DOOR LOWER OUTSIDE MOULDING SUB-ASSEMBLY LH
Tech Tips
When removing the rear door lower outside moulding sub-assembly LH, heat the rear door panel and rear door lower outside moulding sub-assembly LH using a heat light.
Standard Item Temperature Rear Door Panel 40 to 60°C (104 to 140°F) Rear Door Lower Outside moulding Sub-assembly LH 20 to 30°C (68 to 86°F) Note
Do not heat the rear door panel and rear door lower outside moulding sub-assembly LH excessively.
-
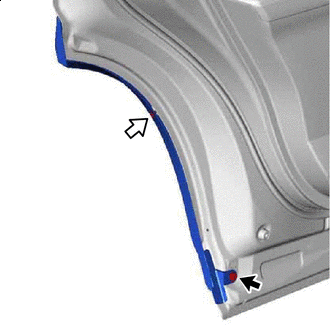
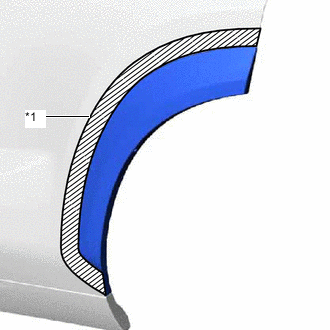
Put protective tape around the rear door lower outside moulding sub-assembly LH.
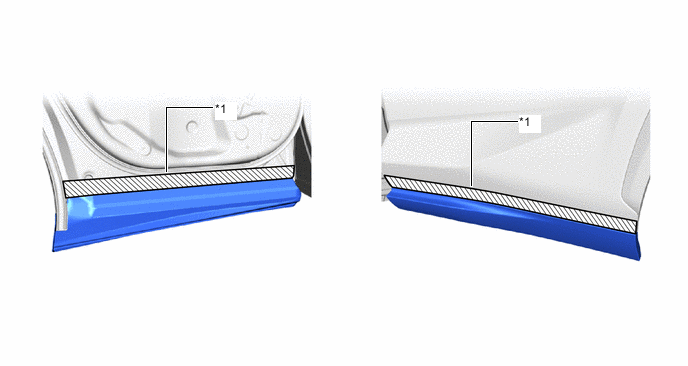
*1 Protective Tape - - -

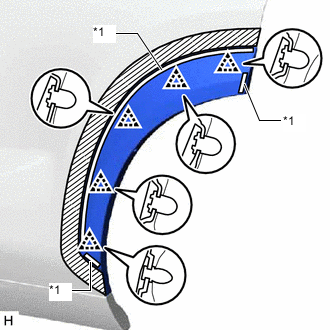
Using moulding remover D, detach the 5 claws.
-
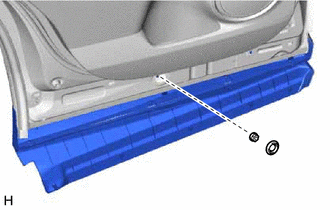
Remove the hole cover.
-
Remove the nut.
-
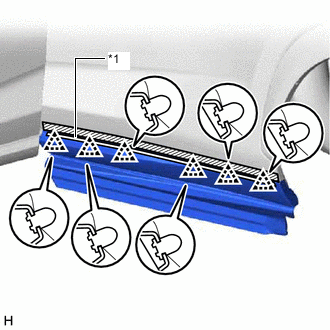
*1 Double-sided Tape Using moulding remover D, detach the 6 clips and remove the rear door lower outside moulding sub-assembly LH.
-
-
REMOVE REAR DOOR NO. 2 WEATHERSTRIP LH
-
*1 Double-sided Tape Detach the 6 clips and remove the rear door No. 2 weatherstrip LH.
-
-
REMOVE REAR DOOR REAR UPPER OUTSIDE MOULDING LH
Tech Tips
When removing the rear door rear upper outside moulding LH, heat the rear door panel and rear door lower outside moulding LH using a heat light.
Standard Item Temperature Rear Door Panel 40 to 60°C (104 to 140°F) Rear Door Rear Upper Outside Moulding LH 20 to 30°C (68 to 86°F) Note
Do not heat the rear door panel and rear door rear upper outside moulding LH excessively.
-

Bolt 
Clip Remove the clip.
-
Remove the bolt.
-
*1 Protective Tape Put protective tape around the rear door rear upper outside moulding LH.
-
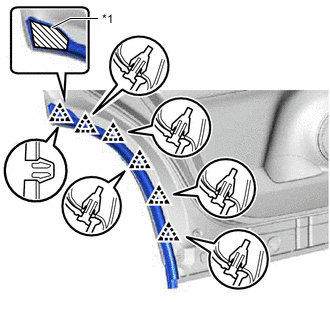
*1 Double-sided Tape Detach the 5 clips and remove the rear door rear upper outside moulding LH
-
-
REMOVE OUTSIDE MOULDING RETAINER
-
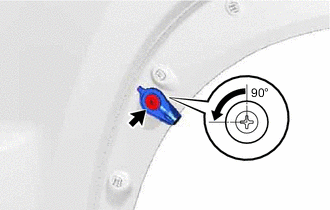
Turn the clip 90° and remove the clip.
-
Detach the claw and remove the outside moulding retainer.
-