HEADLIGHT DIMMER SWITCH REMOVAL
CAUTION / NOTICE / HINT
Tech Tips
-
Use the same procedure for RHD and LHD vehicles.
-
The procedure listed below is for LHD vehicles.
PROCEDURE
-
REMOVE NO. 3 DECK BOARD SUB-ASSEMBLY (w/ Spare Tire)
-
REMOVE REAR DECK FLOOR BOX (w/ Spare Tire)
-
REMOVE DECK FLOOR BOX LH (w/ Spare Tire)
-
PRECAUTION
Note
After turning the power switch off, waiting time may be required before disconnecting the cable from the auxiliary battery negative (-) terminal. Therefore, make sure to read the disconnecting the cable from the auxiliary battery negative (-) terminal notice before proceeding with work.
-
DISCONNECT CABLE FROM NEGATIVE AUXILIARY BATTERY TERMINAL
CAUTION:
Wait at least 90 seconds after disconnecting the cable from the auxiliary battery negative (-) terminal to disable the SRS system.
Note
When disconnecting the cable, some systems need to be initialized after the cable is reconnected.
-
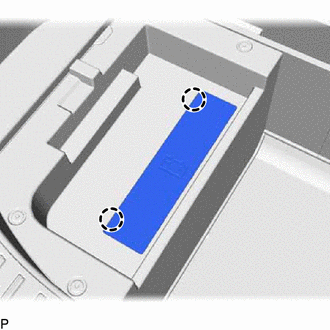
w/o Spare tire:
Detach the 2 claws and remove the battery service cover.
-
Loosen the nut and disconnect the auxiliary battery negative (-) terminal.
-
-
REMOVE SPIRAL CABLE WITH SENSOR SUB-ASSEMBLY
-
REMOVE WINDSHIELD WIPER SWITCH ASSEMBLY
-
REMOVE TILT AND TELESCOPIC SWITCH (for Headlight Dimmer Switch LH Side Type, for Power Tilt and Power Telescopic Steering Column)
-
REMOVE HEADLIGHT DIMMER SWITCH ASSEMBLY
-
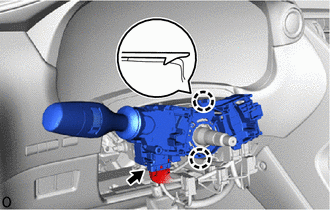
Disconnect the connector.
-
Detach the 2 claws and remove the headlight dimmer switch assembly.
-