HEADLIGHT CLEANER ACTUATOR REMOVAL
PROCEDURE
-
REMOVE FRONT BUMPER ASSEMBLY
-
Remove the front bumper assembly.
-
for Sport Package:
-
except Sport Package:
-
-
-
REMOVE HEADLIGHT WASHER ACTUATOR SUB-ASSEMBLY RH
-
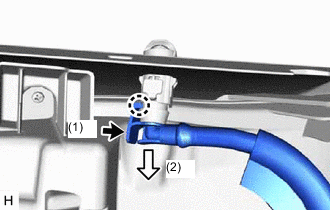
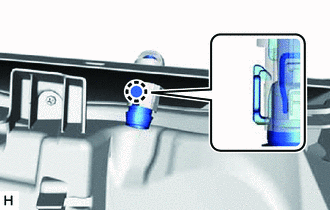
Detach the claw and disconnect the No. 2 headlight cleaner hose as shown in the illustration.
-
Detach the claw and remove the headlight washer actuator sub-assembly RH.
-
-
REMOVE HEADLIGHT WASHER ACTUATOR SUB-ASSEMBLY LH
Tech Tips
Use the same procedure described for the RH side.
-
REMOVE NO. 2 HEADLIGHT CLEANER HOSE
-
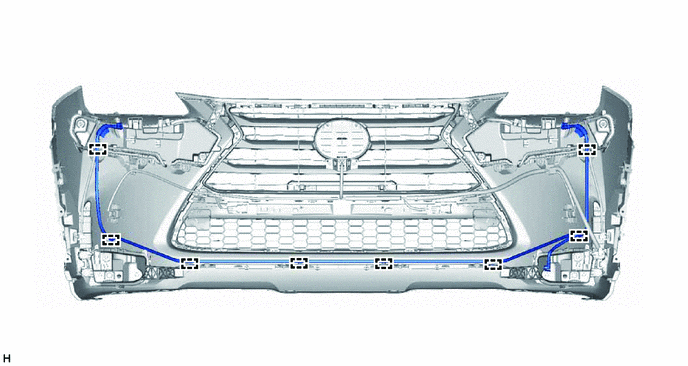
Detach the 8 clamps and remove the No. 2 headlight cleaner hose.
-
-
REMOVE HEADLIGHT CLEANER WASHER BRACKET
Tech Tips
Use the same procedure for both headlight cleaner washer brackets.
-
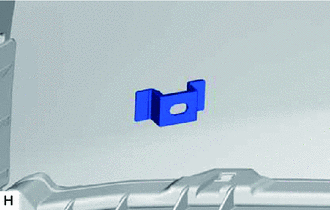
While heating the headlight cleaner washer bracket using a dryer, pull the headlight cleaner washer bracket lightly and remove the double-sided tape. Then remove the headlight cleaner washer bracket.
Heating temperature 40 to 60°C (104 to 140°F) CAUTION:
Be careful of burns.
-
Using a cloth or non-residue solvent, wipe off any tape residue on the front bumper cover.
-