ROOF SUNSHADE REASSEMBLY
PROCEDURE
-
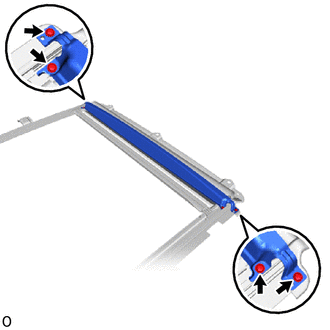
INSTALL SLIDING ROOF DRIVE CABLE RH
-
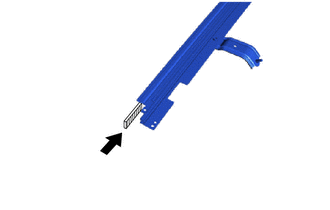
Install the sliding roof drive cable RH to the sunshade housing assembly.
-
-
INSTALL SLIDING ROOF DRIVE CABLE LH
-
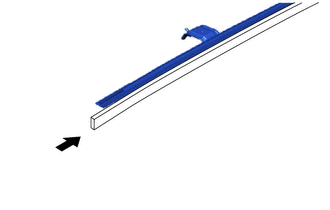
Install the sliding roof drive cable LH to the sunshade housing assembly.
-
-
INSTALL SUNSHADE TRIM SUB-ASSEMBLY
-
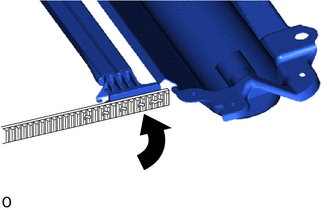
Install the sliding roof drive cable to the sunshade trim sub-assembly.
-
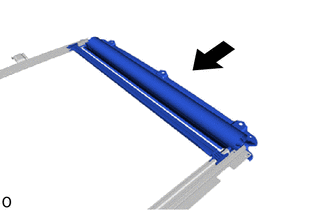
Install the sunshade trim sub-assembly to the sunshade housing assembly.
-
Install the sliding housing center frame with the 4 screws.
- Torque:
- 2.0 N*m { 20 kgf*cm, 18 in.*lbf }
-
-
ADJUST FULLY CLOSED POSITION
-
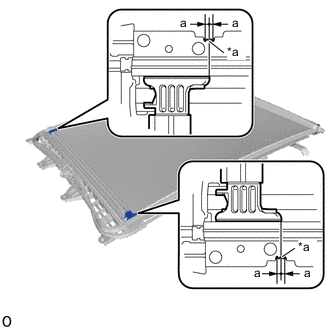
*a Alignment Mark Slide the sunshade trim sub-assembly so that it is aligned with the alignment marks.
Standard Area Measurement a 3.0 mm (0.1181 in.) Tech Tips
Make sure that the difference between the alignment mark position on the left and right of the sunshade trim sub-assembly is within 3.0 mm (0.1181 in.).
-
-
TEMPORARILY TIGHTEN SLIDING ROOF DRIVE GEAR SUB-ASSEMBLY
-
Apply MP grease around the gear of the sliding roof drive gear sub-assembly.
-
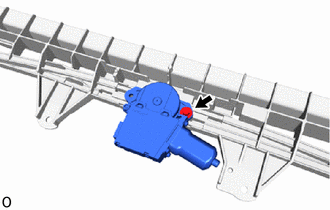
Temporarily install the sliding roof drive gear assembly to the sliding roof housing sub-assembly with the bolt.
-
-
INSTALL ROOM LIGHT BRACKET
-
Install the room light bracket with the bolt.
-
-
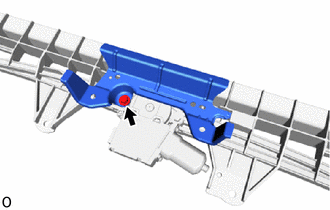
TIGHTEN SLIDING ROOF DRIVE GEAR SUB-ASSEMBLY
-
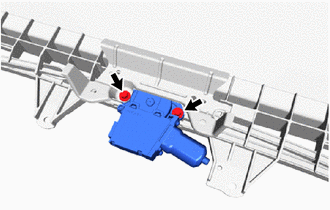
Tighten the 2 bolts to install the sliding roof drive gear assembly.
- Torque:
- 5.4 N*m { 55 kgf*cm, 48 in.*lbf }
-