AIR CONDITIONING UNIT DISASSEMBLY
CAUTION / NOTICE / HINT
Tech Tips
-
Use the same procedure for RHD and LHD vehicles.
-
The procedure listed below is for LHD vehicles.
PROCEDURE
-
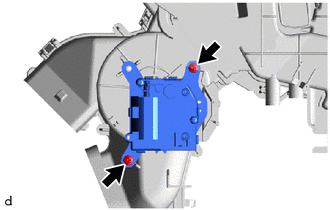
REMOVE AIR CONDITIONING RADIATOR ASSEMBLY
-
Disconnect the No. 1 blower damper servo sub-assembly connector.
-
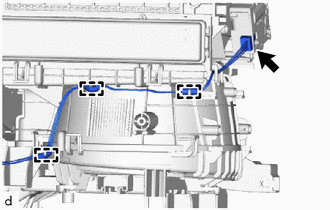
Detach the 3 clamps and remove the air conditioning harness assembly.
-
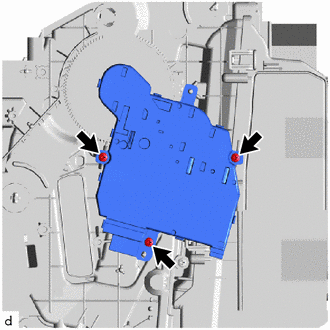
Remove the 2 screws.
-
Detach the 2 claws and remove the air conditioning radiator assembly.
-
-
REMOVE ASPIRATOR
-
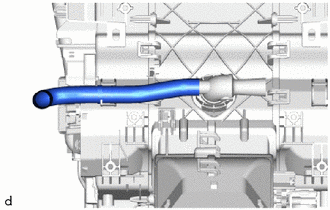
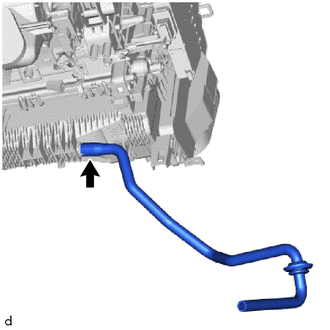
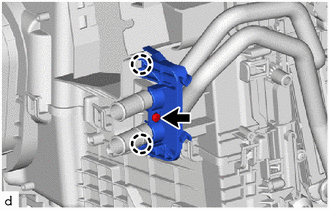
Remove the aspirator hose.
-

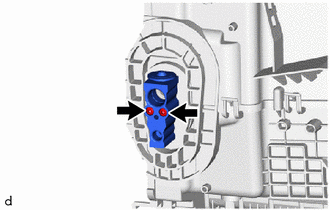
Detach the 2 claws and remove the aspirator.
-
-
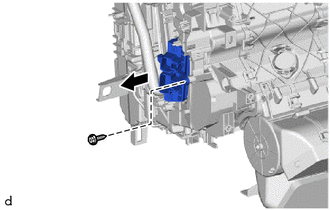
REMOVE AIR CONDITIONING AMPLIFIER ASSEMBLY
-
Disconnect the air conditioning amplifier assembly connector.
-
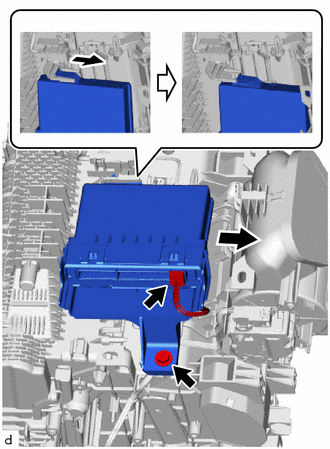
Remove the screw.
-
Detach the guide and remove the air conditioning amplifier assembly as shown in the illustration.
-
-
REMOVE DRAIN COOLER HOSE
-
Remove the drain cooler hose.
-
-
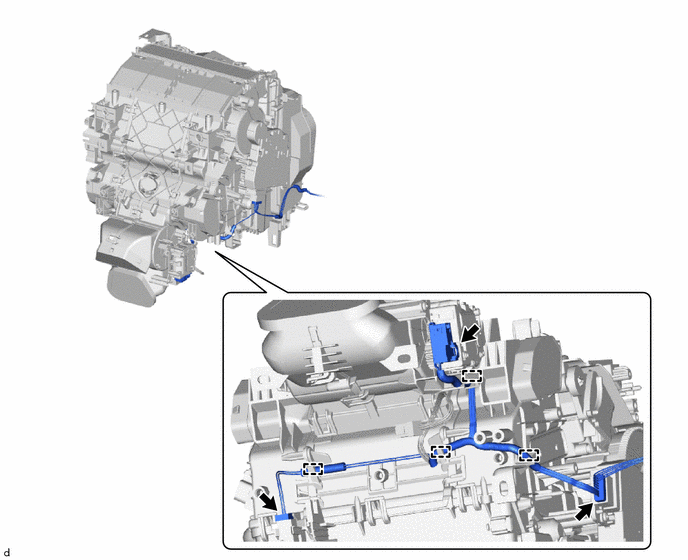
REMOVE AIR CONDITIONING HARNESS ASSEMBLY
-
Disconnect the 2 connectors.
-
Detach the 4 clamps and remove the air conditioning harness assembly.
-
-
REMOVE HEATER COVER (for RHD)
-
REMOVE NO. 2 HEATER COVER (except Cold Area)
-
Remove the screws and No. 2 heater cover.
-
-
REMOVE QUICK HEATER ASSEMBLY (for Cold Area)
-
Remove the screw and quick heater assembly.
-
-
REMOVE NO. 1 AIR CONDITIONING RADIATOR DAMPER SERVO SUB-ASSEMBLY
-
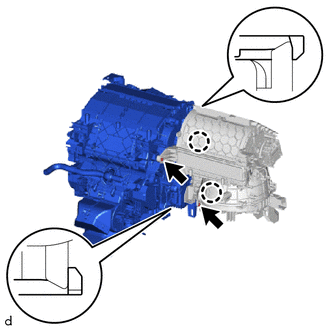
Remove the 2 screws and No. 1 air conditioning radiator damper servo sub-assembly.
-
-
REMOVE NO. 2 AIR CONDITIONING RADIATOR DAMPER SERVO SUB-ASSEMBLY
-
Remove the 3 screws and No. 2 air conditioning radiator damper servo sub-assembly.
-
-
REMOVE HEATER RADIATOR UNIT SUB-ASSEMBLY
-
Remove the screw.
-
Detach the 2 claws and remove the clamp.
-
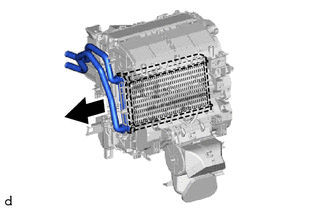
Remove the heater radiator unit sub-assembly from the air conditioning radiator assembly.
-
-
REMOVE COOLER EXPANSION VALVE
-
Remove the cooling unit packing.
-
Using a 4 mm hexagon wrench, remove the 2 hexagon bolts and cooler expansion valve.
-
-
REMOVE NO. 1 COOLER EVAPORATOR SUB-ASSEMBLY
-
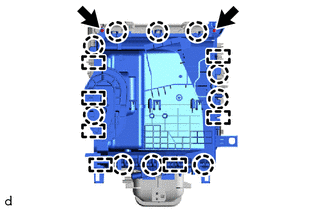
Remove the 2 screws.
-
Detach the 10 claws and 8 guides, and remove the upper heater case.
-
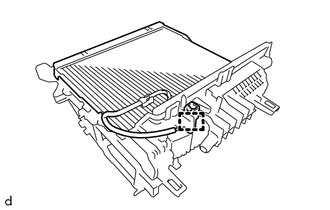
Detach the clamp.
-
Remove the No. 1 cooler evaporator sub-assembly with the No. 1 cooler thermistor.
-
Remove the 2 O-rings from the No. 1 cooler evaporator sub-assembly.
-
-
REMOVE NO. 1 COOLER THERMISTOR