STEREO COMPONENT AMPLIFIER REMOVAL
PROCEDURE
-
REMOVE REAR SEAT ASSEMBLY (for Manual Seat)
-
REMOVE REAR SEAT ASSEMBLY (for Power Seat)
-
REMOVE TONNEAU COVER ASSEMBLY
-
REMOVE DECK BOARD ASSEMBLY
-
REMOVE NO. 2 DECK BOARD SUB-ASSEMBLY
-
REMOVE NO. 3 DECK BOARD SUB-ASSEMBLY
-
REMOVE REAR DECK FLOOR BOX (w/ Spare Tire)
-
REMOVE SPARE TIRE (w/ Spare Tire)
-
REMOVE DECK FLOOR BOX LH (w/ Spare Tire)
-
REMOVE DECK FLOOR BOX LH (w/o Spare Tire)
-
REMOVE DECK FLOOR BOX RH (w/ Spare Tire)
-
REMOVE DECK FLOOR BOX RH (w/o Spare Tire)
-
REMOVE NO. 1 TOOL BOX SUB-ASSEMBLY (w/ Spare Tire)
-
REMOVE NO. 1 TOOL BOX SUB-ASSEMBLY (w/o Spare Tire)
-
REMOVE NO. 2 TOOL BOX SUB-ASSEMBLY (w/ Spare Tire)
-
REMOVE NO. 2 TOOL BOX SUB-ASSEMBLY (w/o Spare Tire)
-
REMOVE REAR FLOOR FINISH PLATE
-
REMOVE REAR DOOR SCUFF PLATE RH
-
REMOVE REAR DOOR OPENING TRIM WEATHERSTRIP RH
-
REMOVE UPPER DECK TRIM SIDE BOARD RH
-
REMOVE ROPE HOOK ASSEMBLY
-
REMOVE LUGGAGE HOLD BELT STRIKER ASSEMBLY
-
REMOVE NO. 1 LUGGAGE COMPARTMENT TRIM HOOK
-
REMOVE DECK TRIM SIDE PANEL ASSEMBLY RH
-
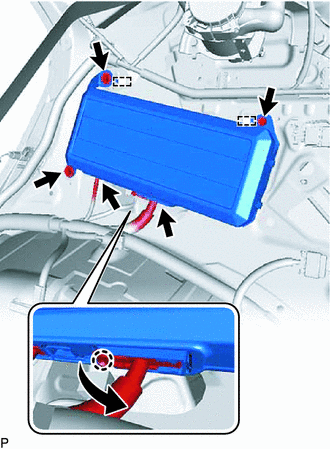
REMOVE STEREO COMPONENT AMPLIFIER ASSEMBLY WITH BRACKET
-
for 10 Speakers:
-

Detach the claw and remove the connector lock as shown in the illustration.
-
Disconnect the connectors.
-
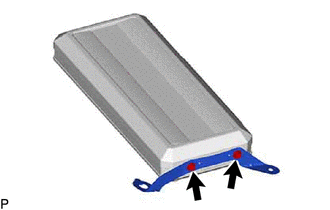
Remove the 3 bolts, detach the 2 guides and stereo component amplifier assembly with bracket.
-
-
for 14 Speakers:
-
Detach the claw and remove the connector lock as shown in the illustration.
-
Disconnect the connectors.
-
Remove the 3 bolts, detach the 2 guides and stereo component amplifier assembly with bracket.
-
-
-
REMOVE NO. 1 AMPLIFIER BRACKET
-
for 10 Speakers:
-
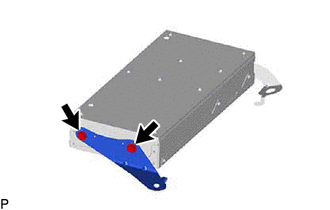
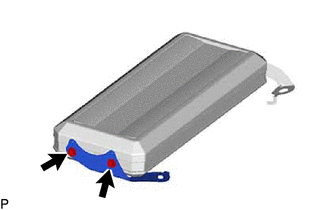
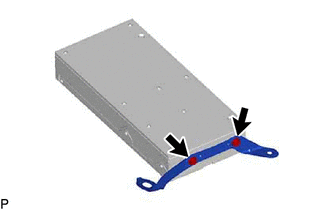
Remove the 2 screws and No. 1 amplifier bracket.
-
-
for 14 Speakers:
-
Remove the 2 screws and No. 1 amplifier bracket.
-
-
-
REMOVE NO. 2 AMPLIFIER BRACKET
-
for 10 Speakers:
-
Remove the 2 screws and No. 2 amplifier bracket.
-
-
for 14 Speakers:
-
Remove the 2 screws and No. 2 amplifier bracket.
-
-
-
REMOVE STEREO COMPONENT AMPLIFIER ASSEMBLY