BRAKE BOOSTER(for RHD) REMOVAL
PROCEDURE
-
PRECAUTION
Note
After turning the power switch off, waiting time may be required before disconnecting the cable from the negative (-) auxiliary battery terminal. Therefore, make sure to read the disconnecting the cable from the negative (-) auxiliary battery terminal notices before proceeding with work.
-
DISABLE BRAKE CONTROL
-
REMOVE WINDSHIELD WIPER MOTOR ASSEMBLY
-
REMOVE SUSPENSION TOWER DAMPER (w/ Performance Rod)
-
REMOVE OUTER COWL TOP PANEL
-
REMOVE COWL BODY MOUNTING REINFORCEMENT RH
-
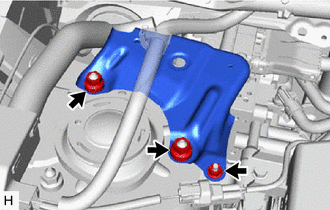
Remove the 3 nuts and cowl body mounting reinforcement RH.
-
-
DRAIN BRAKE FLUID
Note
Wash off brake fluid immediately if it comes in contact with any painted surface.
-
REMOVE NO. 1 INSTRUMENT PANEL UNDER COVER SUB-ASSEMBLY
-
REMOVE PUSH ROD PIN
-
DISCONNECT BRAKE MASTER CYLINDER RESERVOIR ASSEMBLY
-
Disconnect the brake fluid level warning switch connector from the brake master cylinder reservoir assembly.
-
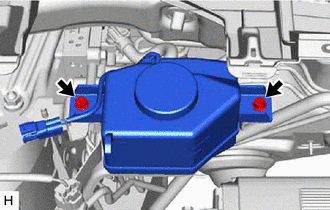
Remove the 2 bolts and disconnect the brake master cylinder reservoir assembly with reservoir bracket.
-
-
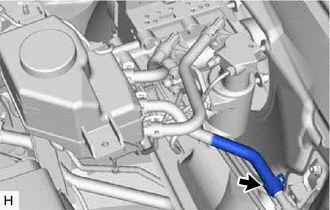
DISCONNECT NO. 2 RESERVOIR HOSE
-
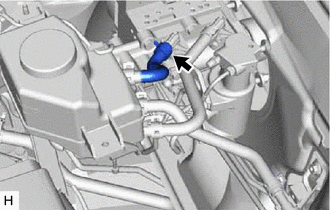
Slide the clip and disconnect the No. 2 reservoir hose from the brake booster with master cylinder assembly.
-
-
DISCONNECT NO. 1 RESERVOIR HOSE
-
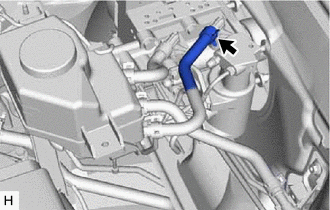
Slide the clip and disconnect the No. 1 reservoir hose from the brake booster with master cylinder assembly.
-
-
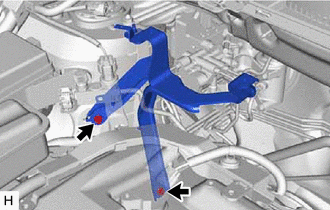
DISCONNECT NO. 2 BRAKE ACTUATOR HOSE
-
Slide the clip and disconnect the No. 2 brake actuator hose from the No. 1 brake actuator tube.
-
-
REMOVE BRAKE MASTER CYLINDER RESERVOIR ASSEMBLY
-
REMOVE RESERVOIR BRACKET
-
Remove the 2 bolts and reservoir bracket.
-
-
REMOVE BRAKE BOOSTER WITH MASTER CYLINDER ASSEMBLY
-
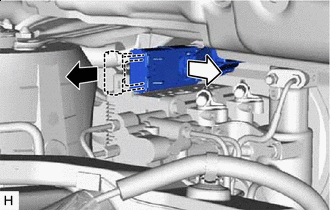

Release the lock lever 
Disconnect the connector Release the lock lever and disconnect the connector from the brake booster with master cylinder assembly.
Note
Be careful not to allow the brake fluid to enter the removed connector.
-
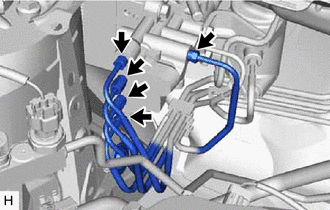
Using a union nut wrench, disconnect the 5 brake tubes from the brake booster with master cylinder assembly.
-
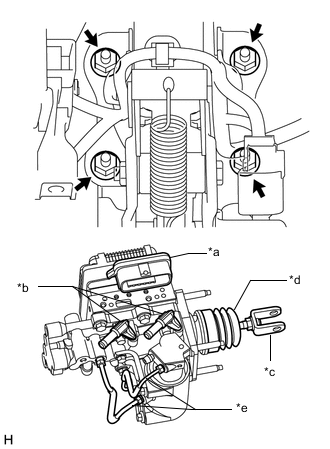
*a Connector Portion *b Union *c Push Rod Clevis *d Boot *e Front No. 2 Brake Tube Remove the 4 nuts and brake booster with master cylinder assembly.
Note
-
Do not kink or damage the brake tubes.
-
Do not carry the brake booster with master cylinder assembly by the portion shown in bold in the illustration.
-
-
-
REMOVE BRAKE BOOSTER GASKET