REAR DRIVE SHAFT ASSEMBLY REMOVAL

CAUTION / NOTICE / HINT
Tech Tips
-
Use the same procedure for the RH and LH sides.
-
The procedure listed below is for the LH side.
PROCEDURE
-
REMOVE REAR WHEEL
-
REMOVE TAIL EXHAUST PIPE ASSEMBLY
-
REMOVE REAR AXLE SHAFT NUT LH
-
REMOVE REAR SUSPENSION BRACE SUB-ASSEMBLY
-
REMOVE REAR SUSPENSION ARM COVER LH
-
REMOVE REAR DRIVE SHAFT ASSEMBLY LH
-
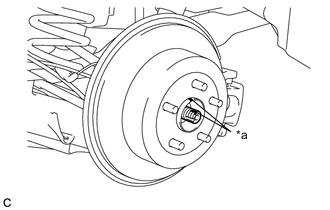
*a Matchmark Put matchmarks on the rear drive shaft assembly LH and rear axle hub and bearing assembly.
-
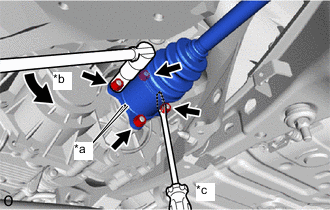
*a Matchmark *b Turn *c Hold Put matchmarks on the rear drive shaft assembly LH and differential side gear shaft sub-assembly.
-
Using a screwdriver or an equivalent, hold the differential side gear shaft sub-assembly as shown in the illustration.
-
Remove the 4 nuts and 4 washers.
-
Push the rear drive shaft inboard joint assembly LH toward the outside of the vehicle and disconnect the rear drive shaft assembly LH from the differential side gear shaft sub-assembly.
-
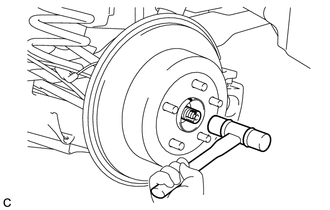
Using a plastic-faced hammer, remove the rear drive shaft assembly LH from the rear axle hub and bearing assembly.
Note
-
Do not damage the outboard joint boot.
-
Do not drop the rear drive shaft assembly LH.
-
Do not damage the rear speed sensor rotor.
If it is difficult to remove, tap the end of the rear drive shaft assembly LH using a brass bar and a hammer.
-
-