TILT AND TELESCOPIC MANUAL SWITCH REMOVAL
CAUTION / NOTICE / HINT
Tech Tips
-
Use the same procedure for RHD and LHD vehicles.
-
The procedure listed below is for LHD vehicles.
PROCEDURE
-
PRECAUTION
Note
After turning the power switch off, waiting time may be required before disconnecting the cable from the battery terminal. Therefore, make sure to read the disconnecting the cable from the battery terminal notice before proceeding with work.
-
CUSTOMIZE POWER TILT AND POWER TELESCOPIC STEERING COLUMN SYSTEM
-
Disable the auto tilt away function by changing the customize parameter.
Note
Record the current customize parameter setting (whether the auto tilt away function is enabled or disabled) in order to restore the current setting after finishing the operation.
Tech Tips
Performing the above operation causes the auto tilt away function to be disabled when the power switch is turned off.
-
Turn the power switch on (IG). Operate the tilt and telescopic switch to fully extend and lower the steering column assembly.
-
-
REMOVE NO. 3 DECK BOARD SUB-ASSEMBLY (w/ Spare Tire)
-
REMOVE REAR DECK FLOOR BOX (w/ Spare Tire)
-
REMOVE DECK FLOOR BOX LH (w/ Spare Tire)
-
DISCONNECT CABLE FROM NEGATIVE AUXILIARY BATTERY TERMINAL
-
ALIGN FRONT WHEELS FACING STRAIGHT AHEAD
-
REMOVE LOWER STEERING COLUMN COVER
-
Remove the 3 screws.
-
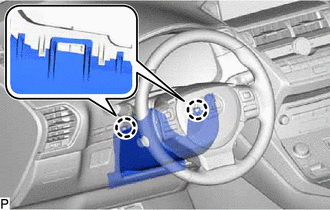
Detach the 2 claws and remove the lower steering column cover.
Note
Do not damage the tilt and telescopic switch.
-
-
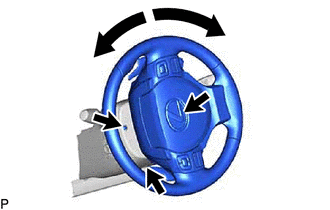
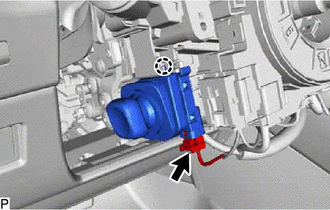
REMOVE TILT AND TELESCOPIC SWITCH
-
Disconnect the connector.
-
Detach the claw and pull out the tilt and telescopic switch.
Note
Pushing on the claw too hard will break the claw.
-