РЫЧАГ ПЕРЕКЛЮЧЕНИЯ ПЕРЕДАЧ СНЯТИЕ
PROCEDURE
-
REMOVE SHIFT LEVER CAP
-
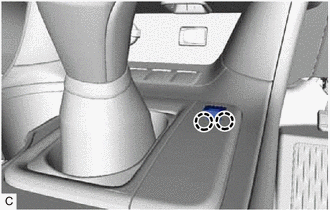
Using a screwdriver with its tip wrapped with protective tape, disengage the 2 claws to remove the shift lever cap from the transmission floor shift assembly.
Note
Be careful not to damage the shift lever cap and transmission floor shift assembly.
-
-
REMOVE CONSOLE BOX ASSEMBLY
-
REMOVE SHIFTING HOLE BEZEL
-
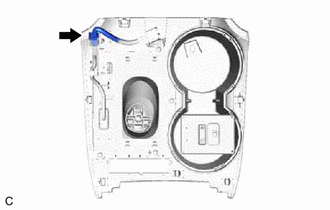
Disconnect the shift position indicator connector.
-
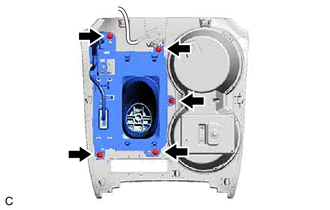
Remove the 5 screws and shifting hole bezel from the upper console panel sub-assembly.
-
-
REMOVE SHIFT POSITION INDICATOR
-
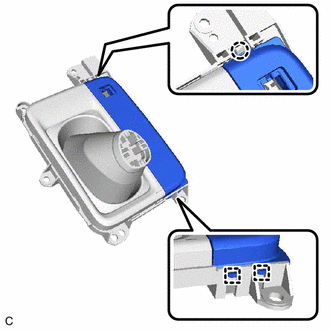
Disengage the claw and 2 guides and remove the shift position indicator from the shifting hole bezel.
-
-
REMOVE NO. 2 SWITCH HOLE BASE
-
REMOVE FRONT NO. 2 CONSOLE BOX INSERT
-
REMOVE CONSOLE BOX INSERT
-
REMOVE NO. 2 CONSOLE BOX MOUNTING BRACKET
-
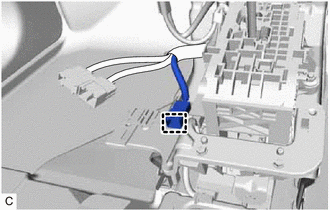
Disengage the clamp from the No. 2 console box mounting bracket.
-
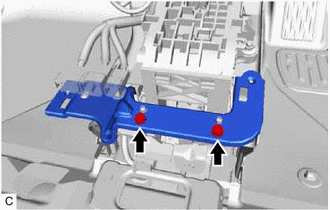
Remove the 2 screws and No. 2 console box mounting bracket from the transmission floor shift assembly.
-
-
REMOVE TRANSMISSION FLOOR SHIFT ASSEMBLY
-
Move the shift lever to N.
-
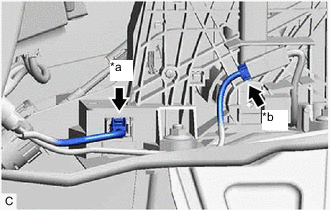
*a Transmission Control Switch Connector *b Shift Lock Control ECU Connector Disconnect the transmission control switch connector.
-
Disconnect the shift lock control ECU connector.
-
Separate the end of the transmission control cable assembly from the transmission floor shift assembly.
-
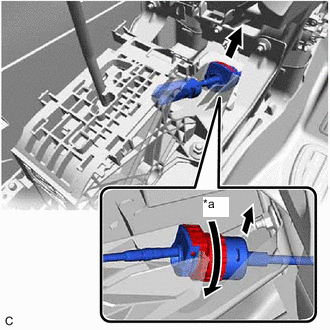
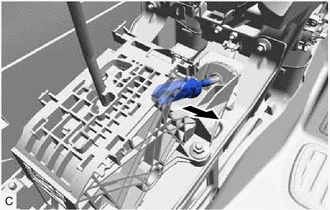
*a Counterclockwise Rotate the nut counterclockwise approximately 180° and, while holding the nut in that position, separate the transmission control cable assembly from the transmission floor shift assembly.
-
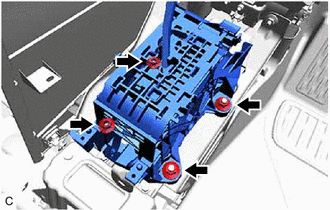
Remove the 4 nuts and transmission floor shift assembly from the shift lever support.
-