BACK DOOR OUTSIDE GARNISH REMOVAL
PROCEDURE
-
REMOVE REAR WIPER MOTOR ASSEMBLY
-
REMOVE BACK DOOR GLASS GUIDE BRACKET SUB-ASSEMBLY (for Fixed Glass Type)
-
REMOVE BACK WINDOW LOCK ASSEMBLY (for Glass Hatch Type)
-
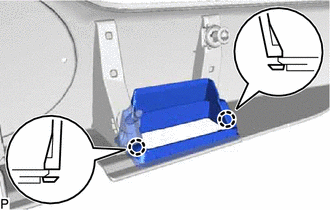
REMOVE POWER BACK DOOR SENSOR ASSEMBLY LH (w/ Power Back Door)
-
REMOVE POWER BACK DOOR SENSOR ASSEMBLY RH (w/ Power Back Door)
Tech Tips
Use the same procedure as for the LH side.
-
REMOVE REAR LIGHT ASSEMBLY LH
-
REMOVE REAR LIGHT ASSEMBLY RH
Tech Tips
Use the same procedure as for the LH side.
-
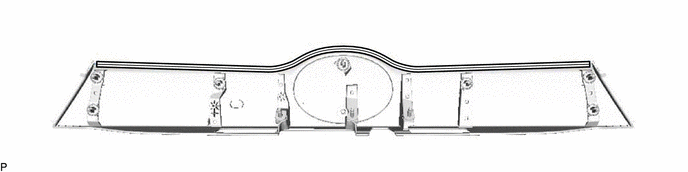
REMOVE BACK DOOR OUTSIDE GARNISH SUB-ASSEMBLY
-
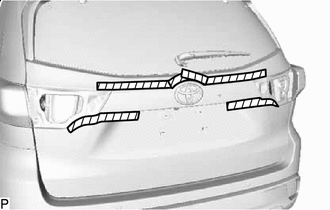

Protective Tape Apply protective tape around the back door outside garnish sub-assembly.
-
Disconnect the connector.
-
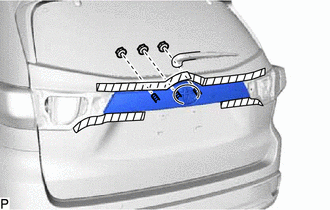
Remove the 3 nuts.
-
Disengage the 7 clips and remove the back door outside garnish sub-assembly.
-
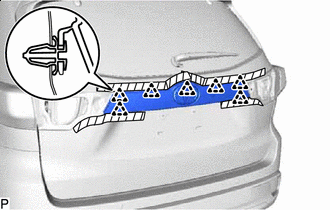
Remove the 7 clips.
-
Remove the 3 gaskets.
-
-
REMOVE BACK DOOR OPENER SWITCH ASSEMBLY
-
REMOVE SYMBOL EMBLEM
-
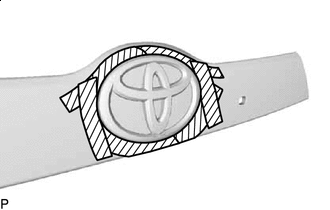
Protective Tape Apply protective tape around the symbol emblem.
-

Using a moulding remover, separate the double-sided tape and disengage the 2 pins to remove the symbol emblem.
Note
Be careful not to damage the back door outside garnish.
-
-
REMOVE BACK DOOR FINISH PANEL COVER LH
-
Disengage the 2 claws and remove the back door finish panel cover LH.
-
-
REMOVE BACK DOOR FINISH PANEL COVER RH
Tech Tips
Use the same procedure as for the LH side.
-
REMOVE GLASS HATCH OPENER SWITCH ASSEMBLY (for Glass Hatch Type)
-
REMOVE BACK DOOR OUTSIDE GARNISH PROTECTOR
-
Remove the back door outside garnish protector.
-
-
REMOVE LOWER BACK DOOR GARNISH MOULDING PROTECTOR
-
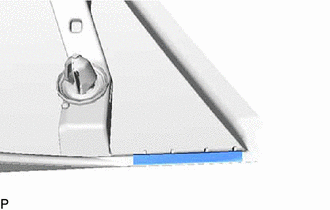
Remove the lower back door garnish moulding protector.
Tech Tips
Use the same procedure for the RH side and LH side.
-