FRONT DOOR OUTSIDE MOULDING REMOVAL
CAUTION / NOTICE / HINT
Tech Tips
-
Use the same procedure for the RH side and LH side.
-
The following procedure is for the LH side.
PROCEDURE
-
REMOVE FRONT DOOR OUTSIDE MOULDING SUB-ASSEMBLY
Tech Tips
When removing the front door outside moulding sub-assembly, heat the vehicle body and front door outside moulding sub-assembly using a heat light.
Heating Temperature Item Temperature Vehicle Body 40 to 60°C (104 to 140°F) Front Door Outside Moulding Sub-assembly 20 to 30°C (68 to 86°F) Note
Do not heat the vehicle body or front door outside moulding sub-assembly excessively.
-
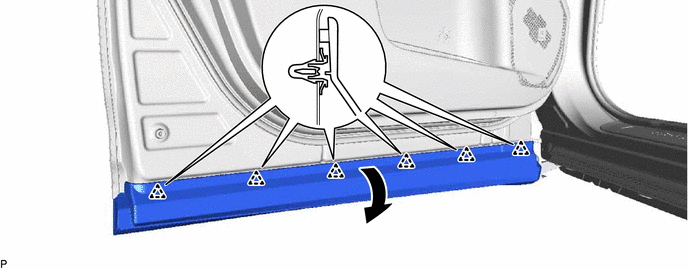
Disengage the 6 clips and turn back the front door outside moulding sub-assembly as shown in the illustration.
-

Remove the hole plug.
-
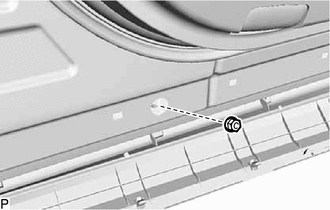
Remove the nut.
-
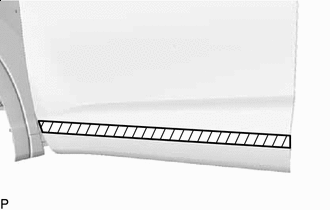

Protective Tape Apply protective tape around the front door outside moulding sub-assembly as shown in the illustration.
-
Disengage the 10 clips and separate the double-sided tape to remove the front door outside moulding sub-assembly.
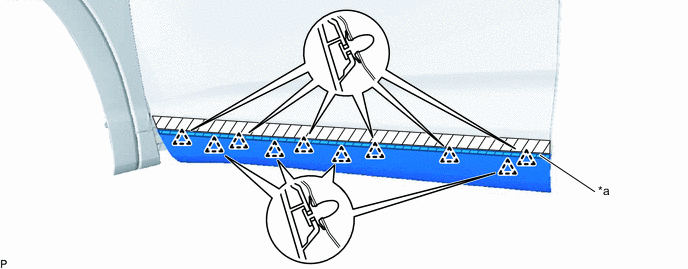
*a Double-sided Tape - - -
Remove the 10 clips.
-
Remove the gasket.
-
-
REMOVE FRONT DOOR UPPER OUTSIDE MOULDING PAD
-
Remove the front door upper outside moulding pad.

-