ROOF RACK REMOVAL
CAUTION / NOTICE / HINT
Tech Tips
-
Use the same procedure for the RH side and LH side.
-
The following procedure is for the LH side.
PROCEDURE
-
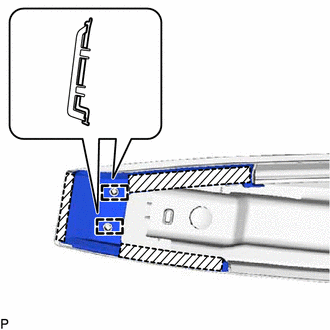
REMOVE NO. 1 ROOF SIDE GARNISH LID
Tech Tips
Use the same procedure for all the No. 1 roof side garnish lids.
-
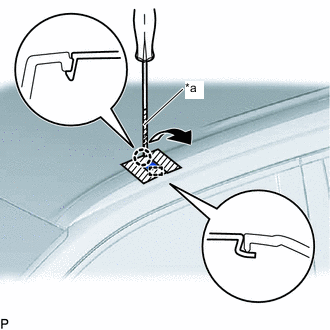
*a Protective Tape 
Protective Tape Apply protective tape around the No. 1 roof side garnish lid.
-
Using a screwdriver with its tip wrapped with protective tape, disengage the claw as shown in the illustration.
-
Disengage the guide to remove the No. 1 roof side garnish lid.
-
-
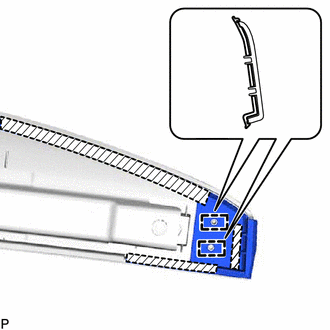
REMOVE NO. 2 ROOF SIDE GARNISH LID
Tech Tips
Use the same procedure for all the No. 2 roof side garnish lids.
-
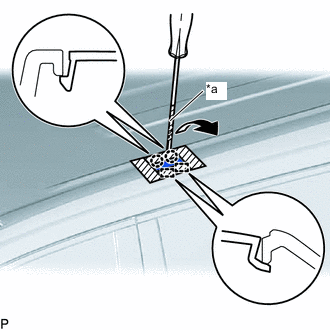
*a Protective Tape Protective Tape Apply protective tape around the No. 2 roof side garnish lid.
-
Using a screwdriver with its tip wrapped with protective tape, disengage the 2 claws as shown in the illustration.
-
Disengage the 2 guides to remove the No. 2 roof side garnish lid.
-
-
REMOVE ROOF RACK ASSEMBLY
-
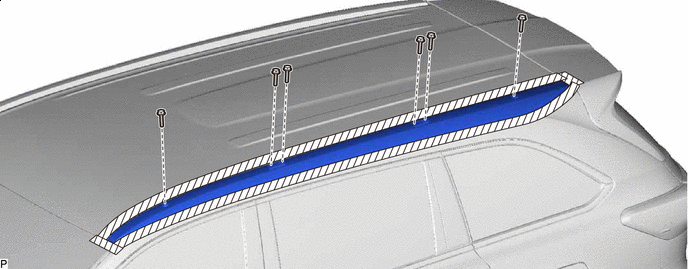
Apply protective tape around the roof rack assembly.
Protective Tape - - -
Remove the 6 bolts and roof rack assembly.
-
Remove the 6 No. 2 roof carrier seals.
-
-
REMOVE NO. 1 ROOF CARRIER PROTECTOR
-
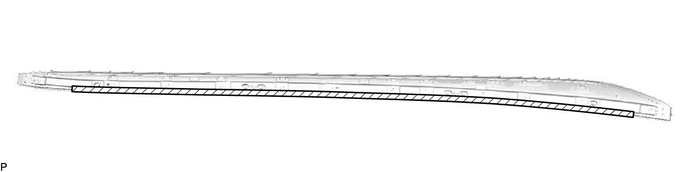
Remove the No. 1 roof carrier protector.
-
-
REMOVE NO. 3 ROOF CARRIER PROTECTOR
-
Remove the No. 3 roof carrier protector.

-
-
REMOVE FRONT ROOF RACK LEG CUSHION
-
Double-sided Tape Separate the double-sided tape and disengage the 2 guides to remove the front roof rack leg cushion.
-
-
REMOVE REAR ROOF RACK LEG CUSHION
-
Double-sided Tape Separate the double-sided tape and disengage the 2 guides to remove the rear roof rack leg cushion.
-