REAR BUMPER DISASSEMBLY
PROCEDURE
-
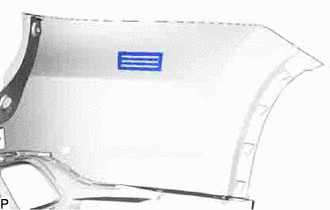
REMOVE REFLEX REFLECTOR ASSEMBLY LH (w/o Rear Fog Light)
-
Disengage the clamp.
-
Remove the 2 screws.
-
Disengage 2 claws to remove the reflex reflector assembly LH.
-
-
REMOVE REFLEX REFLECTOR ASSEMBLY RH (w/o Rear Fog Light)
Tech Tips
Use the same procedure as for the LH side.
-
REMOVE REAR FOG LIGHT ASSEMBLY LH (w/ Rear Fog Light)
-
REMOVE REAR FOG LIGHT ASSEMBLY RH (w/ Rear Fog Light)
Tech Tips
Use the same procedure as for the LH side.
-
REMOVE NO. 1 ULTRASONIC SENSOR (w/ TOYOTA Parking Assist-sensor System)
for Corner Sensor:
-
REMOVE NO. 1 ULTRASONIC SENSOR (w/ TOYOTA Parking Assist-sensor System)
for Back Sensor:
-
REMOVE REAR CORNER ULTRASONIC SENSOR RETAINER (w/ TOYOTA Parking Assist-sensor System)
-
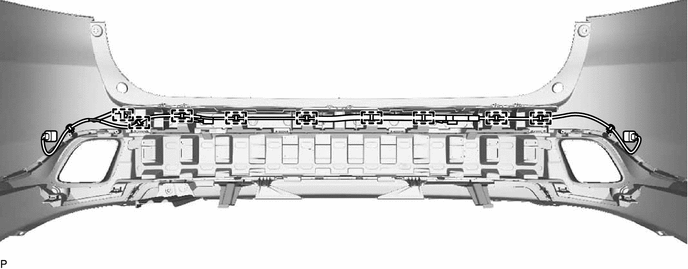
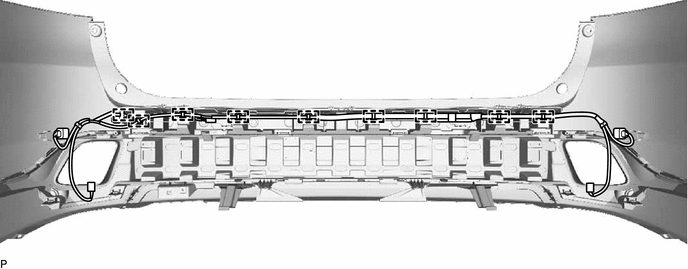
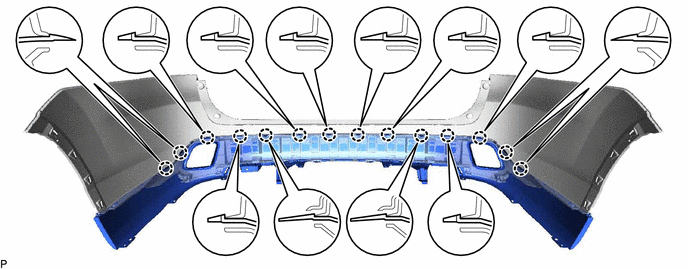
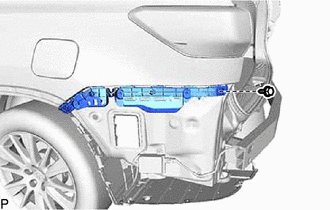
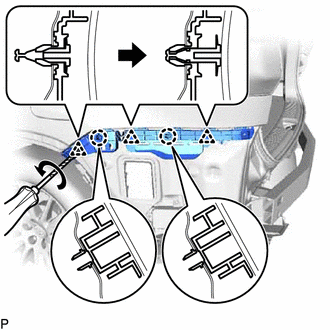
REMOVE NO. 3 LUGGAGE ROOM WIRE
-
w/o Rear Fog Light with TOYOTA Parking Assist-sensor System:
-
Disengage the 9 clamps to remove the No. 3 luggage room wire.
-
-
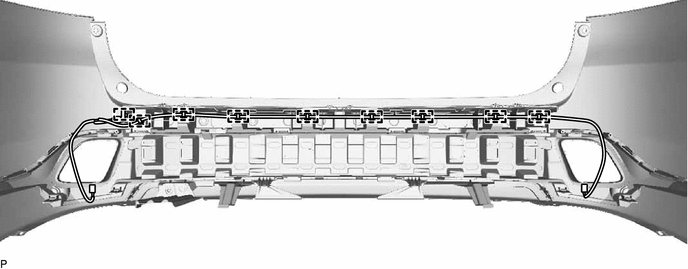
w/ Rear Fog Light without TOYOTA Parking Assist-sensor System:
-
Disengage the 9 clamps to remove the No. 3 luggage room wire.
-
-
w/ Rear Fog Light and TOYOTA Parking Assist-sensor System:
-
Disengage the 9 clamps to remove the No. 3 luggage room wire.
-
-
-
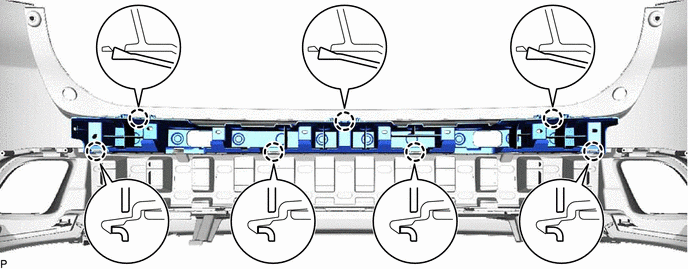
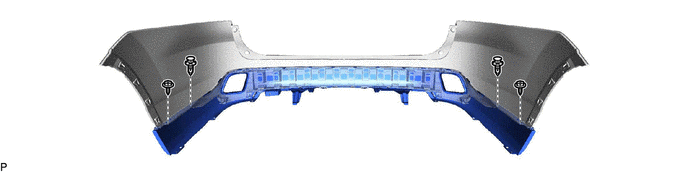
REMOVE REAR BUMPER ENERGY ABSORBER
-
Disengage the 7 claws and remove the rear bumper energy absorber.
-
-
REMOVE REAR CENTER ULTRASONIC SENSOR RETAINER (w/ TOYOTA Parking Assist-sensor System)
-
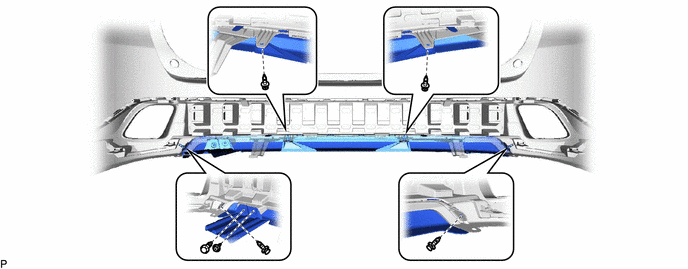
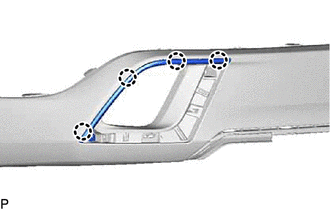
REMOVE REAR BUMPER EXTENSION
-
Remove the screw.
-
Remove the 5 clips.
-
Disengage the 10 claws and 2 guides to remove the rear bumper extension.
-
-
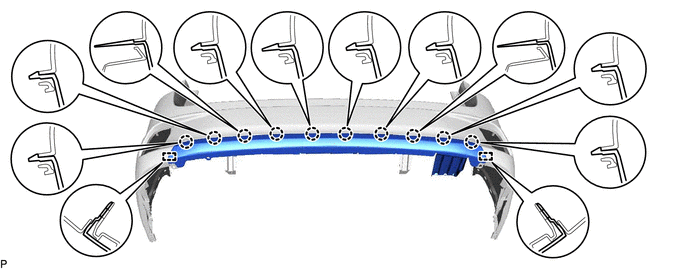
REMOVE LOWER REAR BUMPER COVER
-
Remove the 2 screws.
-
Remove the 2 clips.
-
Disengage the 14 claws to remove the lower rear bumper cover.
-
-
REMOVE REAR BUMPER EXTENSION MOULDING LH (w/ Plated Moulding)
-
Remove the 2 screws.
-
Disengage the 2 claws to remove the rear bumper extension moulding LH.
-
-
REMOVE REAR BUMPER EXTENSION MOULDING RH (w/ Plated Moulding)
Tech Tips
Use the same procedure as for the LH side.
-
REMOVE REAR BUMPER SIDE MOULDING LH (w/ Plated Moulding)
-
Disengage the 4 claws to remove the rear bumper side moulding LH.
-
-
REMOVE REAR BUMPER SIDE MOULDING RH (w/ Plated Moulding)
Tech Tips
Use the same procedure as for the LH side.
-
REMOVE NO. 2 MOULDING TAPE
-
Remove the No. 2 moulding tape.
Tech Tips
Use the same procedure for the RH side and LH side.
-
-
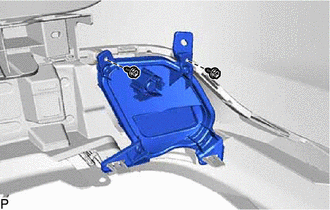
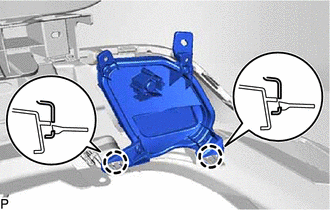
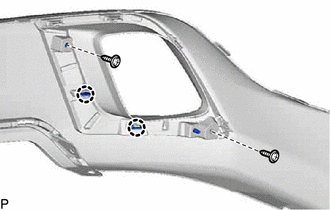
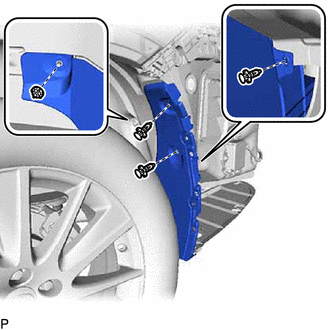
REMOVE REAR BUMPER SIDE SUPPORT LH
-
Remove the screw.
-
Using a screwdriver, disengage the 3 clips as shown in the illustration.
-
Disengage the 2 claws to remove the rear bumper side support LH.
-
-
REMOVE REAR BUMPER SIDE SUPPORT RH
Tech Tips
Use the same procedure as for the LH side.
-
REMOVE REAR BUMPER SIDE SEAL LH
-
Remove the 4 clips and rear bumper side seal LH.
-
-
REMOVE REAR BUMPER SIDE SEAL RH
Tech Tips
Use the same procedure as for the LH side.
-
REMOVE NO. 1 REAR BUMPER REINFORCEMENT

-
Remove the 6 nuts and No. 1 rear bumper reinforcement.
-