PROPELLER SHAFT ASSEMBLY DISASSEMBLY

CAUTION / NOTICE / HINT
Note
-
When using a vise, place aluminum plates between the part and vise.
-
When using a vise, do not overtighten it.
PROCEDURE
-
REMOVE PROPELLER SHAFT ASSEMBLY
-
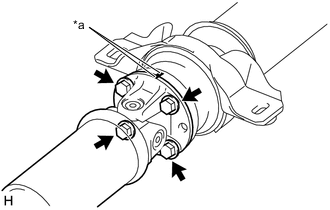
*a Matchmark Place matchmarks on the propeller shaft assembly and universal joint flange.
Note
Do not use a punch for the marks.
-
Remove the 4 nuts, 4 bolts, 4 washers and propeller shaft assembly.
-
-
REMOVE INTERMEDIATE SHAFT ASSEMBLY
-
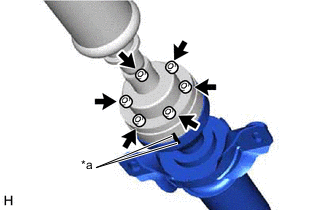
*a Matchmark Place matchmarks on the rear propeller shaft assembly and universal joint flange.
Note
Do not use a punch for the marks.
-
Using a 6 mm hexagon socket wrench, remove the 6 cross groove joint set bolts, 2 universal joint washers and intermediate shaft assembly.
-
-
REMOVE NO. 2 CENTER SUPPORT BEARING ASSEMBLY (for Rear Side)
-
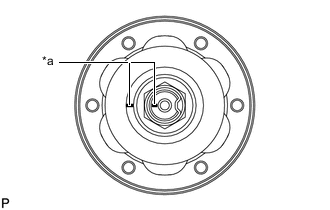
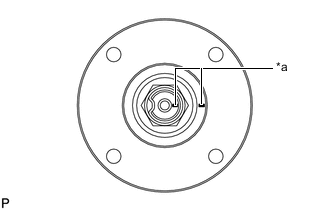
*a Matchmark Place matchmarks on the intermediate shaft assembly and universal joint flange.
Note
Do not use a punch for the marks.
-
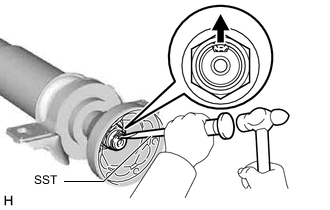
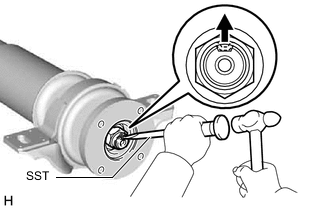
Using SST and a hammer, release the staked part of the nut.
- SST
- 09930-00010
Note
Release the staked part of the nut completely, otherwise the threads of the intermediate shaft assembly may be damaged.
-
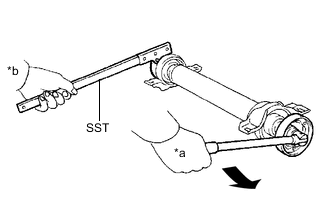
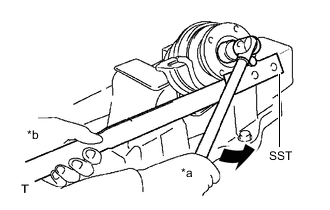
*a Turn *b Hold Using SST to hold the universal joint flange, remove the nut and washer.
- SST
- 09330-00021
-
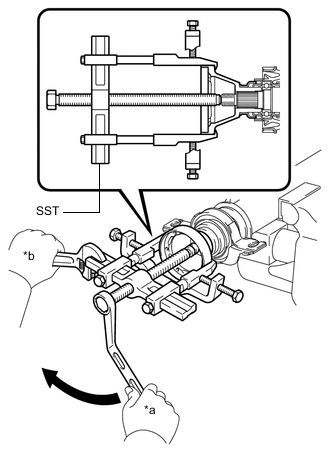
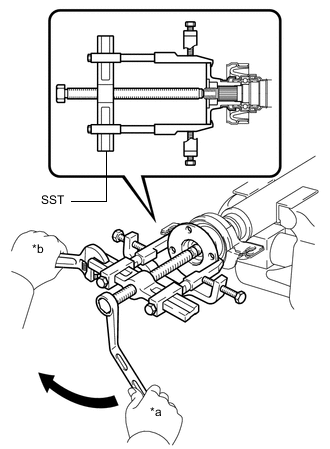
*a Turn *b Hold Using SST, remove the universal joint flange from the intermediate shaft assembly.
- SST
- 09950-40011 ( 09951-04020, 09952-04010, 09953-04030, 09954-04010, 09955-04061, 09957-04010, 09958-04011 )
Note
-
Be careful not to damage the universal joint flange.
-
Do not overtighten the vise.
-
Apply grease to the threads and tip of the center bolt of SST before use.
-
Remove the No. 2 center support bearing assembly and washer from the intermediate shaft assembly.
-
-
REMOVE NO. 2 CENTER SUPPORT BEARING ASSEMBLY (for Front Side)
-
*a Matchmark Place matchmarks on the intermediate shaft assembly and universal joint flange.
Note
Do not use a punch for the marks.
-
Using SST and a hammer, release the staked part of the nut.
- SST
- 09930-00010
Note
Release the staked part of the nut completely, otherwise the threads of the intermediate shaft assembly may be damaged.
-
*a Turn *b Hold Using SST to hold the universal joint flange, remove the nut and washer.
- SST
- 09330-00021
-
*a Turn *b Hold Using SST, remove the universal joint flange from the intermediate shaft assembly.
- SST
- 09950-40011 ( 09951-04020, 09952-04010, 09953-04030, 09954-04010, 09955-04061, 09957-04010, 09958-04011 )
Note
-
Be careful not to damage the universal joint flange.
-
Do not overtighten the vise.
-
Apply grease to the threads and tip of the center bolt of SST before use.
-
Remove the No. 2 center support bearing assembly and washer from the intermediate shaft assembly.
-