SHIFT LEVER INSTALLATION
PROCEDURE
-
INSTALL TRANSMISSION FLOOR SHIFT ASSEMBLY
Note
Check that the park/neutral position switch assembly and the shift lever are in neutral.
-
Temporarily install the transmission floor shift assembly to the shift lever support with the 4 nuts.
-
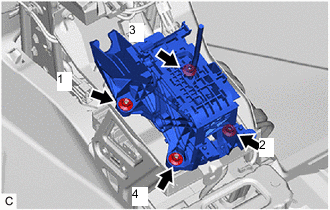
Install the 4 nuts in the order shown in the illustration.
- Torque:
- 12 N*m { 122 kgf*cm, 9 ft.*lbf }
-
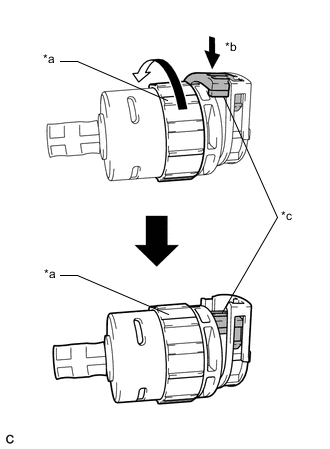
*a Lock Nut *b Push in *c Stopper Turn the lock nut of the transmission control cable assembly counterclockwise. While holding the lock nut, push in the stopper.
-
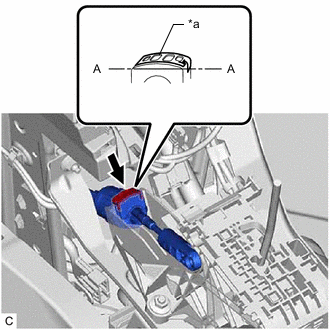
*a Stopper Install the outer part of the transmission control cable assembly to the transmission floor shift assembly.
Note
After installation, check that the outer part of the cable lock is protruding beyond portion A-A as shown in the illustration.
-
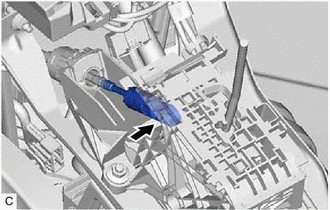
Confirm that the shift lever is in N, and then install the end of the transmission control cable assembly to the transmission floor shift assembly.
Note
-
Securely install the end of the transmission control cable assembly to the transmission floor shift assembly.
-
Install the end of the transmission control cable assembly so that its adjustment lock section is on the driver side.
-
-
-
INSTALL NO. 2 CONSOLE BOX MOUNTING BRACKET
-
Install the No. 2 console box mounting bracket to the transmission floor shift assembly with the 2 screws.
-
Connect the clamp to the No. 2 console box mounting bracket.
-
-
INSTALL CONSOLE BOX INSERT
-
INSTALL FRONT NO. 2 CONSOLE BOX INSERT
-
INSTALL NO. 2 SWITCH HOLE BASE
-
INSTALL SHIFT POSITION INDICATOR
-
Engage the claw and 2 guides to install the shift position indicator to the shifting hole bezel.
-
-
INSTALL SHIFTING HOLE BEZEL
-
Install the shifting hole bezel to the upper console panel sub-assembly with the 5 screws.
-
Connect the shift position indicator connector.
-
-
INSTALL CONSOLE BOX ASSEMBLY
-
INSTALL SHIFT LEVER CAP
-
Engage the 2 claws to install the shift lever cap to the transmission floor shift assembly.
-
-
INSPECT SHIFT LEVER POSITION