PARK / NEUTRAL POSITION SWITCH REMOVAL
PROCEDURE
-
REMOVE RADIATOR SIDE DEFLECTOR SEAL LH
-
REMOVE RADIATOR SIDE SEAL RH
-
REMOVE COOL AIR INTAKE DUCT SEAL
-
REMOVE INLET AIR CLEANER ASSEMBLY
-
REMOVE AIR CLEANER CAP WITH AIR CLEANER HOSE
-
REMOVE AIR CLEANER FILTER ELEMENT SUB-ASSEMBLY
-
REMOVE AIR CLEANER CASE SUB-ASSEMBLY
-
SEPARATE TRANSMISSION CONTROL CABLE ASSEMBLY
-
Move the shift lever to N.
-
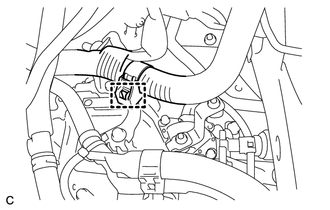
Disengage the wire harness clamp from the wire harness clamp bracket.
-
Remove the nut from the transmission control shaft lever.
-
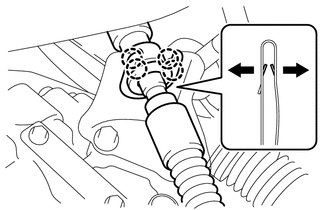
Using a screwdriver, disengage the 4 claws, separate the transmission control cable assembly with clip from the No. 1 transmission control cable bracket.
-
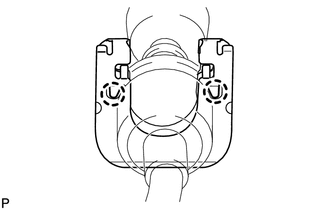
Using a screwdriver, disengage the 2 claws and remove the clip from the transmission control cable assembly.
-
-
REMOVE PARK/NEUTRAL POSITION SWITCH ASSEMBLY
-
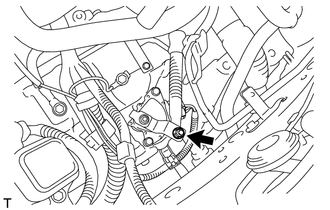
Disconnect the connector from the park/neutral position switch.
-
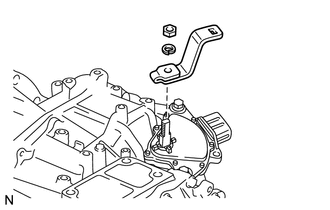
Remove the nut, washer and transmission control shaft lever from the manual valve lever shaft sub-assembly.
-
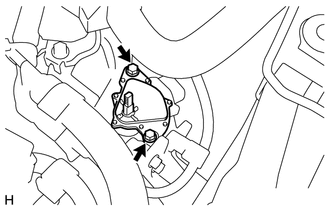
Remove the 2 bolts and park/neutral position switch assembly from the manual valve lever shaft sub-assembly.
Note
Before removing the park/neutral position switch assembly, remove any dirt or rust on the installation portion of the transmission control shaft lever. Be sure to remove the park/neutral position switch assembly straight along the transmission control shaft lever while being careful not to deform the plate spring that supports the transmission control shaft lever. If the plate spring is deformed, the park/neutral position switch assembly cannot be reinstalled correctly.
-