TRANSMISSION CONTROL CABLE ADJUSTMENT
CAUTION / NOTICE / HINT
Note
Before adjusting the transmission control cable assembly, check that the park/neutral position switch assembly and shift lever are in neutral.
PROCEDURE
-
REMOVE CONSOLE BOX ASSEMBLY
-
REMOVE NO. 2 SWITCH HOLE BASE
-
REMOVE FRONT NO. 2 CONSOLE BOX INSERT
-
ADJUST SHIFT LEVER POSITION
-
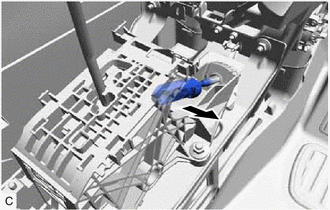
Separate the end of the transmission control cable assembly from the transmission floor shift assembly.
-
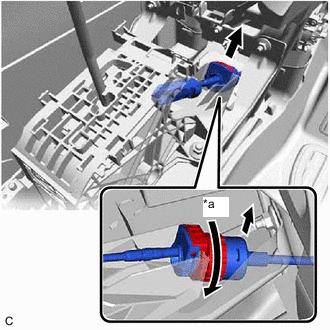
*a Counterclockwise Rotate the nut counterclockwise approximately 180° and, while holding the nut in that position, separate the transmission control cable assembly from the transmission floor shift assembly.
-
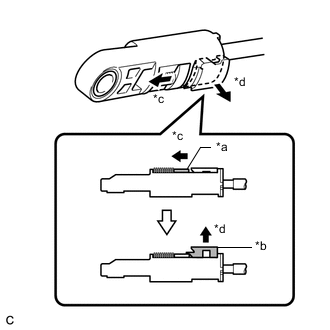
*a Slider *b Lock Piece *c Slide *d Pull Slide the slider of the transmission control cable assembly in the direction indicated by the arrow in the illustration, and pull the lock piece outward.
-
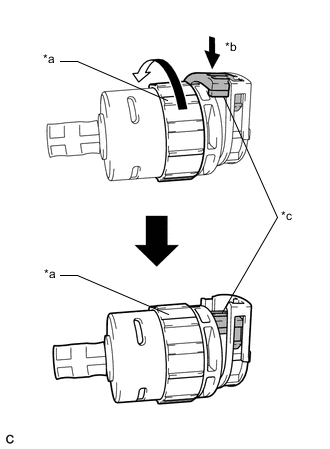
*a Lock Nut *b Push in *c Stopper Turn the lock nut of the transmission control cable assembly counterclockwise. While holding the lock nut, push in the stopper.
-
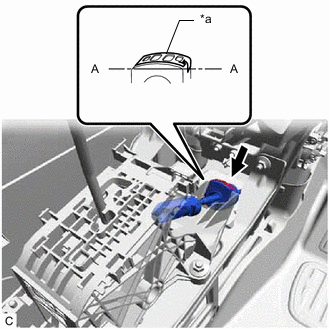
*a Stopper Install the outer part of the transmission control cable assembly to the transmission floor shift assembly.
Note
After installation, check that the outer part of the cable lock is protruding beyond portion A-A as shown in the illustration.
-
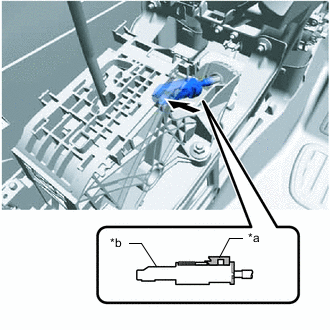
*a Lock Piece *b Adjuster Case Install the end of the transmission control cable assembly to the transmission floor shift assembly.
Note
-
Check that the lock piece is pulled out.
-
Install the cable end all the way to the base of the transmission floor shift assembly pin.
-
-
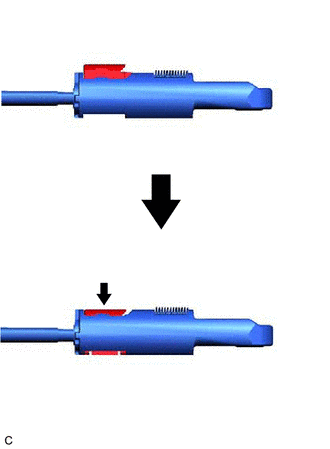
Push the lock piece into the adjuster case.
Note
-
Check that the park/neutral position switch assembly and shift lever are in neutral.
-
Securely push in the lock piece until the slider lock is engaged.
-
-
After adjusting the shift lever position, check the operation and function of the shift lever. If there is a problem, adjust the shift lever position again.
-
-
INSTALL FRONT NO. 2 CONSOLE BOX INSERT
-
INSTALL NO. 2 SWITCH HOLE BASE
-
INSTALL CONSOLE BOX ASSEMBLY