STARTER REMOVAL
PROCEDURE
-
PRECAUTION
Note
After turning the ignition switch off, waiting time may be required before disconnecting the cable from the negative (-) battery terminal. Therefore, make sure to read the disconnecting the cable from the negative (-) battery terminal notice before proceeding with work.
-
DISCONNECT CABLE FROM NEGATIVE BATTERY TERMINAL
Note
When disconnecting the cable, some systems need to be initialized after the cable is reconnected.
-
REMOVE RADIATOR SIDE DEFLECTOR SEAL LH
-
REMOVE RADIATOR SIDE SEAL RH
-
REMOVE COOL AIR INTAKE DUCT SEAL
-
REMOVE NO. 1 ENGINE COVER SUB-ASSEMBLY
-
REMOVE INLET AIR CLEANER ASSEMBLY
-
REMOVE AIR CLEANER CAP WITH AIR CLEANER HOSE
-
REMOVE AIR CLEANER FILTER ELEMENT SUB-ASSEMBLY
-
REMOVE AIR CLEANER CASE SUB-ASSEMBLY
-
REMOVE BATTERY
-
REMOVE STARTER ASSEMBLY
-
Open the terminal cap.
-
Remove the nut and disconnect terminal 30.
-
Disconnect the starter assembly connector.
-
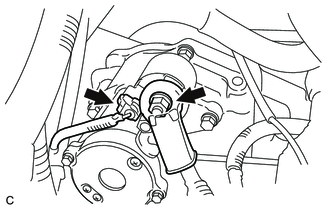
Type A:
-
Remove the 2 bolts and starter assembly.
-
-

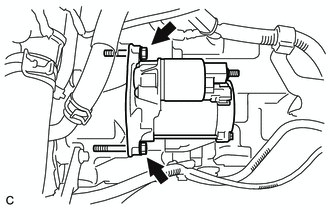
Type B:
-
Remove the 2 nuts and the starter assembly.
-
Using an E8 "TORX" socket wrench, remove the 2 stud bolts from the automatic transaxle assembly.
-
-