BLACK OUT TAPE(for Front Door) REMOVAL
CAUTION / NOTICE / HINT
Tech Tips
-
Use the same procedure for the RH side and LH side.
-
The following procedure is for the LH side.
PROCEDURE
-
REMOVE FRONT DOOR BELT MOULDING ASSEMBLY
-
REMOVE FRONT NO. 1 SPEAKER ASSEMBLY
-
REMOVE FRONT DOOR CHECK ASSEMBLY
-
REMOVE FRONT DOOR WEATHERSTRIP
-
REMOVE DOOR FRAME GARNISH
-
REMOVE FRONT DOOR INNER UPPER BLACK OUT TAPE
-
Using a heat light, heat the front door inner upper black out tape and vehicle body.
Heating Temperature Item Temperature Front Door Inner Upper Black Out Tape and Vehicle Body 40 to 60°C (104 to 140°F) Note
Do not heat the vehicle body excessively.
-
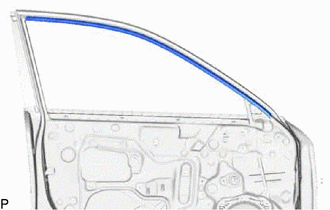
Pull back on one of the ends of the front door inner upper black out tape to remove it.
Tech Tips
When pulling on the black out tape, pull it parallel to the body.
-
-
REMOVE FRONT DOOR REAR INNER BLACK OUT TAPE
-
Using a heat light, heat the front door rear inner black out tape and vehicle body.
Heating Temperature Item Temperature Front Door Rear Inner Black Out Tape and Vehicle Body 40 to 60°C (104 to 140°F) Note
Do not heat the vehicle body excessively.
-
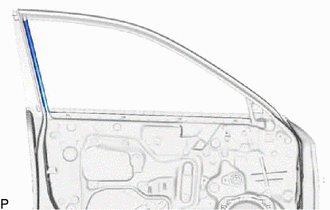
Pull back on one of the ends of the front door rear inner black out tape to remove it.
Tech Tips
When pulling on the black out tape, pull it parallel to the body.
-