FRONT BUMPER(for Standard) REMOVAL
CAUTION / NOTICE / HINT
Tech Tips
When the front bumper is damaged or deformed due to an accident or contact with other objects, etc., or the bumper installation area on the body is repaired, it is necessary to perform millimeter wave radar sensor adjustment.
PROCEDURE
-
PRECAUTION
Note
After turning the power switch off, waiting time may be required before disconnecting the cable from the negative (-) auxiliary battery terminal. Therefore, make sure to read the disconnecting the cable from the negative(-) auxiliary battery terminal notices before proceeding with work.
-
REMOVE BATTERY SERVICE HOLE COVER LH
-
DISCONNECT CABLE FROM NEGATIVE AUXILIARY BATTERY TERMINAL
CAUTION:
Wait at least 90 seconds after disconnecting the cable from the negative (-) auxiliary battery terminal to disable the SRS system.
Note
When disconnecting the cable, some systems need to be initialized after the cable is reconnected.
-
REMOVE COOL AIR INTAKE DUCT SEAL
-
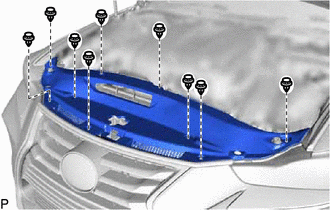
Remove the 9 clips and cool air intake duct seal.
-
-
REMOVE FRONT BUMPER ASSEMBLY
-
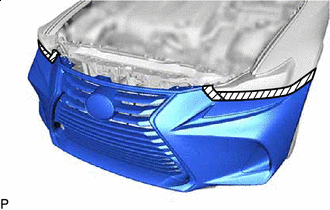

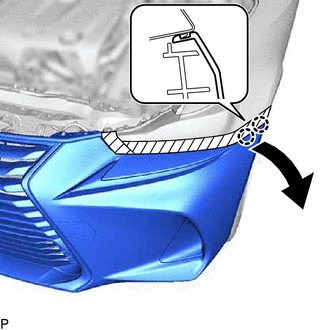
Protective Tape Apply protective tape around the front bumper assembly as shown in the illustration.
-
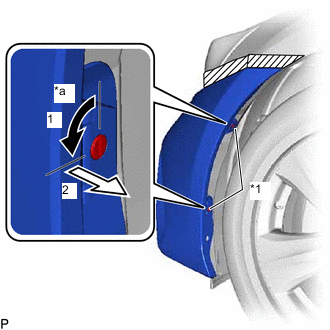
*1 Pin Hold Clip *a 90° Using a screwdriver, turn the pin 90 degrees and remove the pin hold clip.
Tech Tips
Use the same procedure for the RH side and LH side.
-
Remove the clip.
Tech Tips
Use the same procedure for the RH side and LH side.
-
Remove the screw.
Tech Tips
Use the same procedure for the RH side and LH side.
-
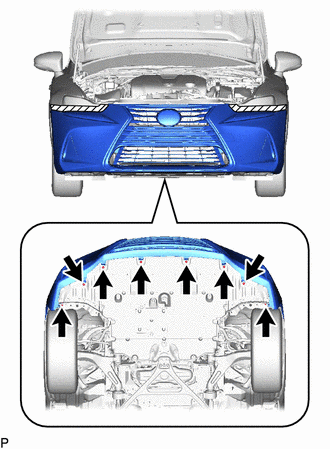
Remove the 8 screws.
-

Remove the 3 bolts.
-
Remove the 2 clips.
-
w/ Lexus Safety System+:
-
Disconnect the connector.
-
-
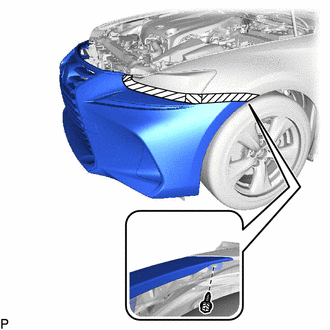
Disengage the 2 claws as shown in the illustration.
Tech Tips
Use the same procedure for the RH side and LH side.
-
Pull back the side of the front bumper assembly and disconnect each connector.
Note
Do not apply excessive force when pulling back the front bumper assembly.
-
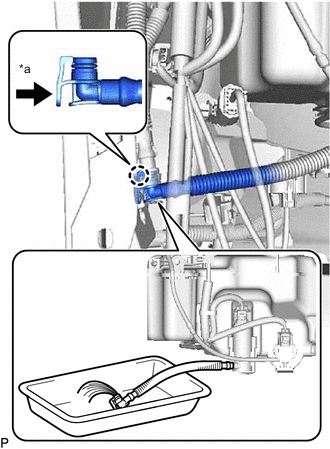
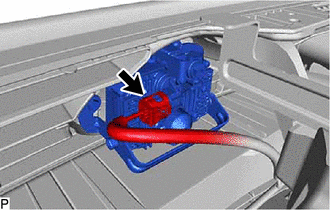
*a Push w/ Headlight Cleaner System:
-
Disengage the claw and disconnect the washer hose from the headlight cleaner hose as shown in the illustration.
Tech Tips
Use a container to collect the washer fluid.
-
-
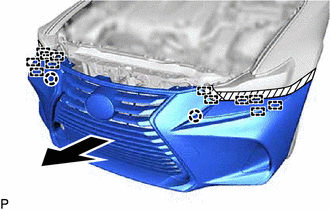
Disengage the 2 claws and 12 guides to remove the front bumper assembly as shown in the illustration.
-