FRONT BUMPER(for Sport Package) DISASSEMBLY
PROCEDURE
-
REMOVE MILLIMETER WAVE RADAR SENSOR ASSEMBLY (w/ Lexus Safety System+)
-
REMOVE HEADLIGHT WASHER ACTUATOR SUB-ASSEMBLY LH (w/ Headlight Cleaner System)
-
REMOVE HEADLIGHT WASHER ACTUATOR SUB-ASSEMBLY RH (w/ Headlight Cleaner System)
Tech Tips
Use the same procedure as for the LH side.
-
REMOVE HEADLIGHT WASHER COVER LH (w/ Headlight Cleaner System)
-
REMOVE HEADLIGHT WASHER COVER RH (w/ Headlight Cleaner System)
Tech Tips
Use the same procedure as for the LH side.
-
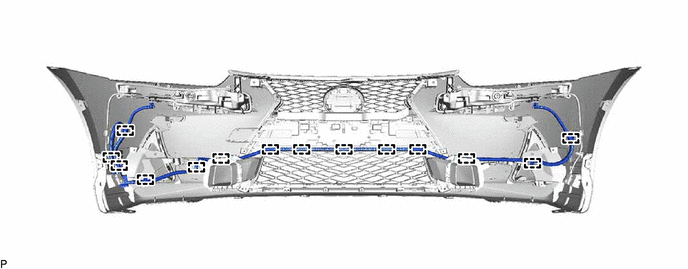
REMOVE HEADLIGHT CLEANER HOSE (w/ Headlight Cleaner System)
-
Disengage the 14 clamps and remove the headlight cleaner hose.
-
-
REMOVE CONNECTOR BRACKET (w/o Intuitive Parking Assist System)
-
REMOVE NO. 1 ULTRASONIC SENSOR (w/ Intuitive Parking Assist System)
-
REMOVE NO. 1 ULTRASONIC SENSOR RETAINER (w/ Intuitive Parking Assist System)
-
REMOVE NO. 2 ULTRASONIC SENSOR (w/ Intuitive Parking Assist System)
-
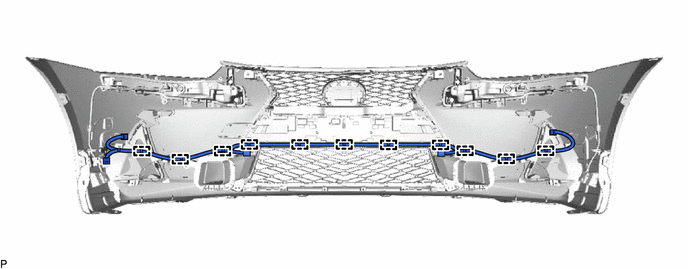
REMOVE NO. 4 ENGINE ROOM WIRE (w/ Intuitive Parking Assist System)
-
Disengage the 11 clamps and remove the No. 4 engine room wire.
-
-
REMOVE FRONT BUMPER EXTENSION MOUNTING BRACKET
-
for Type A:
-
Remove the 2 screws.
-

Disengage the 4 claws and 2 guides to remove the front bumper extension mounting bracket.
-
-
for Type B:
-
Remove the 2 screws.
-
Disengage the 8 claws and 2 guides to remove the front bumper extension mounting bracket.
-
-
for Type C:
-
Remove the 2 screws.
-
Disengage the 8 claws to remove the front bumper extension mounting bracket.
-
-
-
REMOVE CLEARANCE LIGHT ASSEMBLY LH
-
REMOVE CLEARANCE LIGHT ASSEMBLY RH
Tech Tips
Use the same procedure as for the LH side.
-
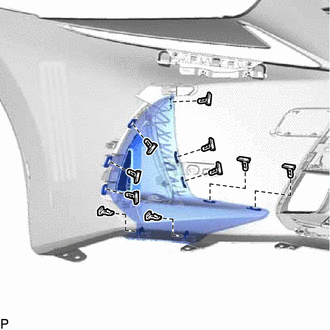
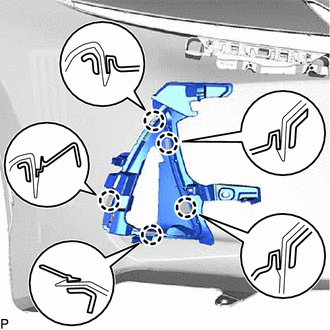
REMOVE FRONT BUMPER SIDE BRACKET LH
-
REMOVE FRONT BUMPER SIDE BRACKET RH
Tech Tips
Use the same procedure as for the LH side.
-
REMOVE NO. 2 COOL AIR INTAKE DUCT
-
Remove the 2 screws.
-
Remove the clip and No. 2 cool air intake duct.
-
-
REMOVE NO. 1 COOL AIR INTAKE DUCT
Tech Tips
Use the same procedure as for the No. 2 cool air intake duct.
-
REMOVE FRONT FENDER LINER RETAINER
-
REMOVE NO. 2 RADIATOR GRILLE GARNISH
-
Remove the 10 clips.
-

Disengage the 10 guides to remove the No. 2 radiator grille garnish.
-
-
REMOVE RADIATOR GRILLE GARNISH
Tech Tips
Use the same procedure as for the No. 2 radiator grille garnish.
-
REMOVE LOWER RADIATOR GRILLE LH
-
Disengage the 5 claws to remove the lower radiator grille LH.
-
-
REMOVE LOWER RADIATOR GRILLE RH
Tech Tips
Use the same procedure as for the LH side.
-
REMOVE NO. 1 MOULDING TAPE
-
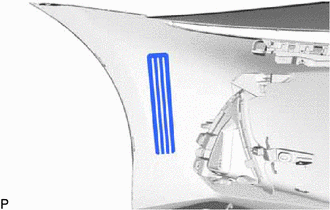
Remove the No. 1 moulding tape.
Tech Tips
Use the same procedure for the RH side and LH side.
-
-
REMOVE NO. 2 FRONT BUMPER RETAINER BRACKET
-
REMOVE NO. 1 FRONT BUMPER RETAINER BRACKET
Tech Tips
Use the same procedure as for the No. 2 front bumper retainer bracket.
-
REMOVE LOWER FRONT BUMPER COVER
-
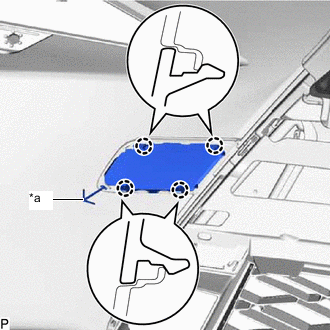
*a Hook Disengage the 4 claws.
-
Disengage the hook to remove the lower front bumper cover.
-
-
REMOVE FRONT ENERGY ABSORBER MOUNTING PLATE
-
REMOVE RADIATOR GRILLE PROTECTOR
-
REMOVE NO. 1 FRONT BUMPER BRACKET LH
-
REMOVE NO. 1 FRONT BUMPER BRACKET RH
Tech Tips
Use the same procedure as for the LH side.
-
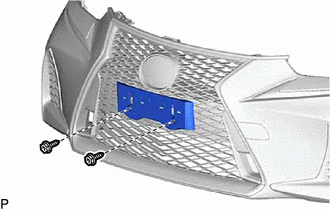
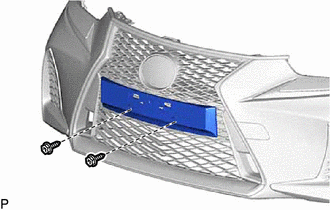
REMOVE RADIATOR GRILLE (OR FRONT PANEL) EMBLEM
-
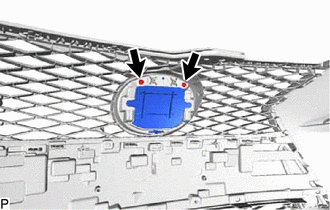
Remove the 2 screws.
-
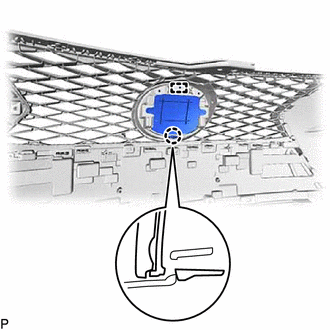
Disengage the claw and pin to remove the radiator grille (or front panel) emblem.
-
-
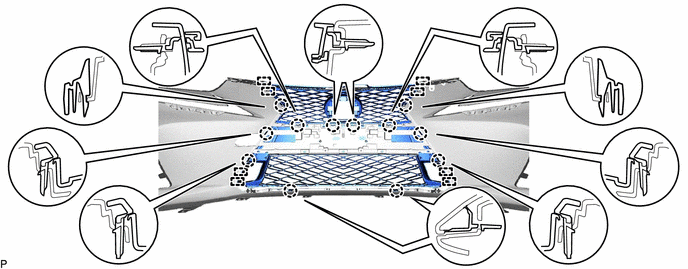
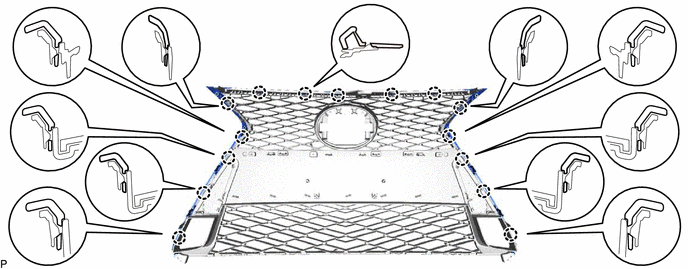
REMOVE RADIATOR GRILLE ASSEMBLY
-
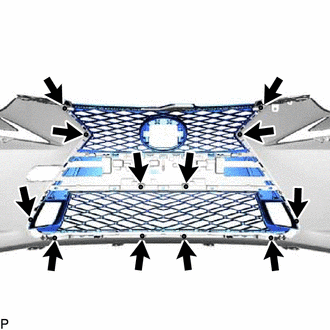
Remove the 12 screws.
-
Disengage the 12 claws and 8 guides to remove the radiator grille assembly.
-
-
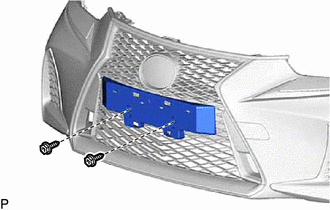
REMOVE RADIATOR GRILLE BRACKET
-
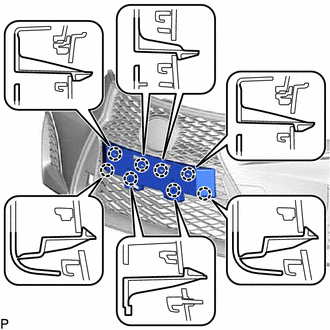
REMOVE LOWER RADIATOR GRILLE MOULDING
-
Remove the 2 screws.
-
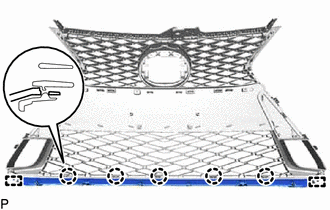
Disengage the 5 claws and 2 guides to remove the lower radiator grille moulding.
-
-
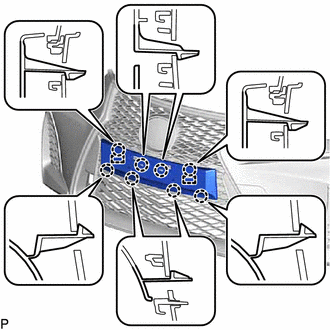
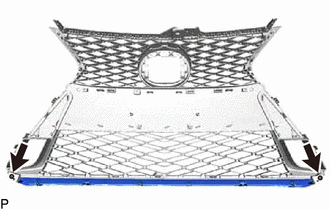
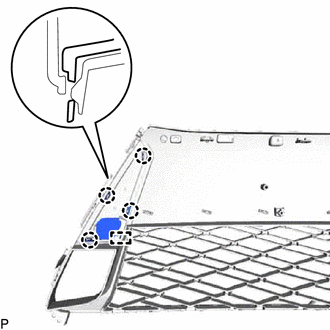
REMOVE RADIATOR GRILLE MOULDING
-
Disengage the 15 claws to remove the radiator grille moulding.
-
-
REMOVE INSIDE RADIATOR GRILLE
-
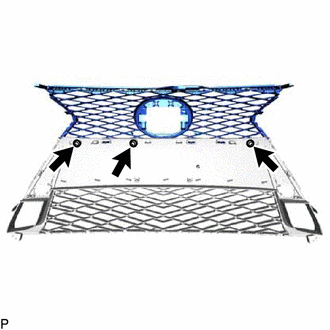
Remove the 3 screws.
-

Disengage the 3 claws to remove the inside radiator grille.
-
-
REMOVE CENTER RADIATOR GRILLE MOULDING LH
-
Disengage the 4 claws and guide to remove the center radiator grille moulding LH.
-
-
REMOVE CENTER RADIATOR GRILLE MOULDING RH
Tech Tips
Use the same procedure as for the LH side.
-
REMOVE NO. 2 LOWER RADIATOR GRILLE
-
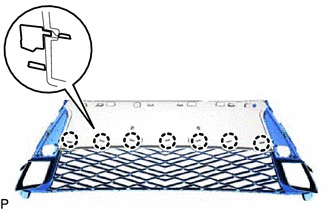
Disengage the 7 claws to remove the No. 2 lower radiator grille.
-
-
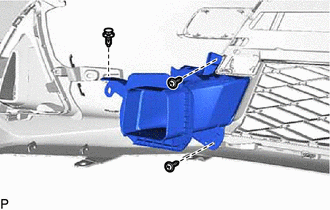
REMOVE FRONT BUMPER ENERGY ABSORBER
-
REMOVE POP-UP HOOD CHAMBER WITH SENSOR ASSEMBLY
-
REMOVE FRONT BUMPER REINFORCEMENT
-
REMOVE FRONT BUMPER SIDE RETAINER LH
-
REMOVE FRONT BUMPER SIDE RETAINER RH
Tech Tips
Use the same procedure as for the LH side.