FRONT BUMPER(for Sport Package) REMOVAL
PROCEDURE
-
REMOVE BATTERY SERVICE HOLE COVER LH
-
PRECAUTION
Note
After turning the power switch off, waiting time may be required before disconnecting the cable from the negative (-) auxiliary battery terminal. Therefore, make sure to read the disconnecting the cable from the negative(-) auxiliary battery terminal notices before proceeding with work.
-
DISCONNECT CABLE FROM NEGATIVE AUXILIARY BATTERY TERMINAL
CAUTION:
Wait at least 90 seconds after disconnecting the cable from the negative (-) auxiliary battery terminal to disable the SRS system.
Note
When disconnecting the cable, some systems need to be initialized after the cable is reconnected.
-
REMOVE COOL AIR INTAKE DUCT SEAL
-
REMOVE RADIATOR SUPPORT CUSHION
-
REMOVE FRONT BUMPER ASSEMBLY
-
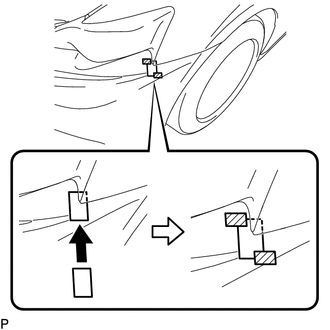

Adhesive Tape Insert a piece of cardstock, such as a business card, between the front bumper assembly and front fender as shown in the illustration.
Note
Make sure to use a piece of cardstock to prevent the front bumper assembly and front fender from interfering with each other and being damaged when removing the front bumper assembly.
-
Secure the cardstock using adhesive tape.
-
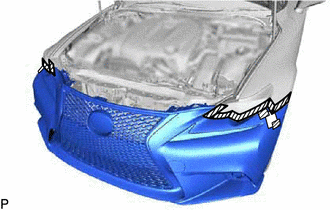
Protective Tape Apply protective tape around the front bumper assembly as shown in the illustration.
-
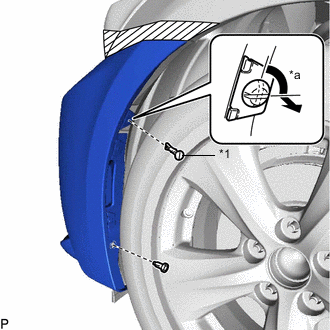
*1 Pin Hold Clip *a 90° Using a screwdriver, turn the pin 90 degrees and remove the pin hold clip.
Tech Tips
Use the same procedure for the RH side and LH side.
-
Remove the clip.
Tech Tips
Use the same procedure for the RH side and LH side.
-
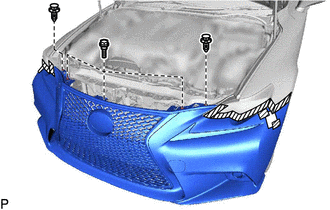
Remove the screw.
Tech Tips
Use the same procedure for the RH side and LH side.
-
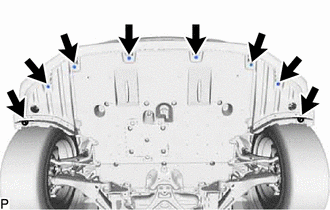
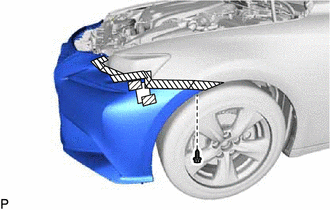
Remove the 8 screws.
-
Remove the 3 bolts.
-
Remove the 2 clips.
-
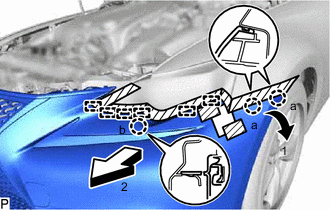
Disengage the 2 claws (a) in the direction indicated by the arrow (1) in the illustration.
Tech Tips
Use the same procedure for the RH side and LH side.
-
Disengage the claw (b) and 7 guides in the direction indicated by the arrow (2) in the illustration.
Tech Tips
Use the same procedure for the RH side and LH side.
-
Pull back the side of the front bumper assembly and disconnect each connector.
Note
Do not apply excessive force when pulling back the front bumper assembly.
-
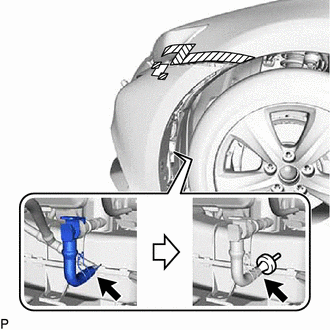
w/ Headlight Cleaner System:
-
Disengage the clip.
-
Disconnect the washer hose from the windshield washer motor and pump assembly, and install the hose plage No. 2.
Tech Tips
Use a container to collect the washer fluid.
-
-
Remove the front bumper assembly.
-