CAUTION / NOTICE / HINT
-
Do not damage the LCD panel.
-
If there are any fingerprints or foreign matter on the display portion of the LCD panel, wipe them off with a soft cloth.
-
Do not separate the rear cover from the LCD panel.
PROCEDURE
- Click here
INSTALL FRONT ESCUTCHEON (for 7 Inch Display)
-
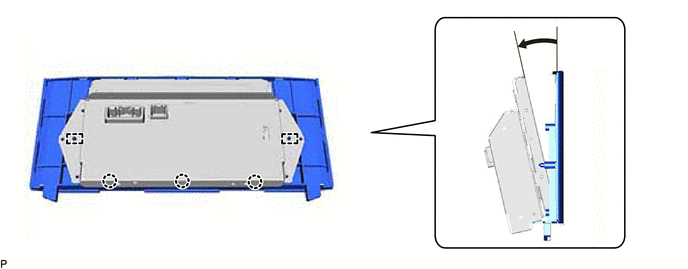
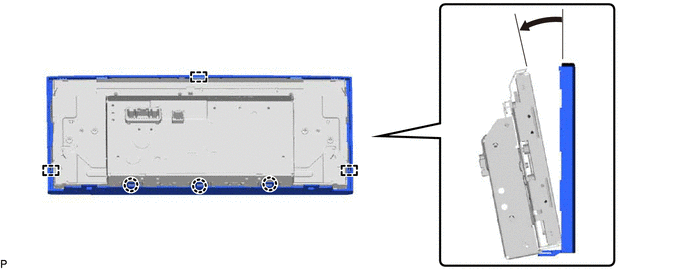
Engage the 3 claws and 2 guides as shown in the illustration.
-
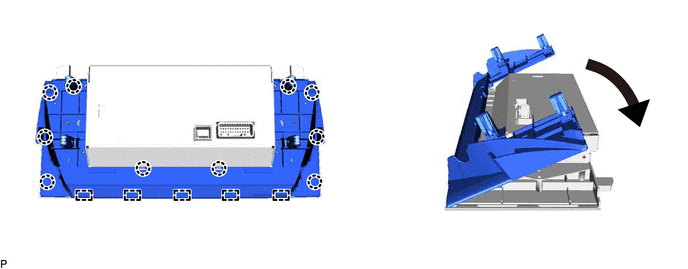
Engage the 5 guides and 10 claws as shown in the illustration.
-
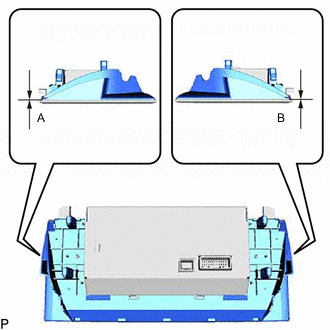
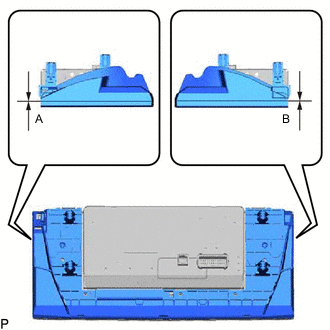
Check that there is no clearance between the front escutcheon and rear escutcheon as shown in the illustration.
Standard Measurement Area Measurement A 0 mm (0 in.) B 0 mm (0 in.) -
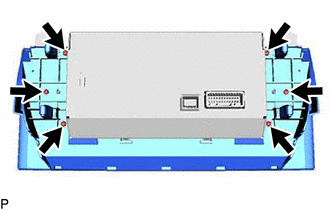
Install the front escutcheon and rear escutcheon with the 6 screws.
-
Remove the release paper from a new insulator.
Tip:After removing the release paper, keep the exposed adhesive free from foreign matter.
-
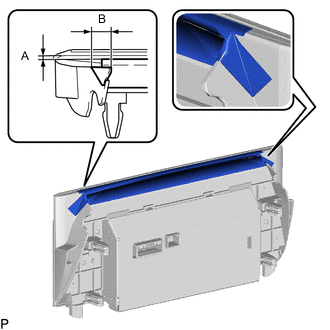
Install the insulator as shown in the illustration.
Standard Measurement Area Measurement A 0 to 2.0 mm (0 to 0.0787 in.) B 0 to 10.0 mm (0 to 0.394 in.)
-
- Click here
INSTALL FRONT ESCUTCHEON (for 10.3 Inch Display)
-
Engage the 3 claws and 3 guides as shown in the illustration.
-
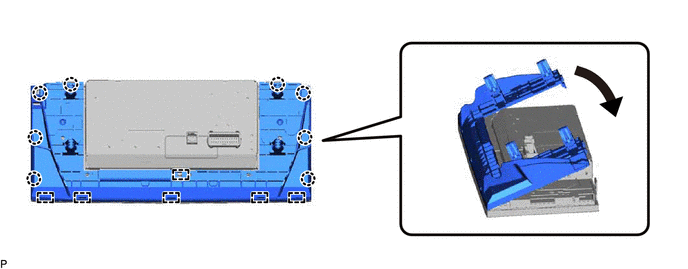
Engage the 6 guides and 8 claws as shown in the illustration.
-
Check that there is no clearance between the front escutcheon and rear escutcheon as shown in the illustration.
Standard Measurement Area Measurement A 0 mm (0 in.) B 0 mm (0 in.) -
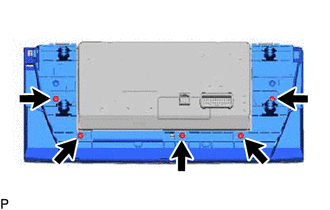
Install the front escutcheon and rear escutcheon with the 5 screws.
-
Remove the release paper from a new insulator.
Tip:After removing the release paper, keep the exposed adhesive free from foreign matter.
-
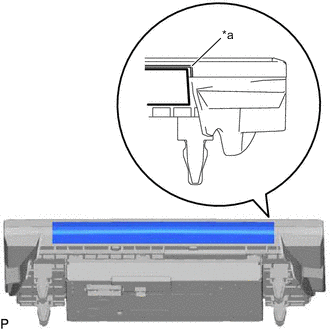
*a Line Install the insulator as shown in the illustration.
Tip:Install the insulator along the line on the front escutcheon.
-