PROCEDURE
- Click here
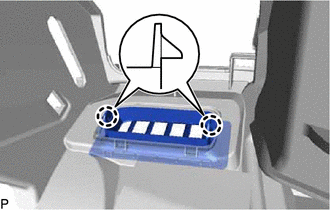
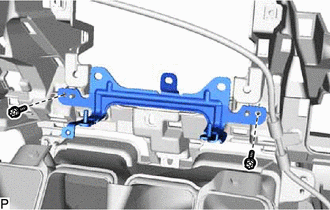
INSTALL GLOVE COMPARTMENT BRACKET
-
Install the glove compartment bracket with the 2 screws<C>.
-
- Click here
INSTALL NO. 2 DEFROSTER NOZZLE GARNISH
-
Engage the 6 claws to install the No. 2 defroster nozzle garnish as shown in the illustration.
-
- Click here
INSTALL NO. 1 DEFROSTER NOZZLE GARNISH
-
Engage the 6 claws to install the No. 1 defroster nozzle garnish as shown in the illustration.
-
- Click here
INSTALL NO. 2 SIDE DEFROSTER NOZZLE
-
Engage the 2 claws to install the No. 2 side defroster nozzle.
-
- Click here
INSTALL NO. 1 SIDE DEFROSTER NOZZLE
-
Engage the 2 claws to install the No. 1 side defroster nozzle.
-
- Click here
INSTALL INSTRUMENT PANEL PASSENGER AIRBAG ASSEMBLY
- Click here
INSTALL NAVIGATION ANTENNA ASSEMBLY (w/ Navigation System)
- Click here
INSTALL NO. 2 HEATER TO REGISTER DUCT
-
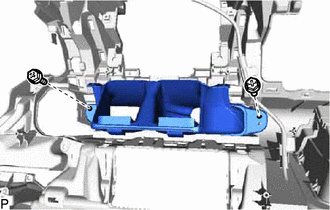
Install the No. 2 heater to register duct with the 2 screws<D>.
-
- Click here
INSTALL DEFROSTER NOZZLE ASSEMBLY
-
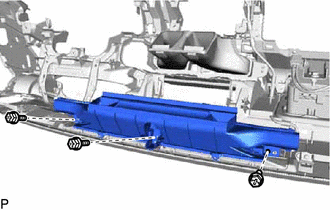
Install the defroster nozzle assembly with the 3 screws<D>.
-
- Click here
INSTALL NO. 2 SIDE DEFROSTER NOZZLE DUCT
-
Engage the 2 claws.
-
Install the No. 2 side defroster nozzle duct with the screw<D>.
-
- Click here
INSTALL NO. 1 SIDE DEFROSTER NOZZLE DUCT
-
Engage the 2 claws.
-
Install the No. 1 side defroster nozzle duct with the screw<D>.
-
- Click here
INSTALL NO. 3 HEATER TO REGISTER DUCT
-
Install the No. 3 heater to register duct with the 3 screws<D>.
-
- Click here
INSTALL NO. 1 HEATER TO REGISTER DUCT
-
Install the No. 1 heater to register duct with the 3 screws<D>.
-
- Click here
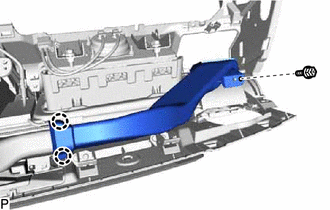
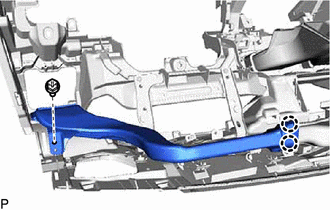
INSTALL BRACKET
-
Install the bracket with the 2 screws<D>.
-
- Click here
INSTALL NO. 2 INSTRUMENT PANEL WIRE
-
Engage the clamp to install the No. 2 instrument panel wire.
-
- Click here
INSTALL AUTOMATIC LIGHT CONTROL SENSOR