PROPELLER SHAFT ASSEMBLY(for 4GR-FSE) REASSEMBLY

CAUTION / NOTICE / HINT
Note
-
When using a vise, place aluminum plates between the part and vise.
-
When using a vise, do not overtighten it.
PROCEDURE
-
INSTALL NO. 1 CENTER SUPPORT BEARING ASSEMBLY
-
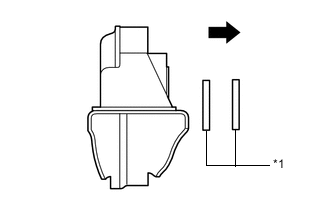
*1 Center Support Bearing Washer 
Rear Side Set the No. 1 center support bearing assembly and 2 center support bearing washers on the propeller intermediate shaft assembly as shown in the illustration.
Note
Be sure to install the bearing so that it is facing in the correct direction.
-
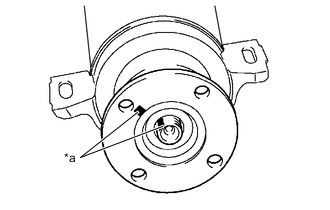
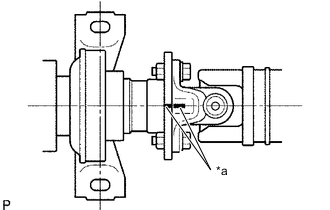
*a Matchmark Align the matchmarks on the universal joint flange and propeller intermediate shaft assembly, and place the universal joint flange on the propeller intermediate shaft assembly.
-
Install the propeller intermediate shaft washer to the propeller intermediate shaft assembly.
-
Hold the propeller intermediate shaft assembly in a vise between aluminium plates.
Note
Do not overtighten the vise.
-
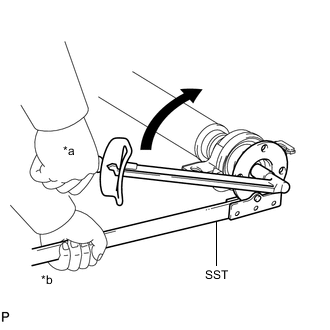
*a Turn *b Hold Using SST to hold the universal joint flange, press the No. 1 center support bearing assembly into the position by tightening a new nut.
- SST
- 09330-00021
- Torque:
- 181.5 N*m { 1851 kgf*cm, 134 ft.*lbf }
-
Loosen the nut.
-
Tighten the nut again.
- Torque:
- 68.7 N*m { 701 kgf*cm, 51 ft.*lbf }
-
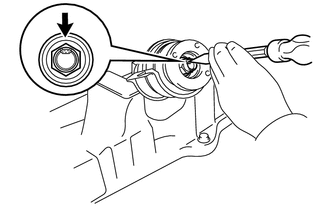
Using a chisel and a hammer, stake the nut.
-
-
INSTALL PROPELLER SHAFT ASSEMBLY
-
Completely remove any oil and other foreign matter and clean the contact surfaces of the propeller intermediate shaft assembly and propeller shaft assembly.
-
*a Matchmark Align the matchmarks on the propeller intermediate shaft assembly and propeller shaft assembly.
-
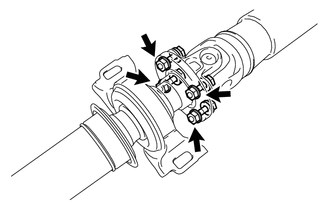
Install the propeller shaft with the 4 bolts, 4 washers and 4 nuts.
- Torque:
- 73.5 N*m { 749 kgf*cm, 54 ft.*lbf }
Tech Tips
Install the washers on the same side as the bolts.
-