AUTOMATIC TRANSMISSION ASSEMBLY REMOVAL

CAUTION / NOTICE / HINT
CAUTION:
The automatic transmission assembly is very heavy. Be sure to follow the procedure described in the repair manual, or the engine lifter may suddenly drop.
PROCEDURE
-
PRECAUTION
Note
After turning the engine switch off, waiting time may be required before disconnecting the cable from the negative (-) battery terminal. Therefore, make sure to read the disconnecting the cable from the negative (-) battery terminal notices before proceeding with work.
-
DISCONNECT CABLE FROM NEGATIVE BATTERY TERMINAL
Note
When disconnecting the cable, some systems need to be initialized after the cable is reconnected.
-
REMOVE INTAKE AIR SURGE TANK ASSEMBLY
-
REMOVE ENGINE UNDER COVER
-
REMOVE FRONT SUSPENSION MEMBER BRACE
-
REMOVE NO. 2 ENGINE UNDER COVER (for Full Cover Type)
-
REMOVE NO. 2 ENGINE UNDER COVER (for Half Cover Type)
-
DRAIN ENGINE COOLANT
-
DRAIN AUTOMATIC TRANSMISSION FLUID
-
REMOVE PROPELLER WITH CENTER BEARING SHAFT ASSEMBLY
-
REMOVE ENGINE UNDER BRACE SUB-ASSEMBLY
-
REMOVE STARTER ASSEMBLY
-
REMOVE FLYWHEEL HOUSING SIDE COVER
-
Remove the flywheel housing side cover from the engine assembly.
-
-
REMOVE DRIVE PLATE AND TORQUE CONVERTER ASSEMBLY SETTING BOLT
-
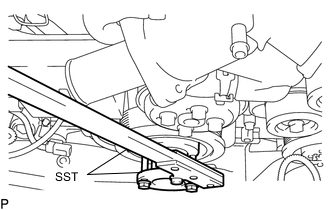
Using SST, hold the crankshaft pulley.
- SST
- 09213-70011 ( 09213-70020 )
-
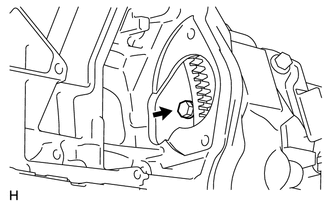
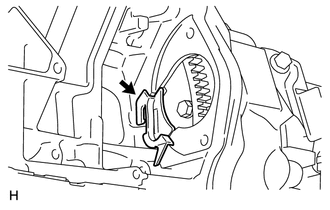
Remove the 6 drive plate and torque converter assembly setting bolts.
Tech Tips
There will be one black colored bolt.
-
-
REMOVE FLOOR SHIFT GEAR SHIFTING ROD SUB-ASSEMBLY
-
Move the shift lever to N.
-
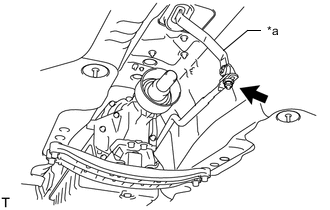
*a Lever Remove the nut and separate the floor shift gear shifting rod sub-assembly from the lever of the transmission floor shift assembly.
-
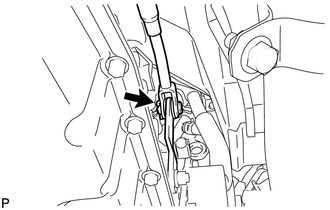
Remove the clip, pin and floor shift gear shifting rod sub-assembly from the transmission control shaft lever RH.
-
-
SUPPORT AUTOMATIC TRANSMISSION ASSEMBLY
-
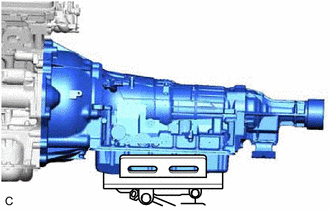
Support the automatic transmission assembly with a transmission jack.
Note
-
In order to protect the automatic transmission oil pan sub-assembly, place attachments on the transmission jack.
-
Make sure that the attachments and the automatic transmission oil pan sub-assembly are centered on the transmission jack.
-
To prevent the automatic transmission oil pan sub-assembly from deforming, do not place any attachments under the automatic transmission oil pan sub-assembly of the automatic transmission assembly.
-
-
-
REMOVE REAR ENGINE MOUNTING MEMBER
-
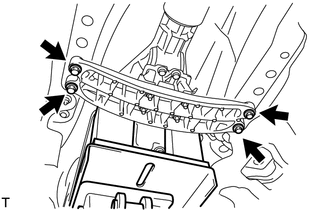
Remove the 4 bolts and separate the rear engine mounting member from the body.
-
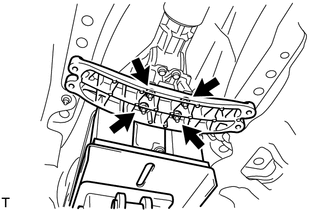
Remove the 4 nuts and rear engine mounting member from the automatic transmission assembly.
-
-
DISCONNECT NO. 2 EARTH WIRE
-
Remove the bolt and disconnect the No. 2 earth wire from the automatic transmission assembly.
-
-
DISCONNECT WIRE HARNESS AND CONNECTOR
-
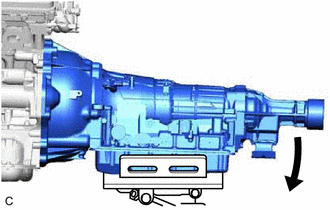
Tilt down the automatic transmission assembly.
Note
Make sure that the cooling fan and fan shroud do not contact the engine assembly when tilting the automatic transmission assembly.
-
Disconnect the park/neutral position switch assembly connector.
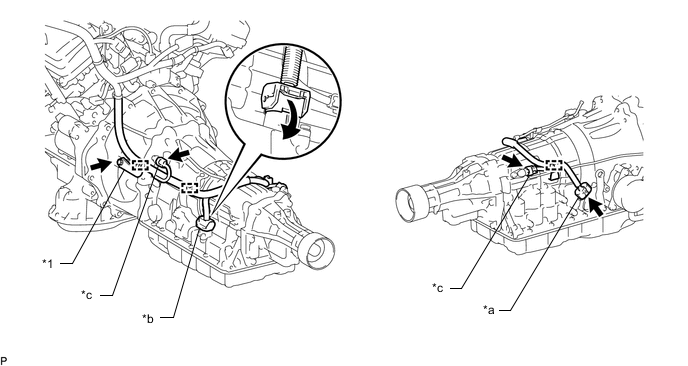
*1 Wire Harness Clamp Bracket - - *a Park/neutral Position Switch Assembly Connector *b Transmission Wire Connector *c Transmission Revolution Sensor Connector - - -
Disconnect the transmission wire connector.
Tech Tips
Disengage the claw, pull down the lever, and then disconnect the transmission wire connector.
-
Disconnect the 2 transmission revolution sensor connectors.
-
Disconnect the 3 clamps and remove the wire harness from the automatic transmission assembly.
-
Remove the bolt and wire harness clamp bracket from the automatic transmission assembly.
-
-
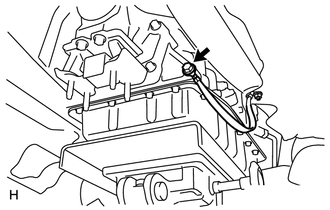
DISCONNECT WATER BY-PASS HOSE
-
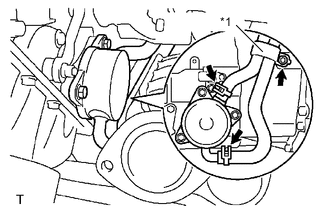
*1 Hose Clamp Remove the bolt and hose clamp from the automatic transmission assembly.
-
Slide the 2 clips and disconnect the water by-pass hose and No. 2 water by-pass hose from the transmission oil cooler.
Tech Tips
Use a container to catch any coolant which flows out of the water by-pass hose and No. 2 water by-pass hose.
-
-
REMOVE AUTOMATIC TRANSMISSION ASSEMBLY
-
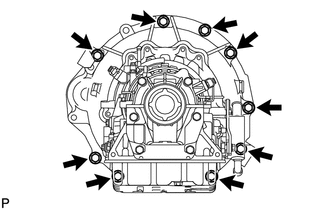
Remove the 9 bolts and automatic transmission assembly from the engine assembly.
Note
-
Secure the automatic transmission assembly to the transmission jack using a belt, etc. to prevent it from falling.
-
To prevent damage to the knock pins, do not pry between the automatic transmission assembly and engine assembly.
-
-
-
REMOVE REAR NO. 1 ENGINE MOUNTING INSULATOR
-
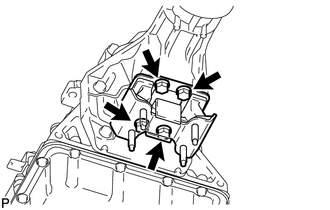
Remove the 4 bolts and rear No. 1 engine mounting insulator from the automatic transmission assembly.
-
-
REMOVE TRANSMISSION CASE COVER (w/ Case Cover)
-
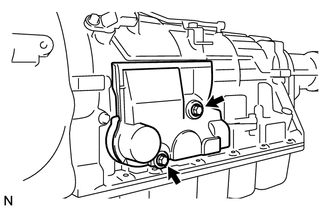
Remove the 2 bolts and transmission case cover from the automatic transmission assembly.
-
-
REMOVE TORQUE CONVERTER ASSEMBLY
-
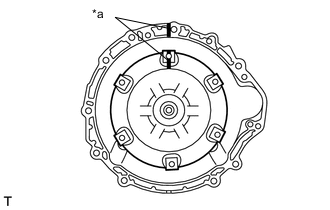
*a Matchmark Put matchmarks on the case and the torque converter assembly.
-
Remove the torque converter assembly from the automatic transmission assembly.
-
-
INSPECT TORQUE CONVERTER ASSEMBLY