EXHAUST PIPE ADJUSTMENT

PROCEDURE
-
REMOVE TAIL EXHAUST PIPE BAFFLE SUB ASSEMBLY
-
ADJUST TAIL EXHAUST PIPE BAFFLE SUB ASSEMBLY
Tech Tips
Use the same procedure for the tail exhaust pipe assembly side.
-
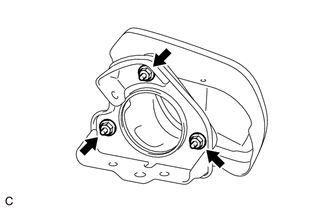
Loosen the 3 nuts.
Tech Tips
Loosen the nuts so that the tail exhaust pipe baffle sub assembly can be adjusted by hand.
-
Temporarily install the tail exhaust pipe baffle sub assembly to the tail exhaust pipe LH with the 3 bolts.
-
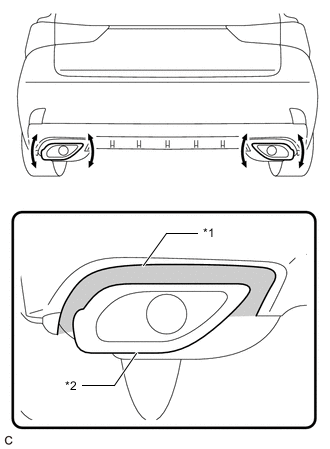
*1 Rear Bumper Assembly *2 Tail Exhaust Pipe Baffle Sub assembly 
Clearance Adjust the angle of the tail exhaust pipe baffle sub assembly as shown in the illustration.
Tech Tips
Make sure the clearance between the rear bumper assembly and tail exhaust pipe baffle sub assembly is even.
-

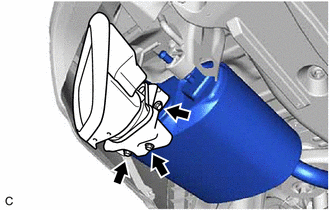
*a Paint Mark Place a paint mark across the contact surfaces of the tail exhaust pipe baffle sub assembly as shown in the illustration.
-
Remove the 3 bolts and tail exhaust pipe baffle sub assembly from the tail exhaust pipe LH.
-
Align the paint marks and tighten the 3 nuts.
- Torque:
- 19 N・m { 194 kgf・cm }
-
-
INSTALL TAIL EXHAUST PIPE BAFFLE SUB ASSEMBLY