EXHAUST PIPE ADJUSTMENT
PROCEDURE
-
REMOVE TAIL EXHAUST PIPE BAFFLE SUB-ASSEMBLY
-
ADJUST TAIL EXHAUST PIPE BAFFLE SUB-ASSEMBLY
Tech Tips
Use the same procedure for the tail exhaust pipe assembly side.
-
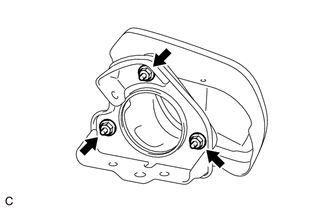
Loosen the 3 nuts.
Tech Tips
Loosen the nuts so that the tail exhaust pipe baffle sub-assembly can be adjusted by hand.
-
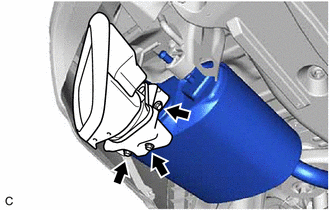
Temporarily install the tail exhaust pipe baffle sub-assembly to the tail exhaust pipe LH with the 3 bolts.
-
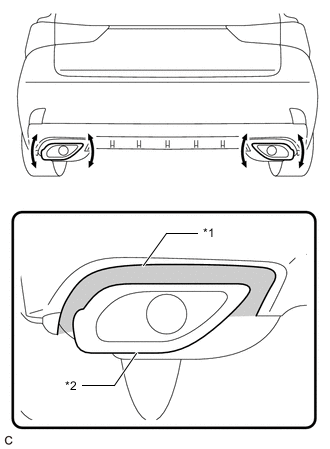
*1 Rear Bumper Assembly *2 Tail Exhaust Pipe Baffle Sub-assembly 
Clearance Adjust the angle of the tail exhaust pipe baffle sub-assembly as shown in the illustration.
Tech Tips
Make sure the clearance between the rear bumper assembly and tail exhaust pipe baffle sub-assembly is even.
-

*a Paint Mark Place a paint mark across the contact surfaces of the tail exhaust pipe baffle sub-assembly as shown in the illustration.
-
Remove the 3 bolts and tail exhaust pipe baffle sub-assembly from the tail exhaust pipe LH.
-
Align the paint marks and tighten the 3 nuts.
- Torque:
- 19 N・m { 194 kgf・cm }
-
-
INSTALL TAIL EXHAUST PIPE BAFFLE SUB-ASSEMBLY